

Just Turbines
 05-07-2020, 08:49 PM
#531
Registered
Thread Starter
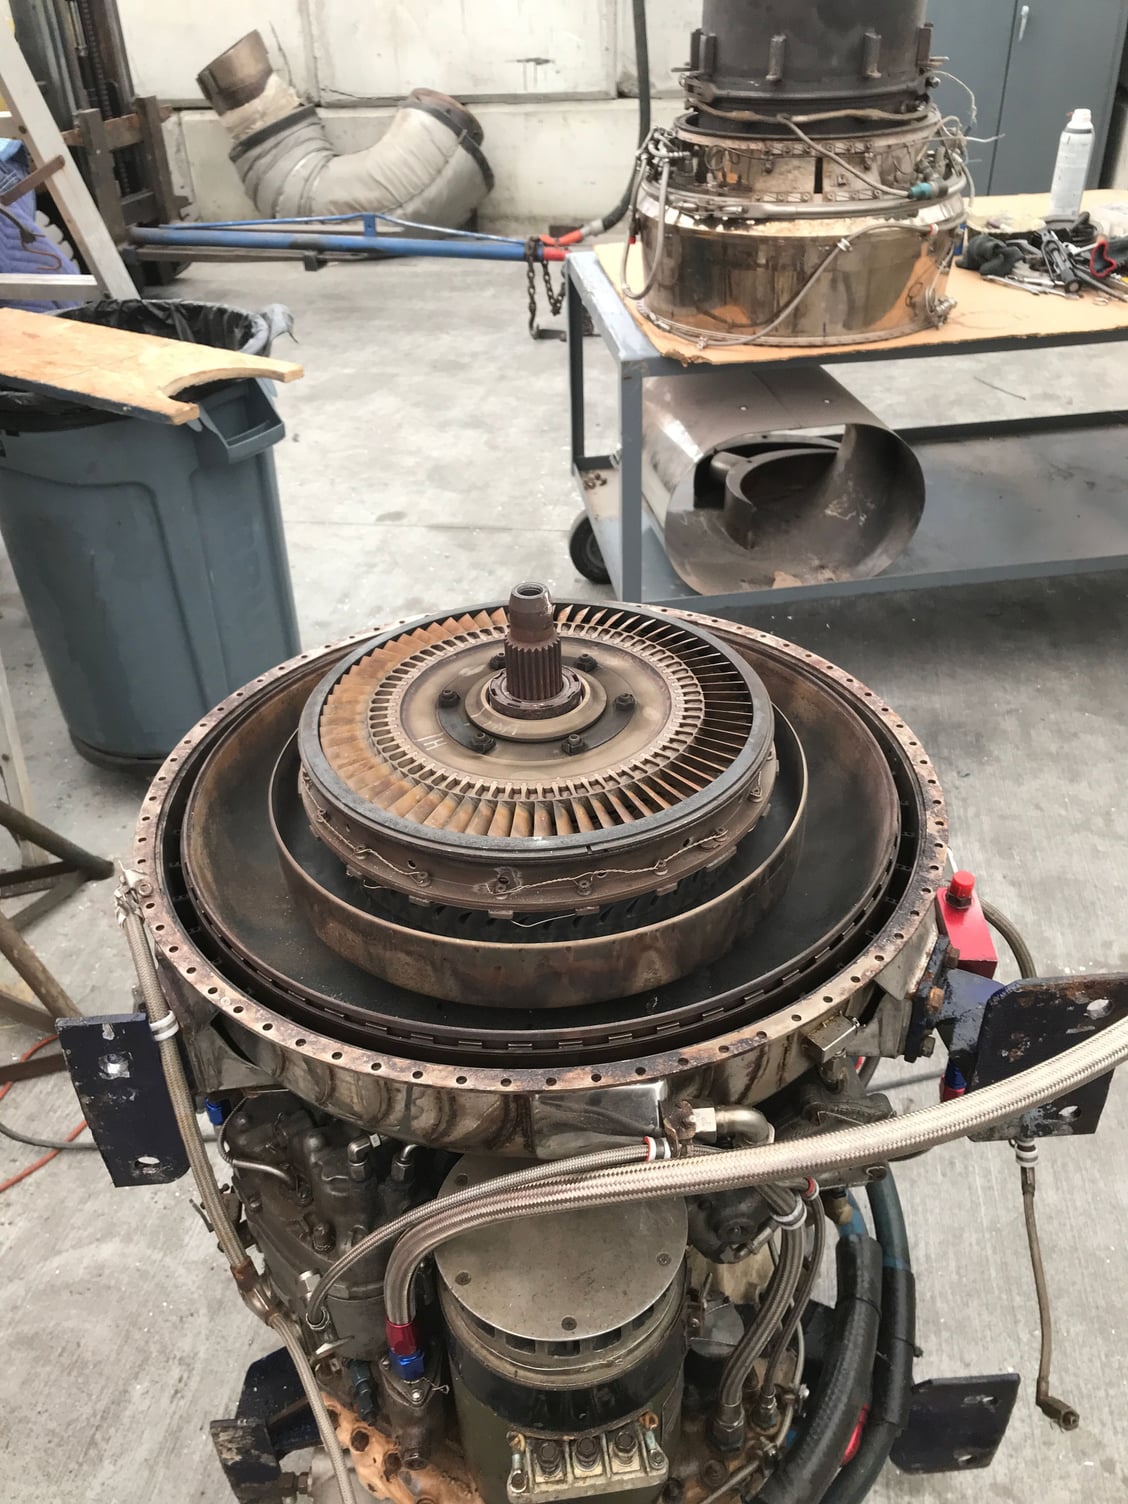
Now it should look like this
 05-07-2020, 09:09 PM
#532
Registered
Thread Starter
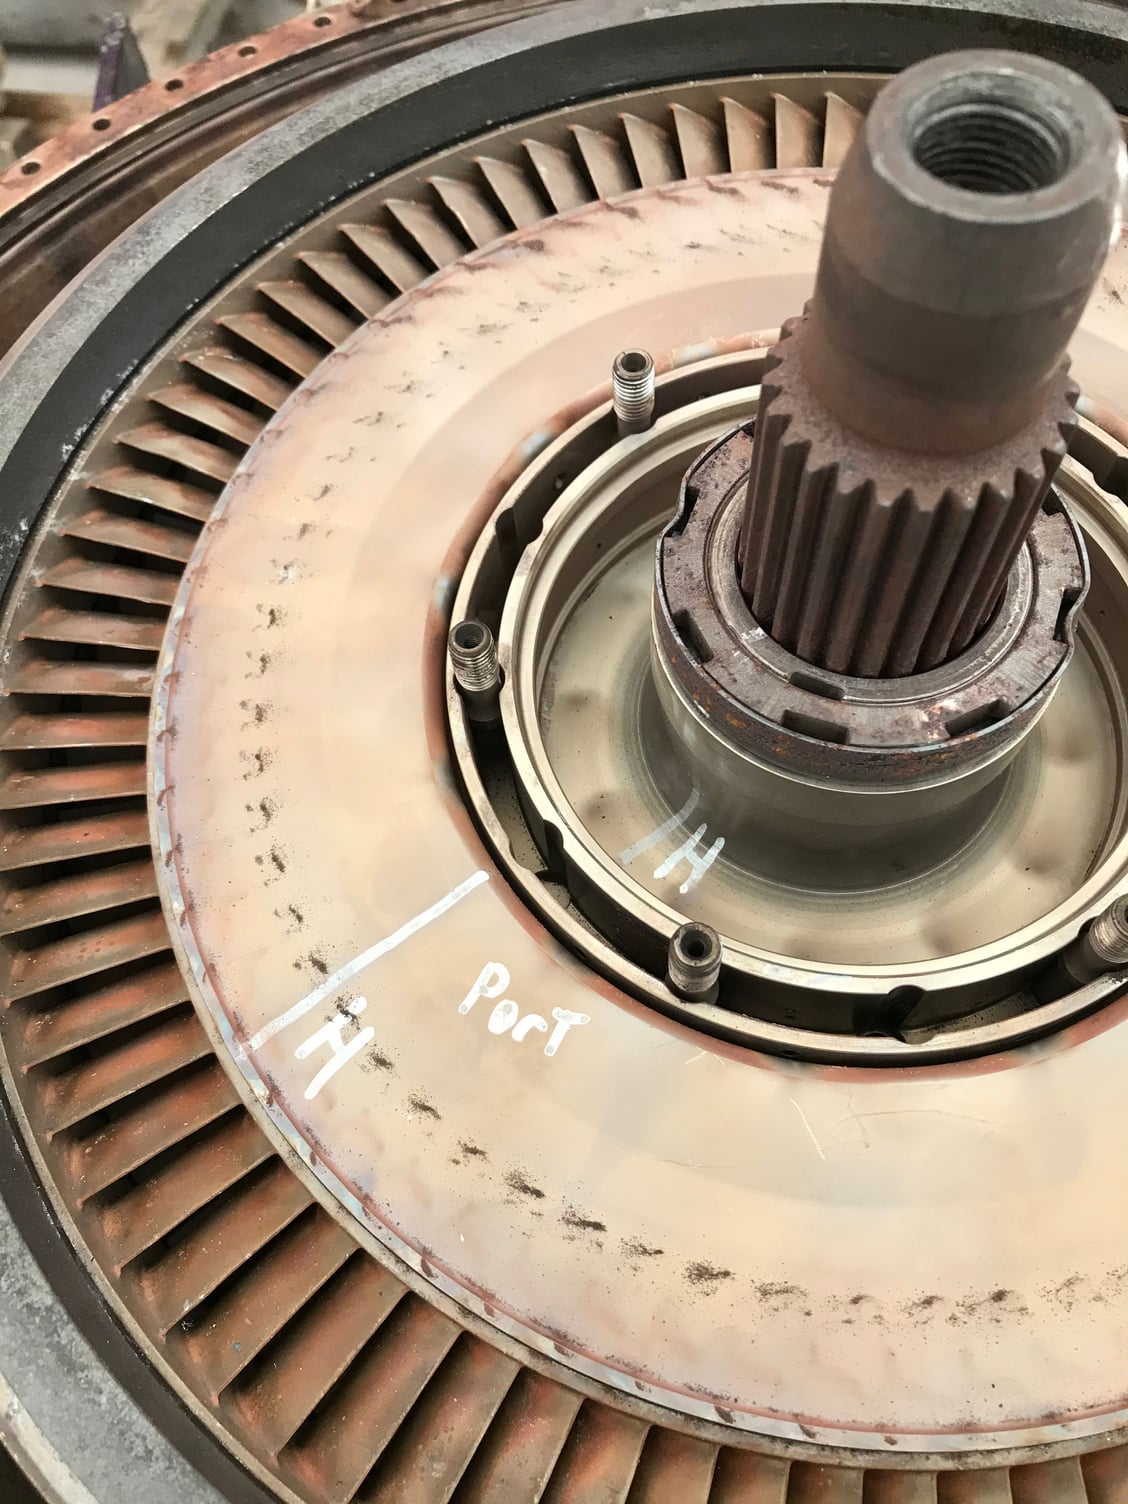
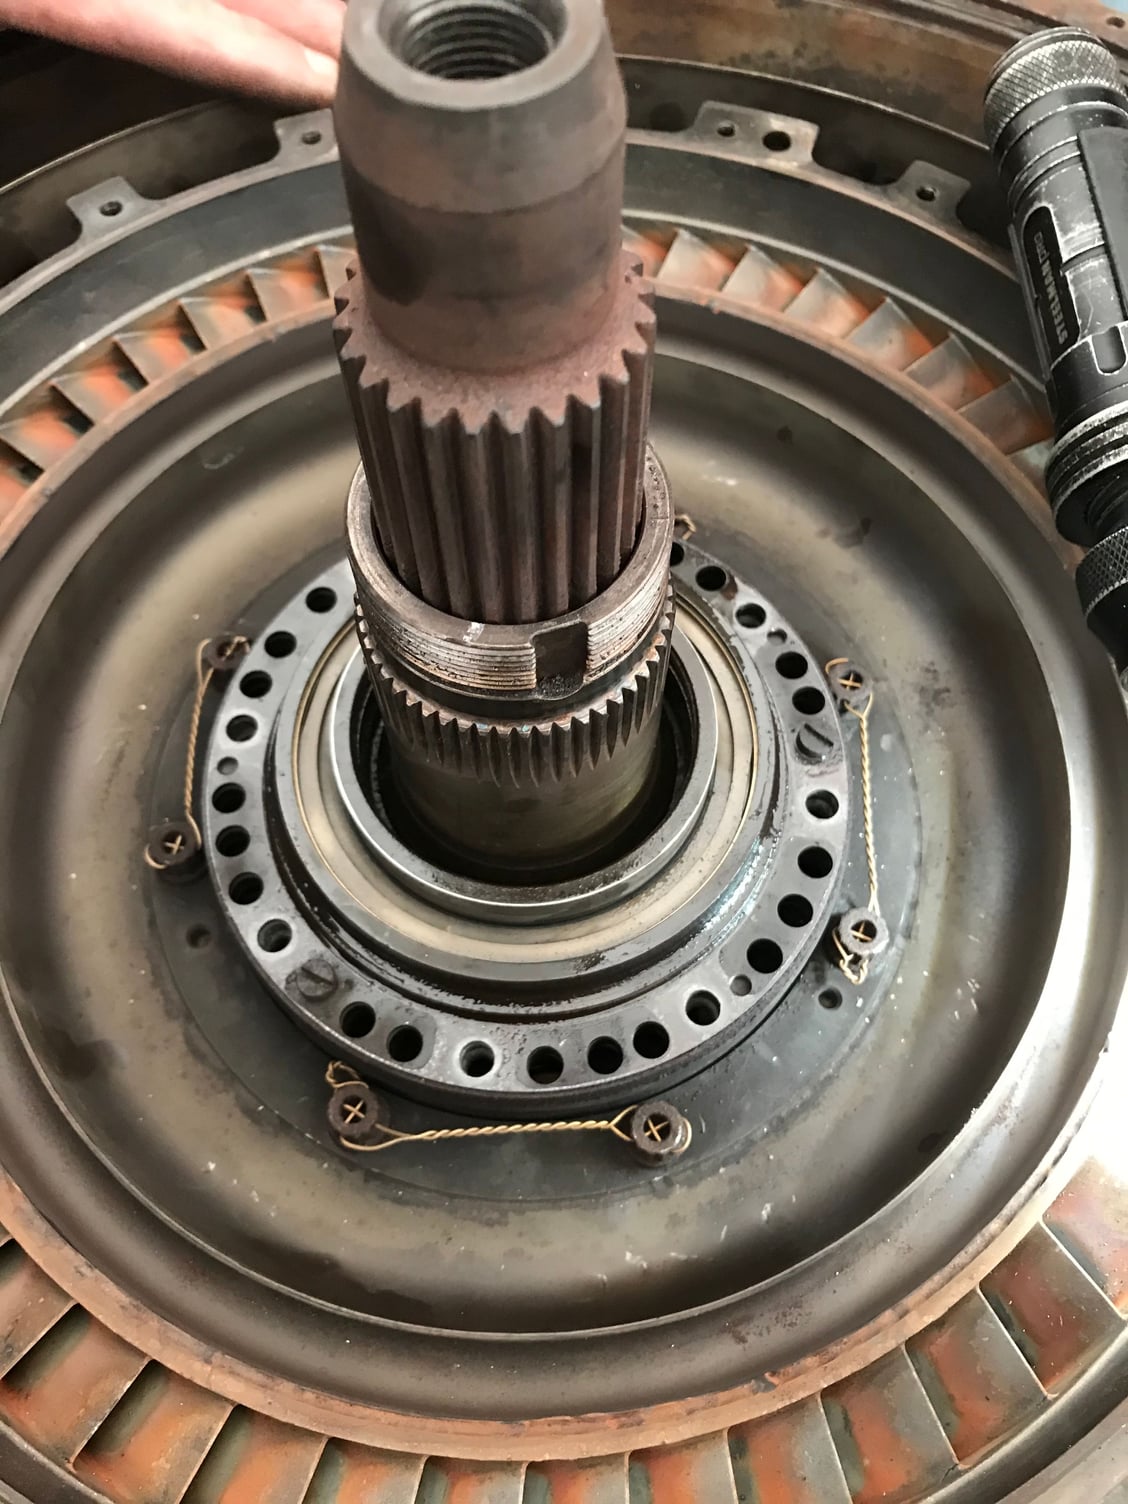
The balance heavy mark is clearly visible The second gp rotor is removed And the spacer and sealing disc stayed behind Which will remove with a internal puller. We have to remove everything until we get to The last stage in the compressor.. when i rotate this now i can still hear something in There possibly what jim said. I do not see any blades Damaged or rubbing
 05-08-2020, 07:32 AM
#533
Registered
Thread Starter
i found myself referring back to this post for instructions.
Note to future self!!!!!!!!!!!!!
The above sealing disk and Ring come out together and give way about a 1\4 of a inch pull.
that there part i be-leave is a 703 version.
if you scroll back in this thread you will see the 13b version before we converted.
Note to future self!!!!!!!!!!!!!
The above sealing disk and Ring come out together and give way about a 1\4 of a inch pull.
that there part i be-leave is a 703 version.
if you scroll back in this thread you will see the 13b version before we converted.
05-08-2020, 07:39 AM
#534
Registered
Thread Starter
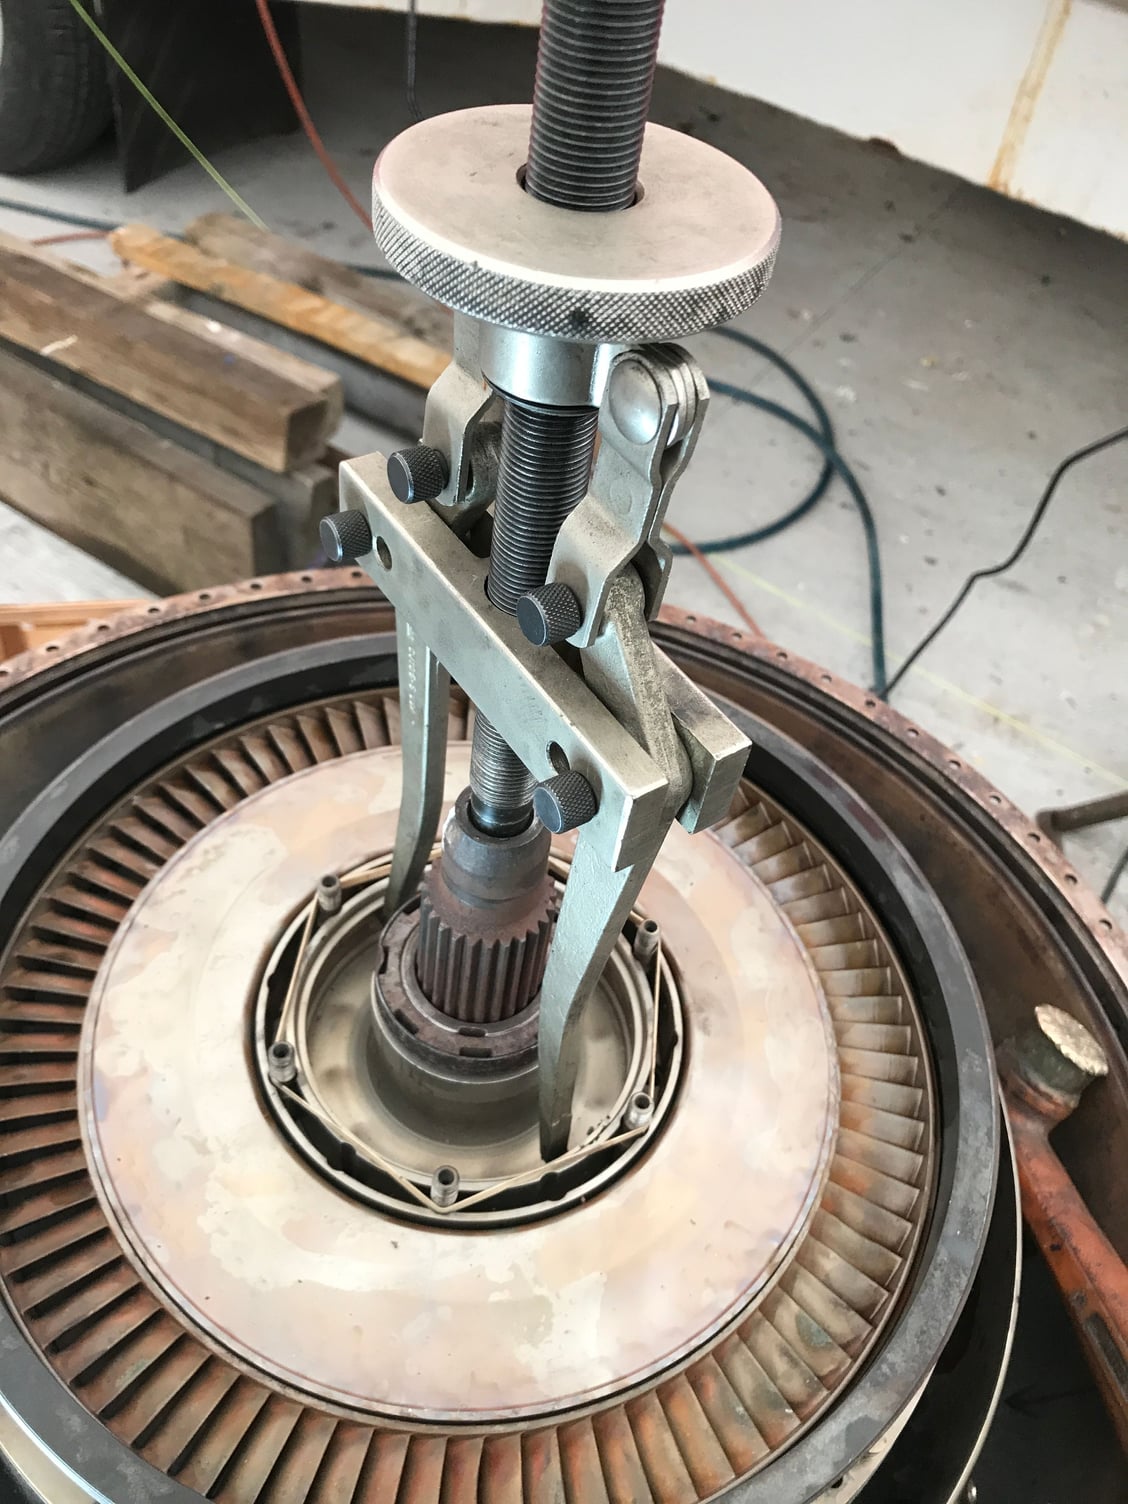
Here it is with my harbour freight butchered locking fixture
this is a Chinese version of the fancy one jim sent me.
jim actually offered to ship his tools.
after ten years he still treats me like i got money!!!!
Try asking to borrow tools from another turbine mechanic...............
..............................(crickets)
05-08-2020, 07:47 AM
#535
Registered
Thread Starter
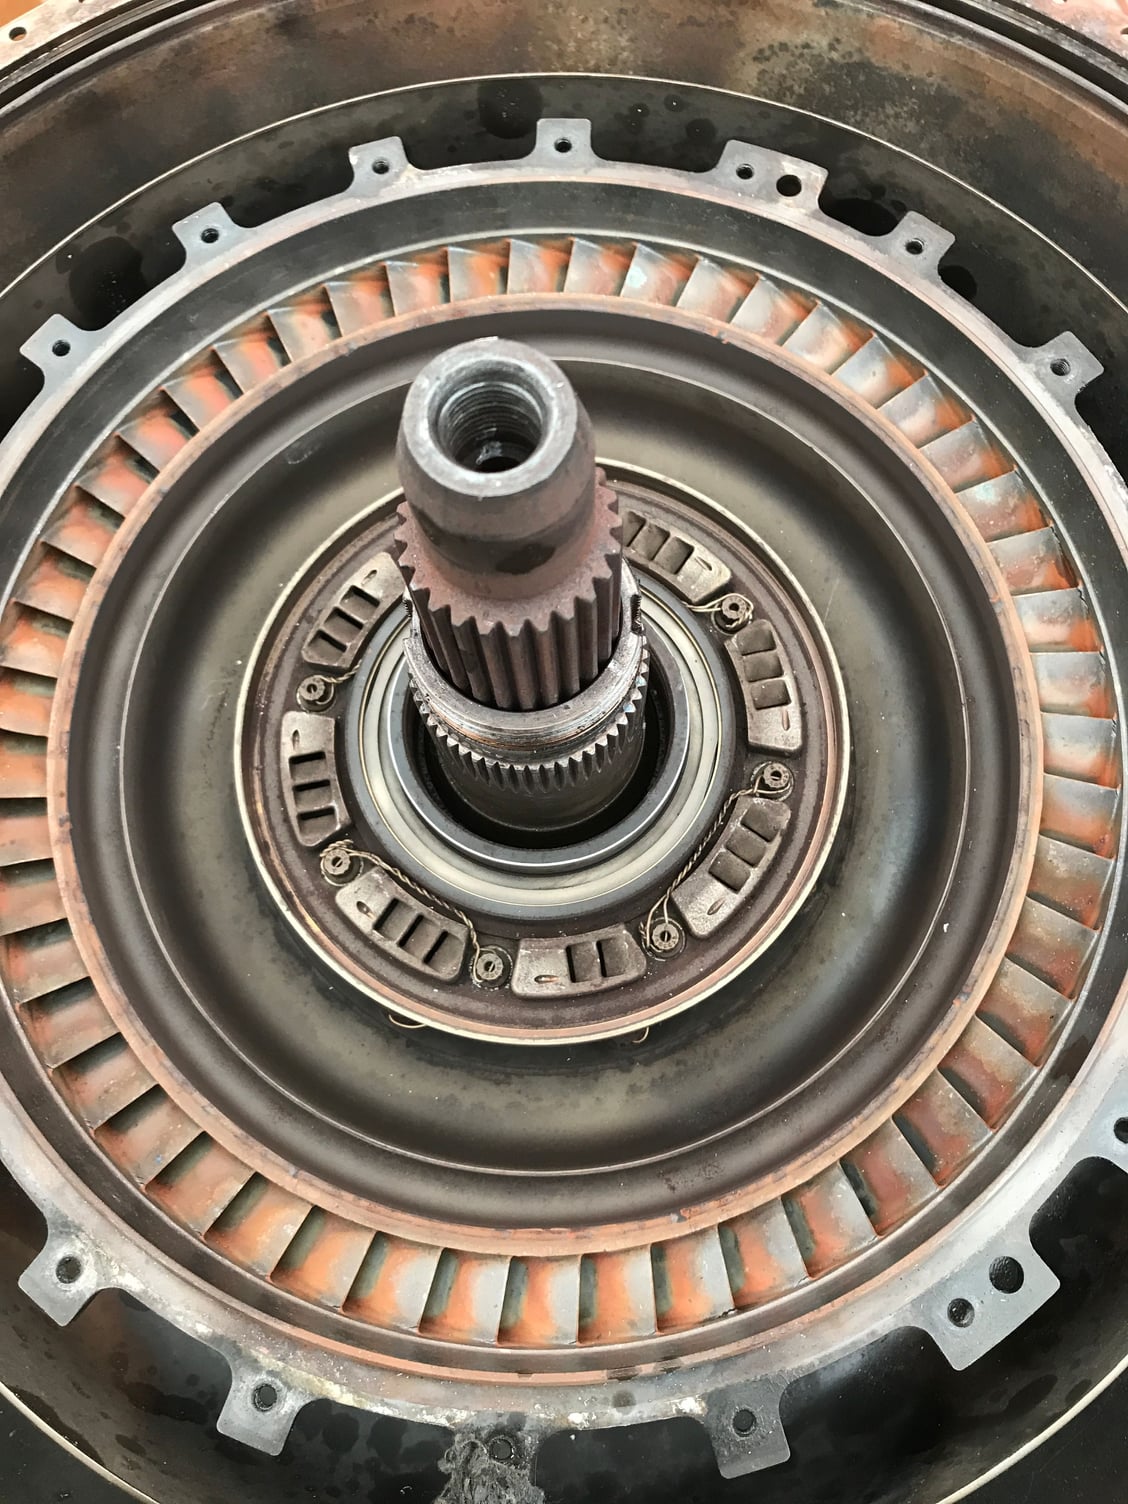
In the picture above the two items you see are the first GP nozzle and the rotor.
Remember Nozzle is stationary and the Rotor spins wicked fast.
the reason we lock it is to go after that spanner nut in center which is torqued to 350ft pounds
heat it with torch just a bit. and a nice easy couple of pulls of the snappy 1/2 inch impact gets it off.
Remember Nozzle is stationary and the Rotor spins wicked fast.
the reason we lock it is to go after that spanner nut in center which is torqued to 350ft pounds
heat it with torch just a bit. and a nice easy couple of pulls of the snappy 1/2 inch impact gets it off.
Last edited by KNOT-RIGHT; 05-08-2020 at 07:49 AM. Reason: info
05-08-2020, 08:53 AM
#536
Registered
Curious....what's your background without getting to personal? I consider myself fairly handy and do a lot of my own projects, but this stuff is way over my head! I would think only a NASA engineer would tackle these projects you've done! I enjoy following along.
The following 2 users liked this post by Tiki Joe:
242LS (05-18-2020), KNOT-RIGHT (05-08-2020)
05-08-2020, 09:17 AM
#537
Registered
Thread Starter
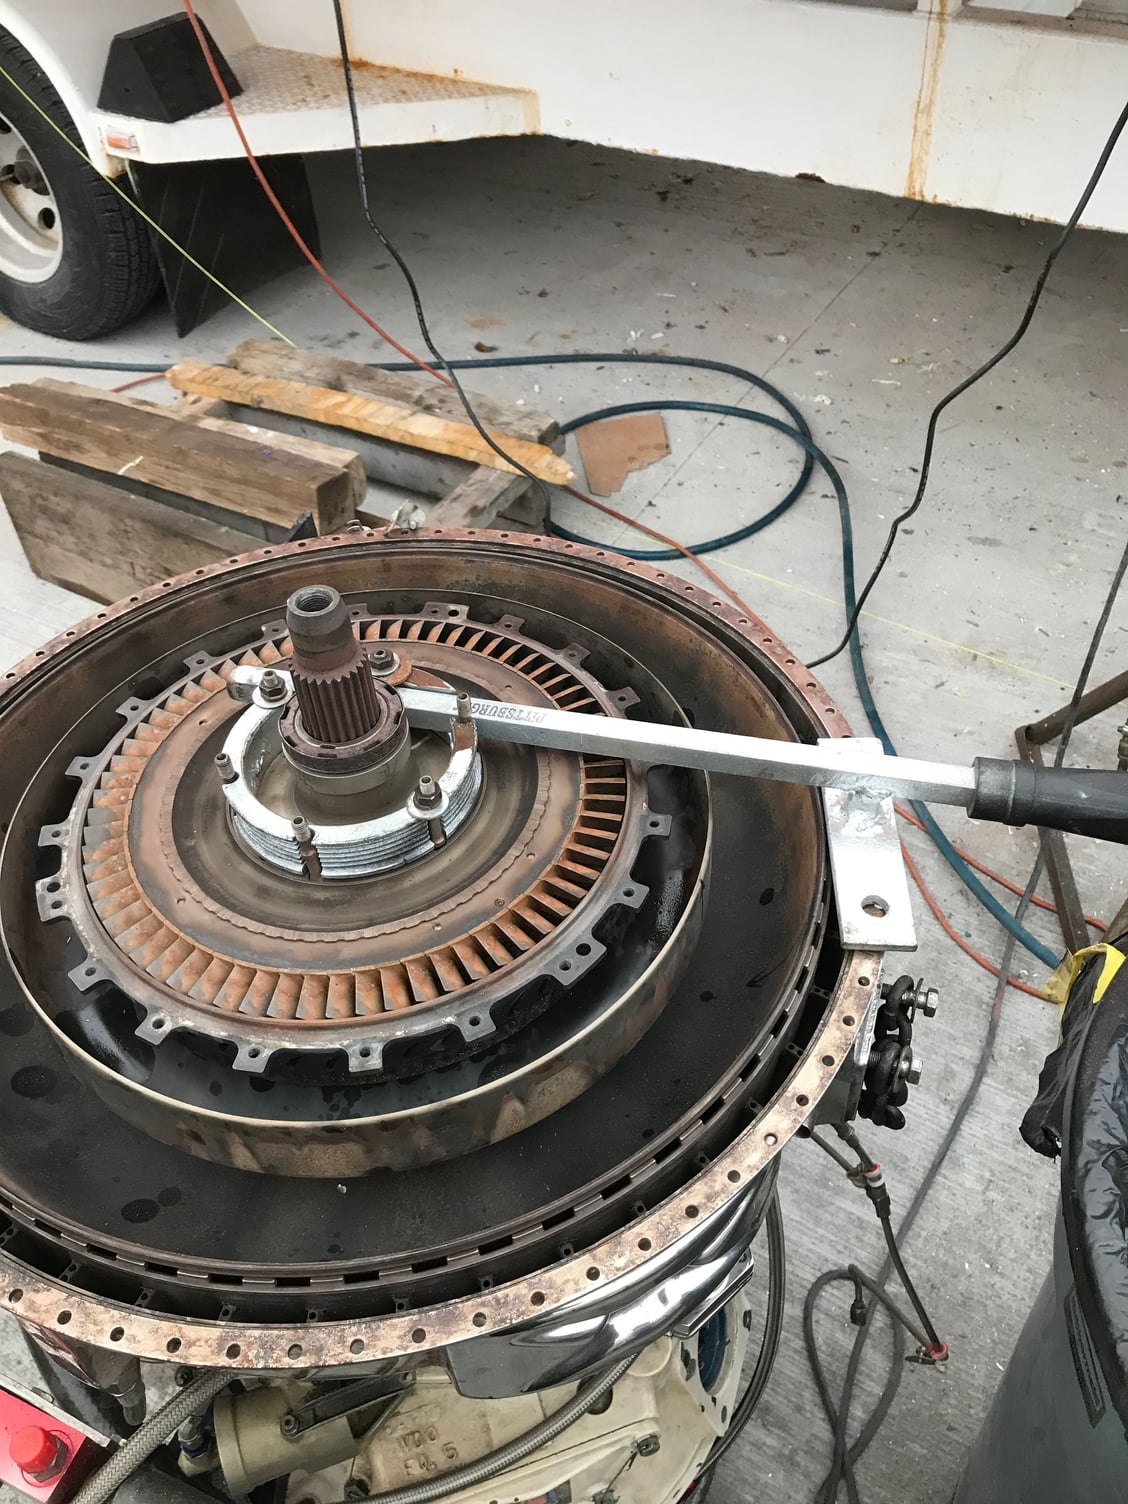
H
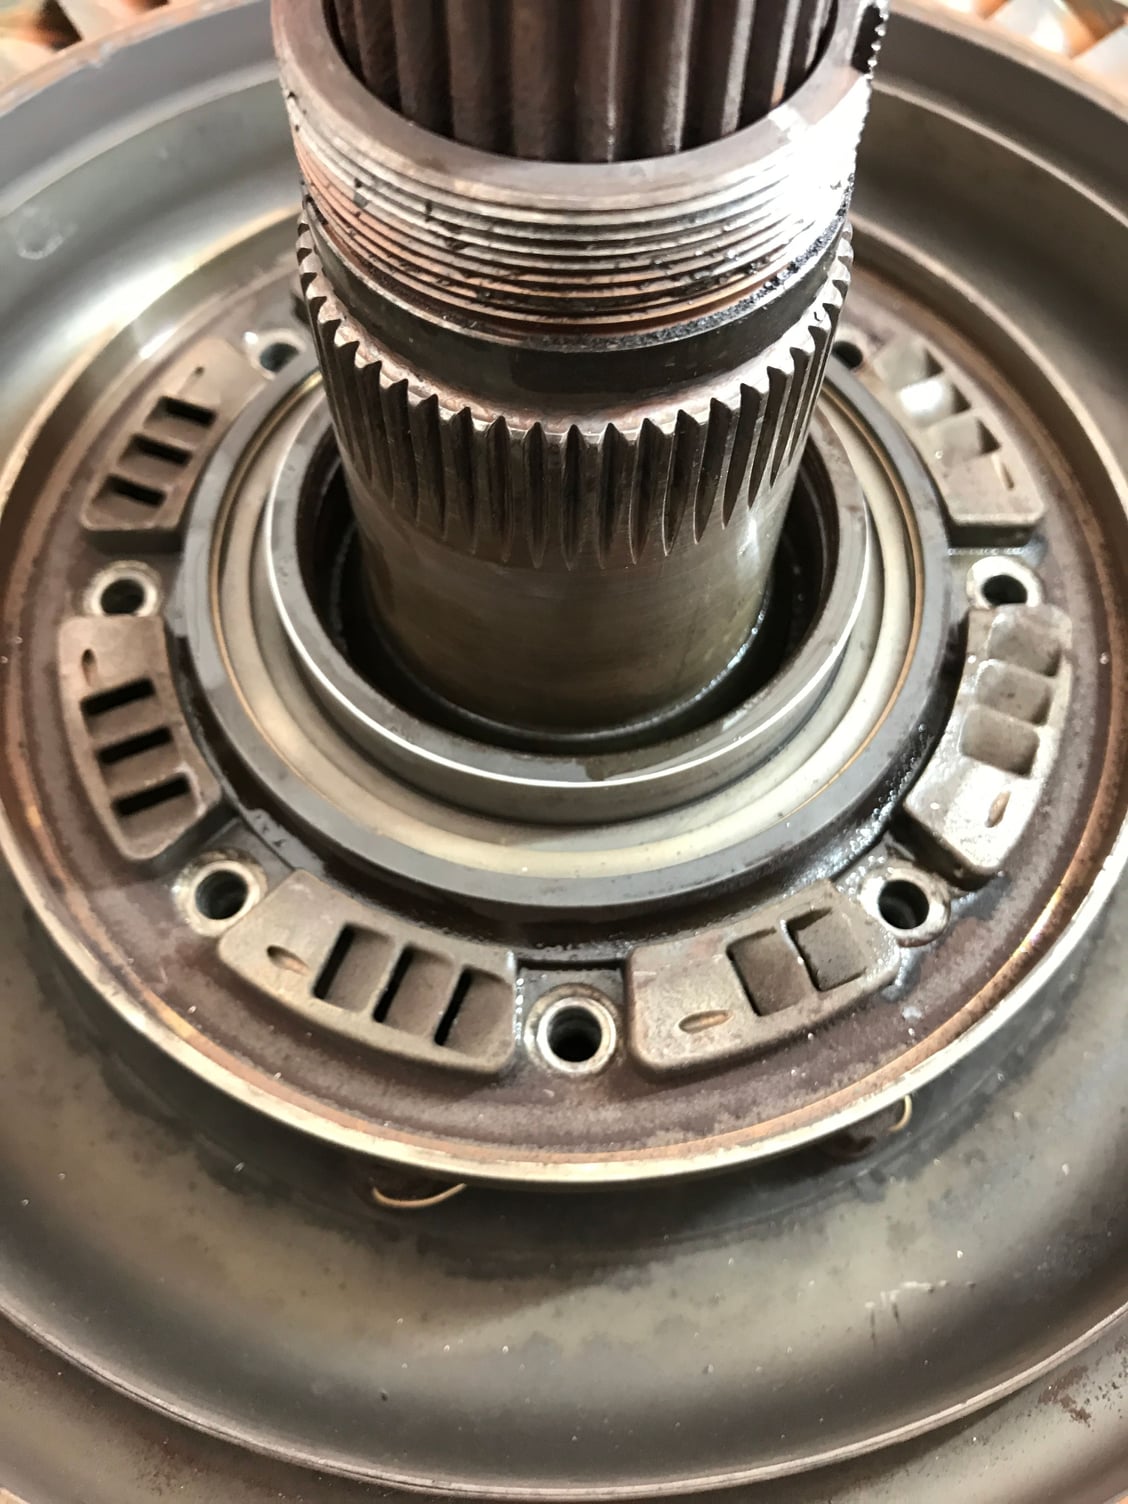
here is the notorious gp nozzle
by the looks of it apparently im a ***** on the
throttles.
it looks good after last 10 years.
also take note on the louvered seal disc
that is also a 703 version item which
directs more airflow to the number two
bearing.
lets get all this off.
jim has stated once you remove the bearing
housing you can view the radial comp bolts
05-08-2020, 09:25 AM
#538
Registered
Thread Starter
you would be surprised it pretty easy to work on.
Dont forget my secret weapon is having Jim to answer my agonizing phone calls. Why dont this line up? which way does the seal come out?
is it suppose to have three cuts in the carbon.( Number two seal does). Why is my wife mad at me?
05-08-2020, 09:28 AM
#539
Registered
Thread Starter
This disk prys up now becareful not to Tweak it It was on there pretty good
05-08-2020, 09:36 AM
#540
Registered
Thread Starter
Now it looks like this now remove
your gp nozzle bolts
After i remove the bolts maybe i can peak thru
the holes to view the broken bolts
your gp nozzle bolts
After i remove the bolts maybe i can peak thru
the holes to view the broken bolts

