

FantaSea 1999 DONZI 35ZF Refurb
 07-15-2020, 09:37 AM
#21
Registered
Thread Starter
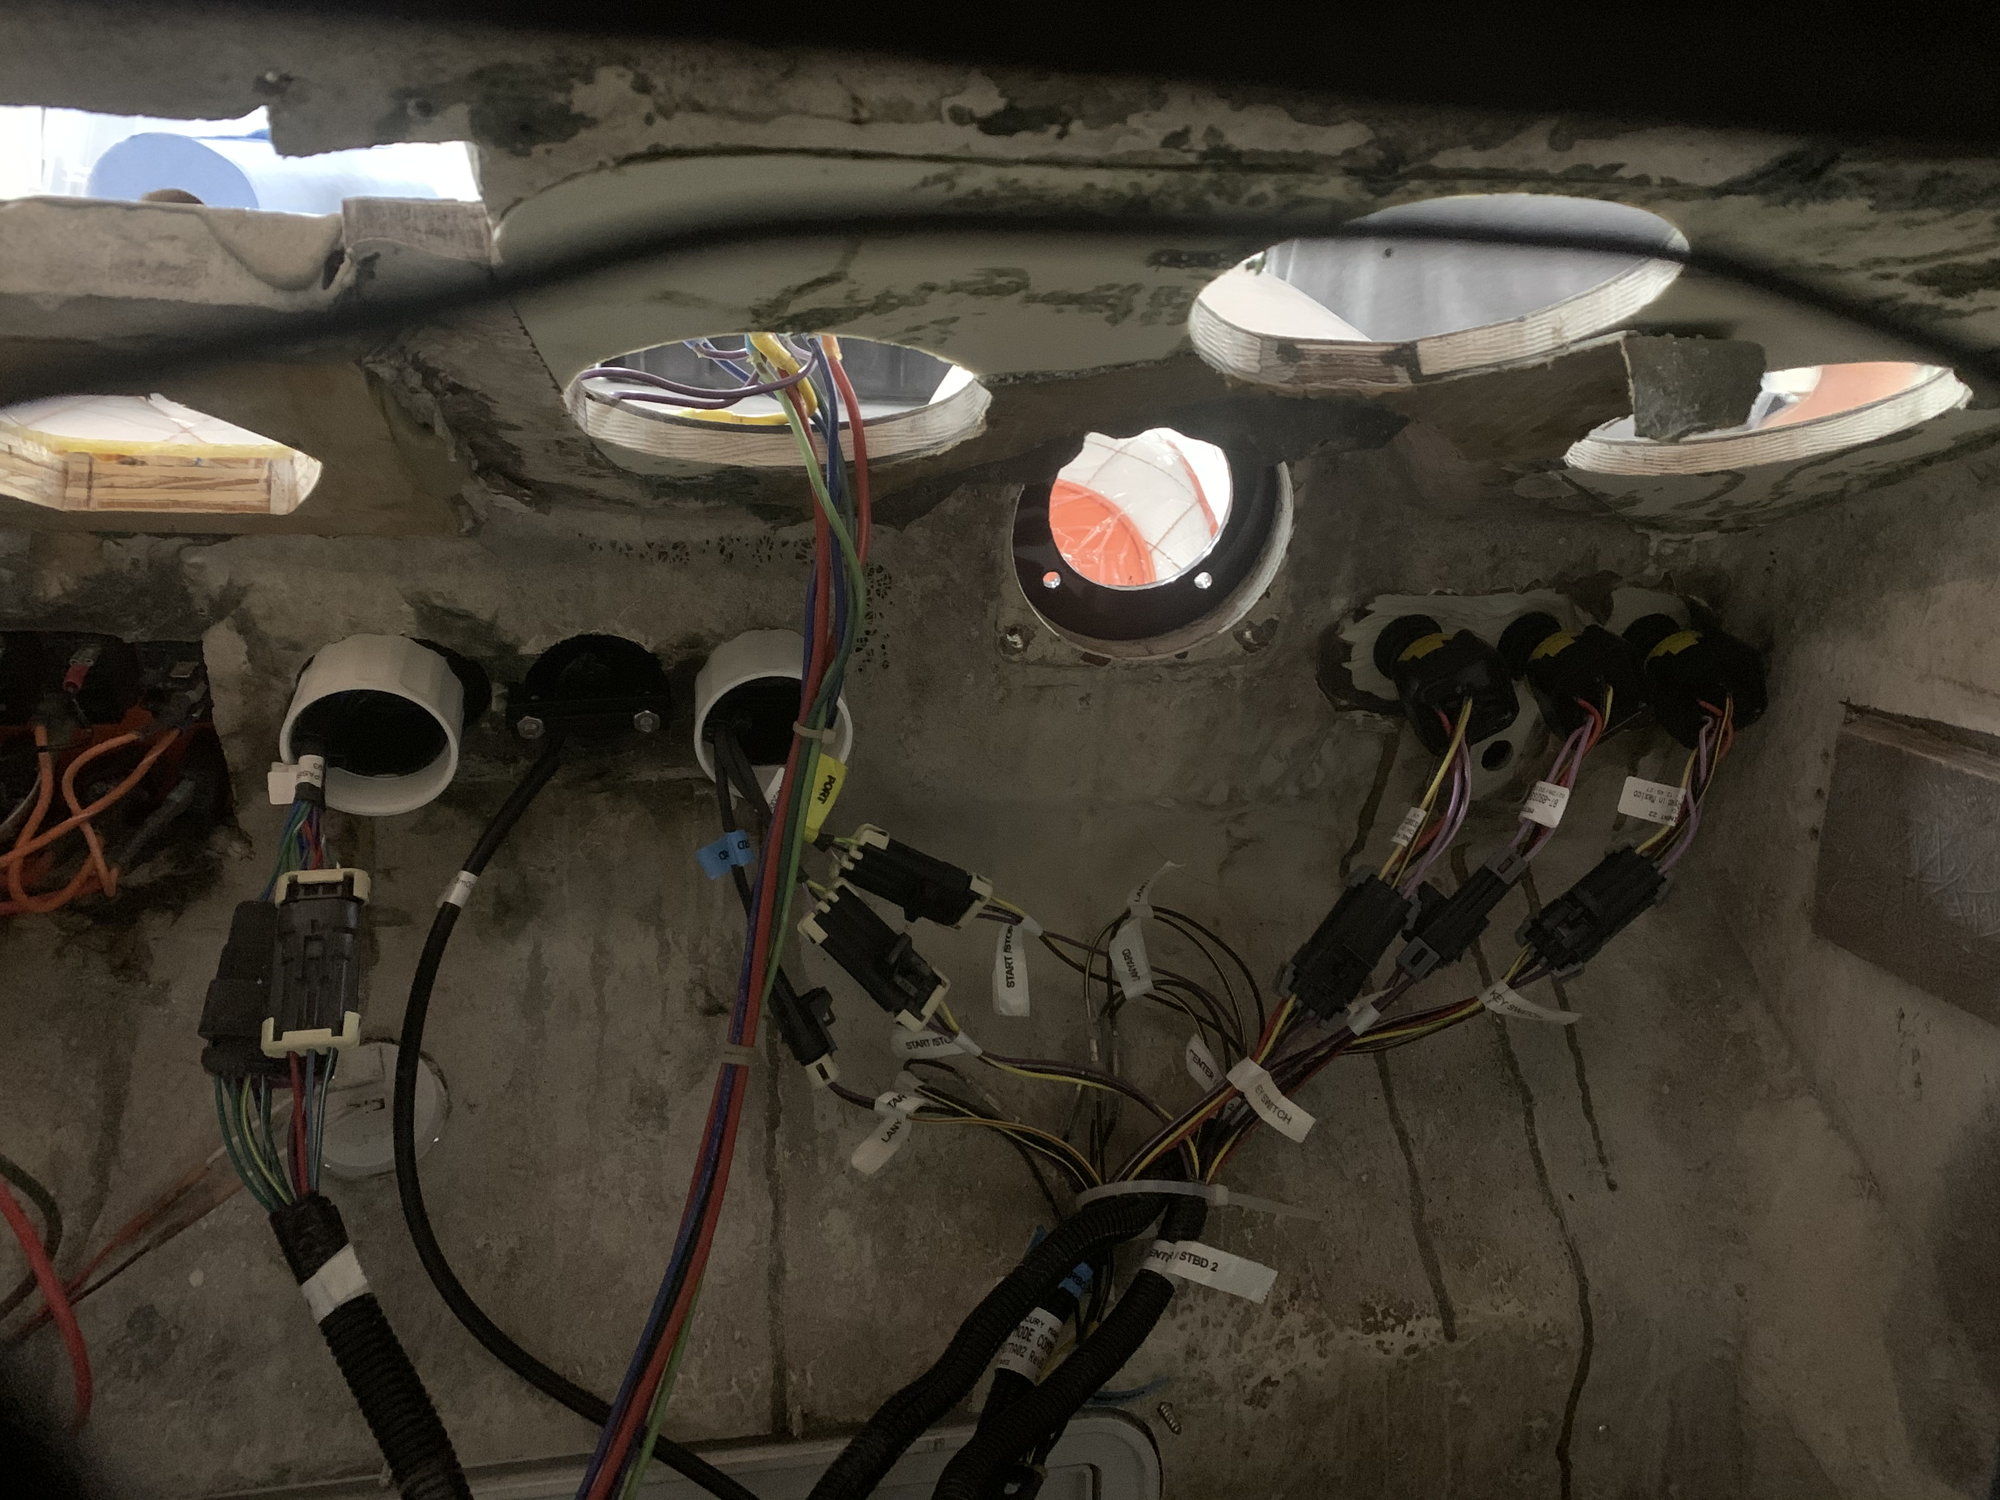
Now that we have the helm, throttles, vesselview, and fusion head unit we can get the mid and lower dash panels cut.

Vesselview Link on the left, NMEA 2000 backbone on the top right. Nice that all of this is accessible thru the center council cabin so the dash won’t have to come off to work on something or add to the NMEA network.

The new throttles have a much smaller footprint since it’s only 4 wiring harness to connect versus 3 shift cables and 3 throttle cables. We cut a square out of 3/4 marine grade plywood then glassed it in the old cutout.
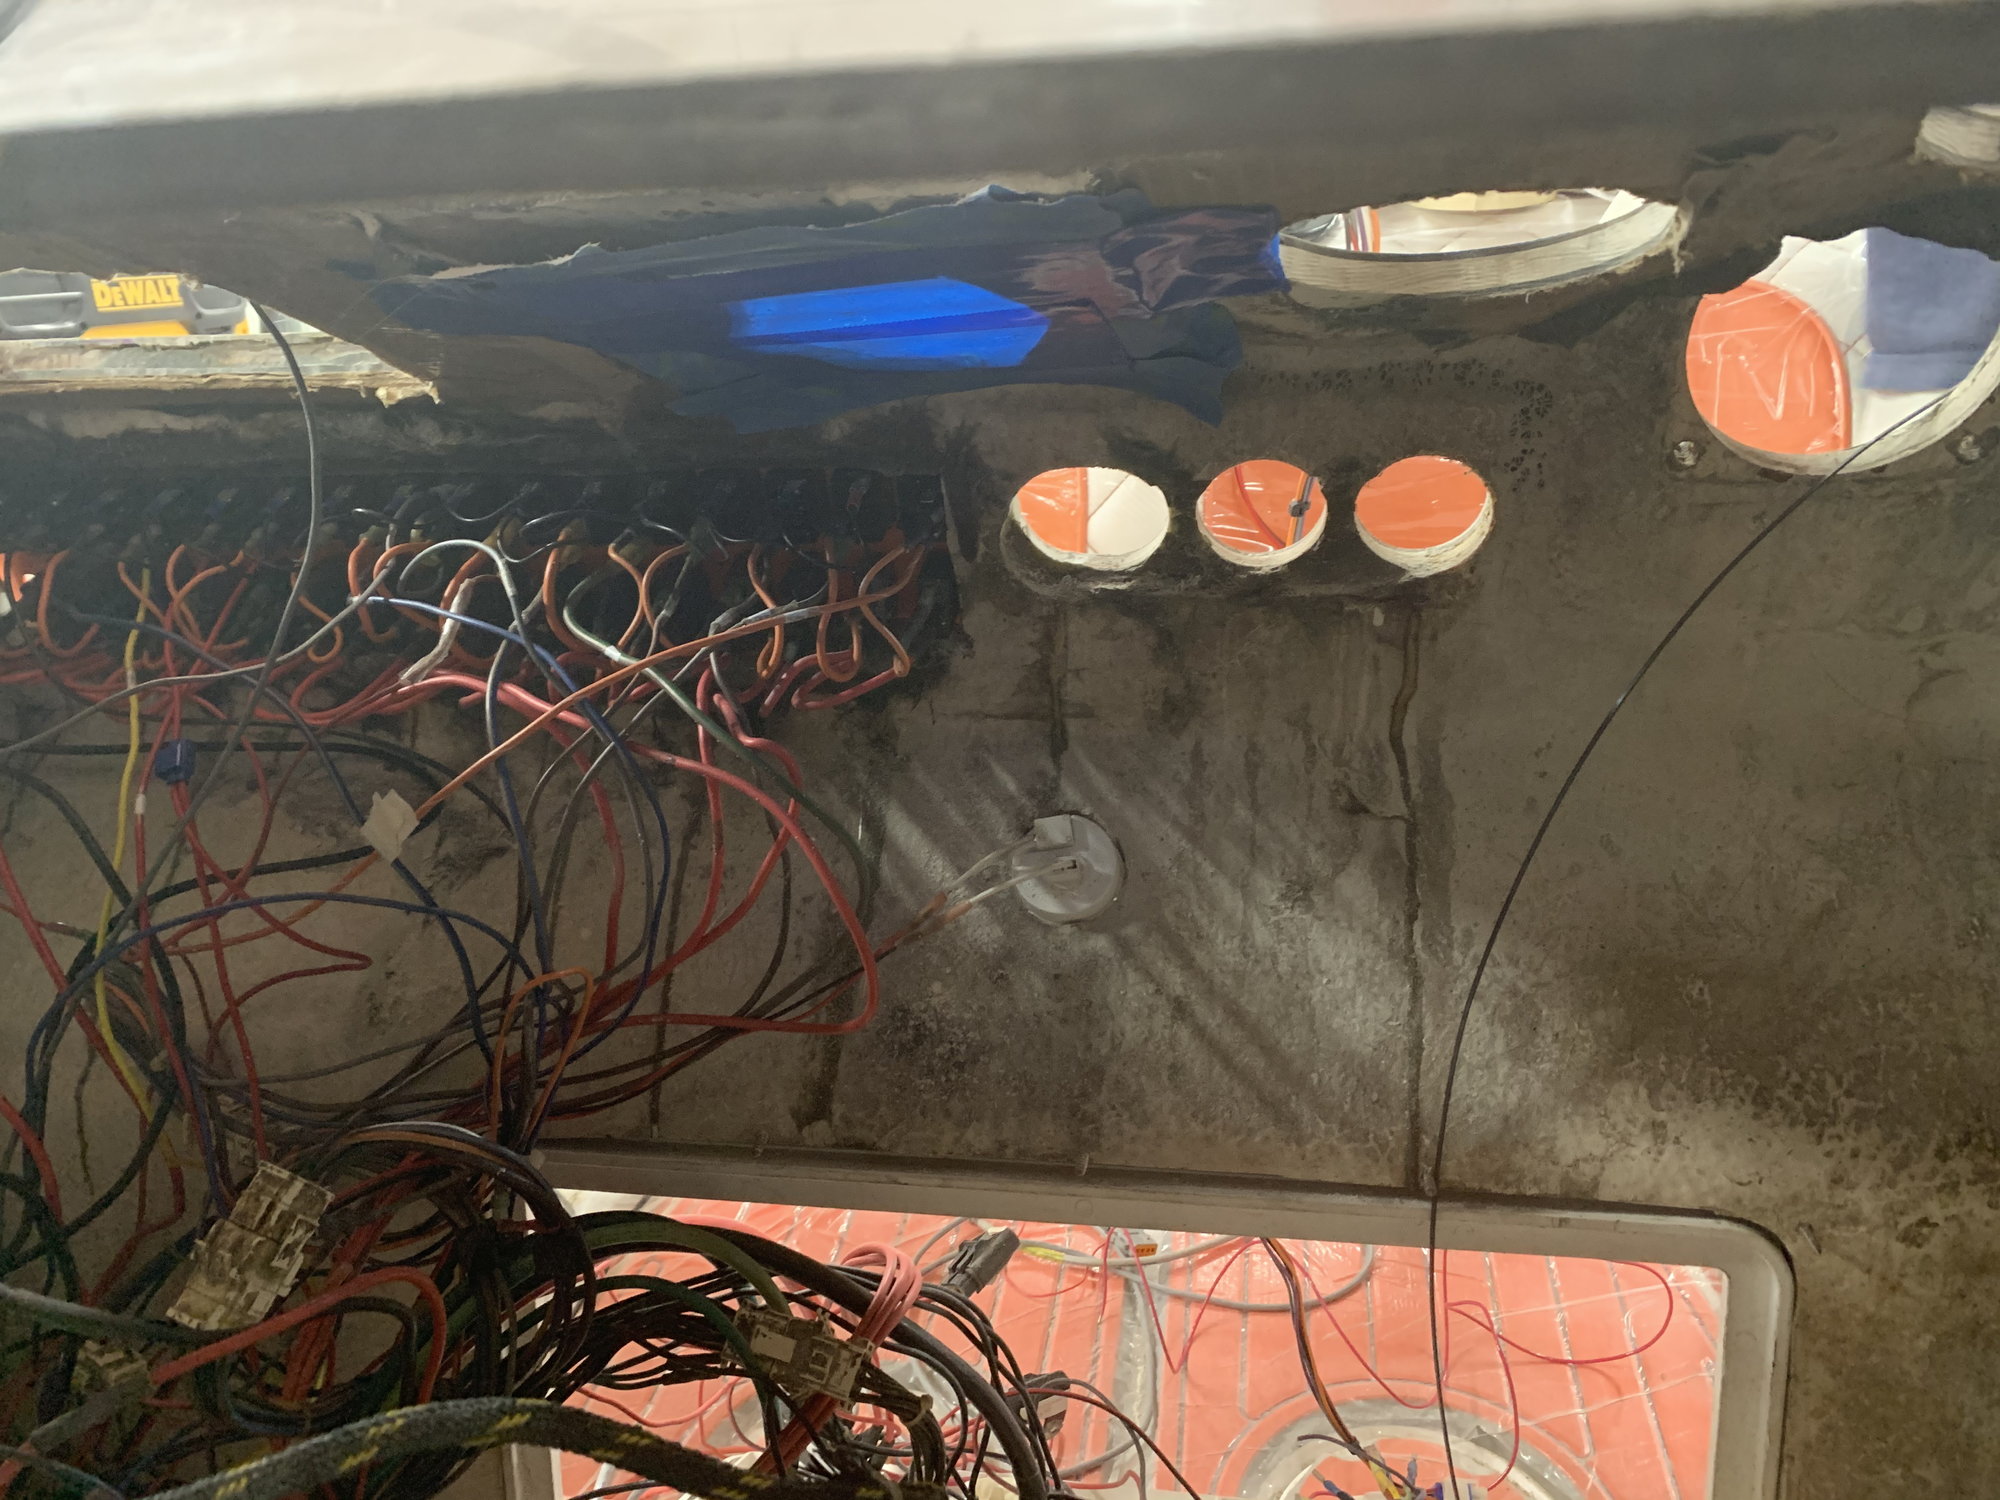
The bottom side of the dash. Used painters tape to contain the fiberglass resin.
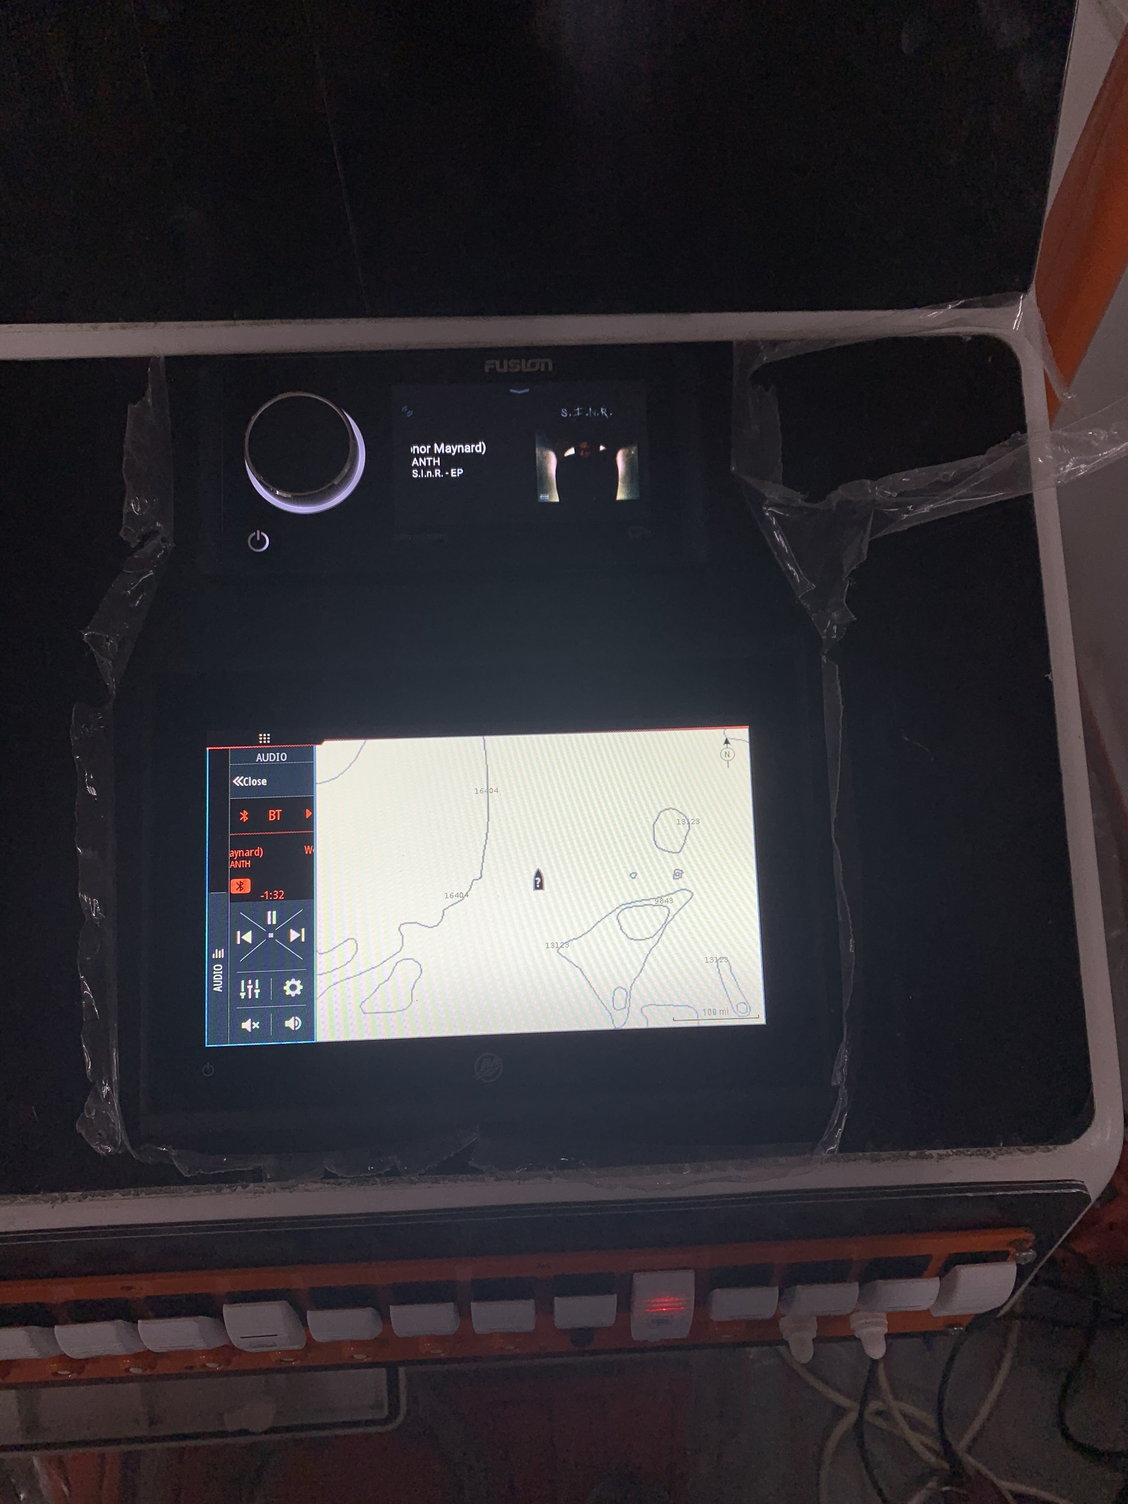
The cutouts on the right side are for the Vesselview 903 display on the bottom and Fusion Apollo RA-770 head unit above it.

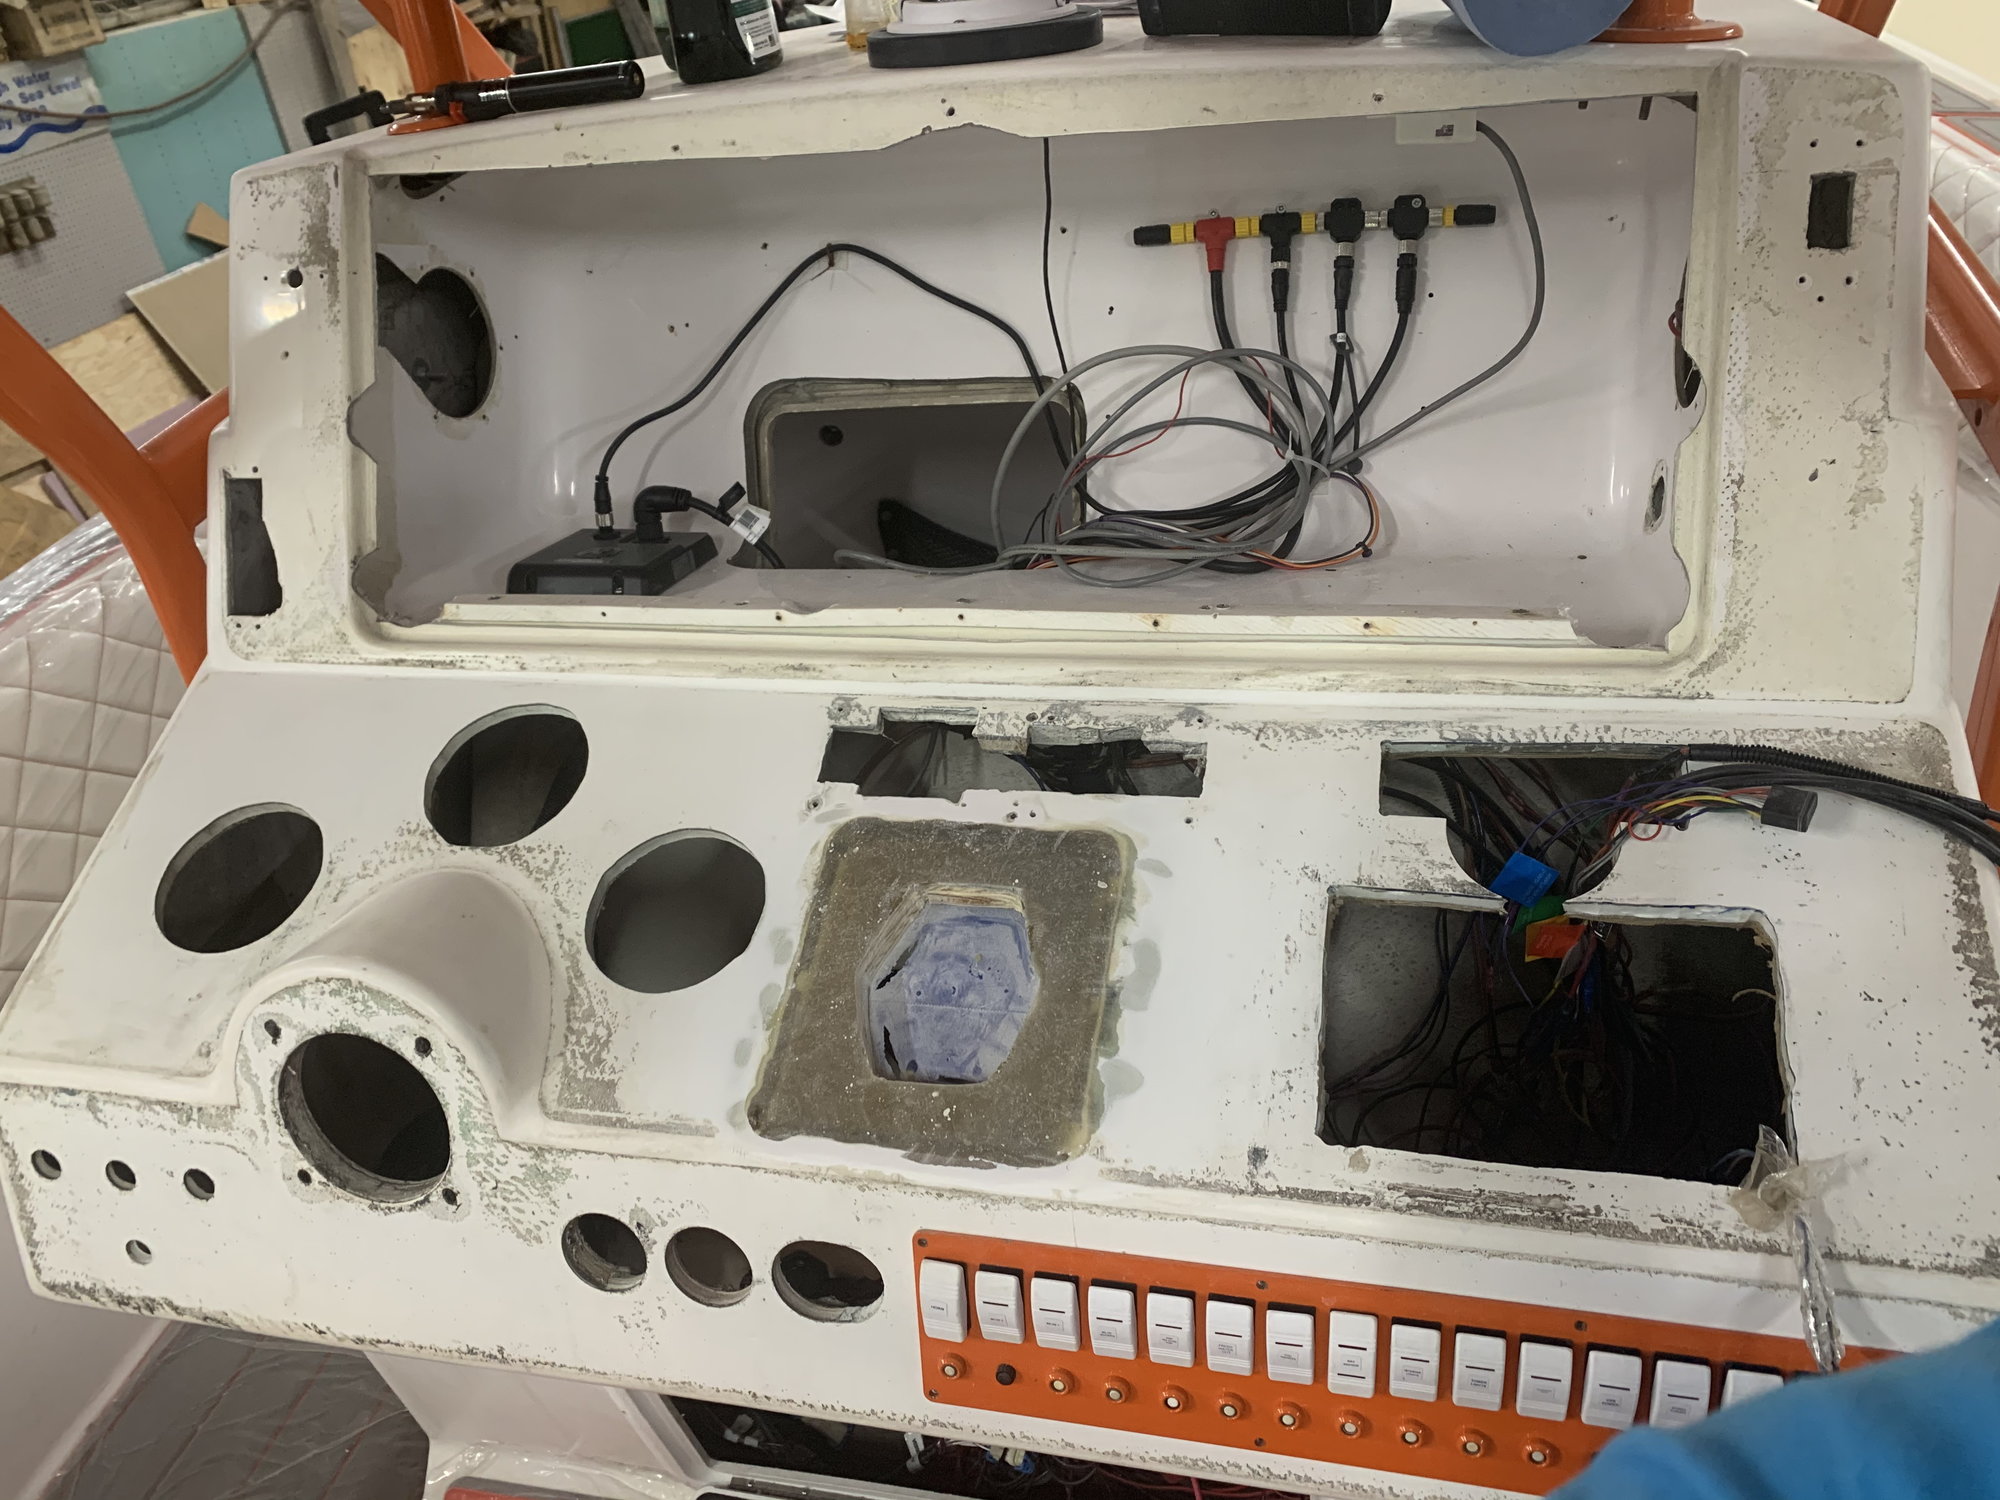
Measure twice cut once
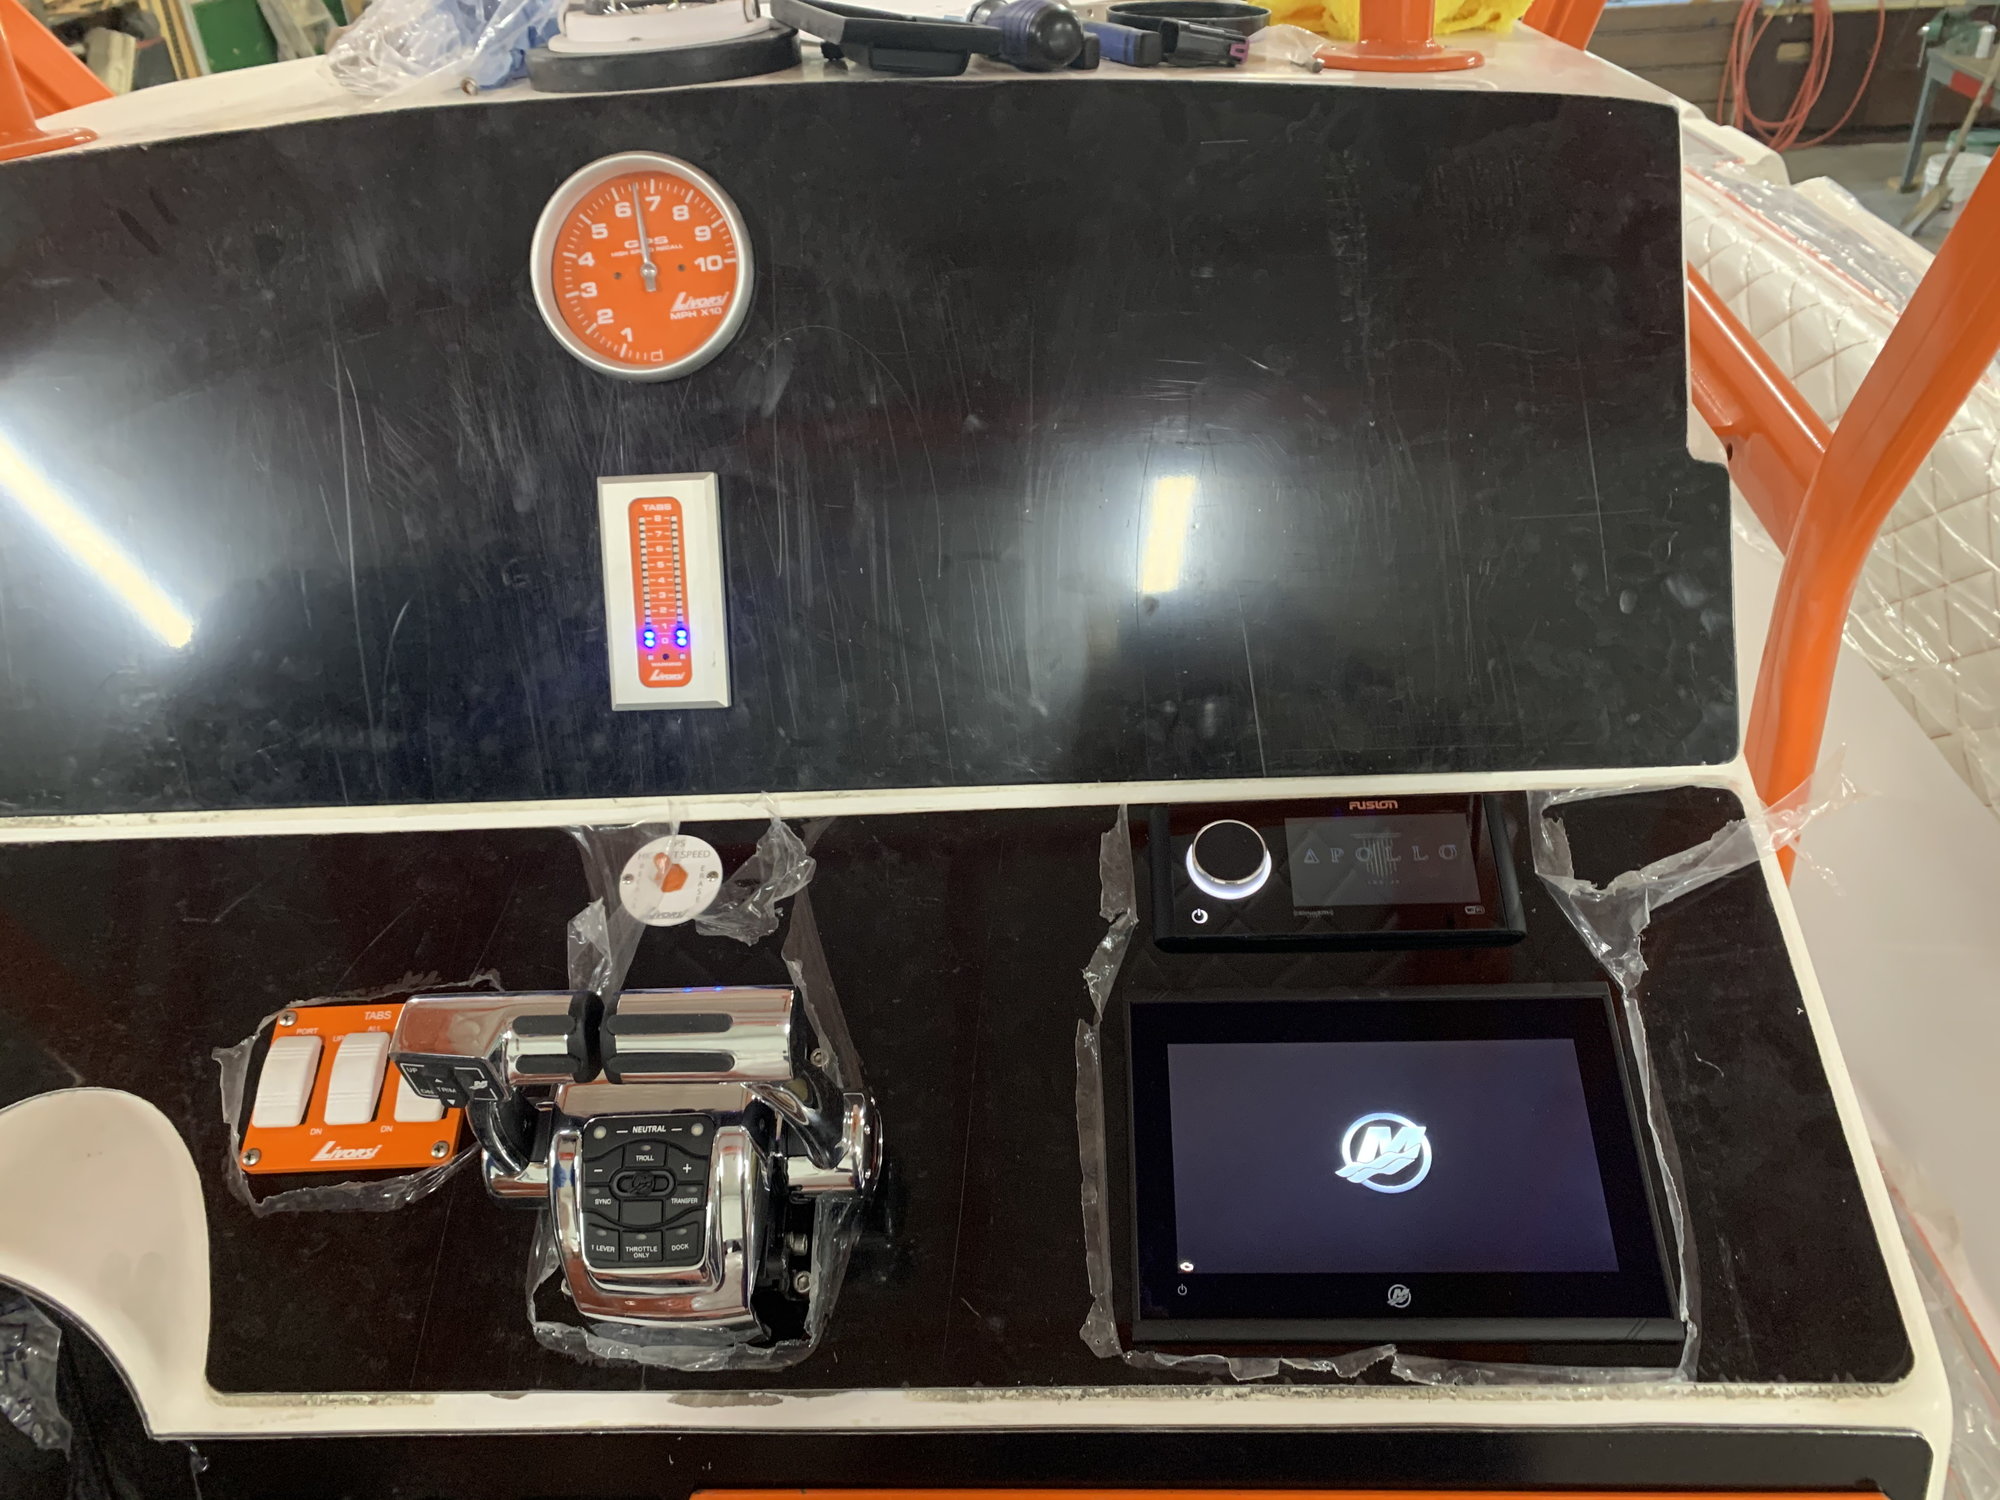
Lower dash installed.
Vesselview Link on the left, NMEA 2000 backbone on the top right. Nice that all of this is accessible thru the center council cabin so the dash won’t have to come off to work on something or add to the NMEA network.
The new throttles have a much smaller footprint since it’s only 4 wiring harness to connect versus 3 shift cables and 3 throttle cables. We cut a square out of 3/4 marine grade plywood then glassed it in the old cutout.
The bottom side of the dash. Used painters tape to contain the fiberglass resin.
The cutouts on the right side are for the Vesselview 903 display on the bottom and Fusion Apollo RA-770 head unit above it.
Measure twice cut once
Lower dash installed.
Last edited by iaoutlaw; 07-15-2020 at 11:28 AM.
 07-15-2020, 09:55 AM
#22
Registered
Thread Starter
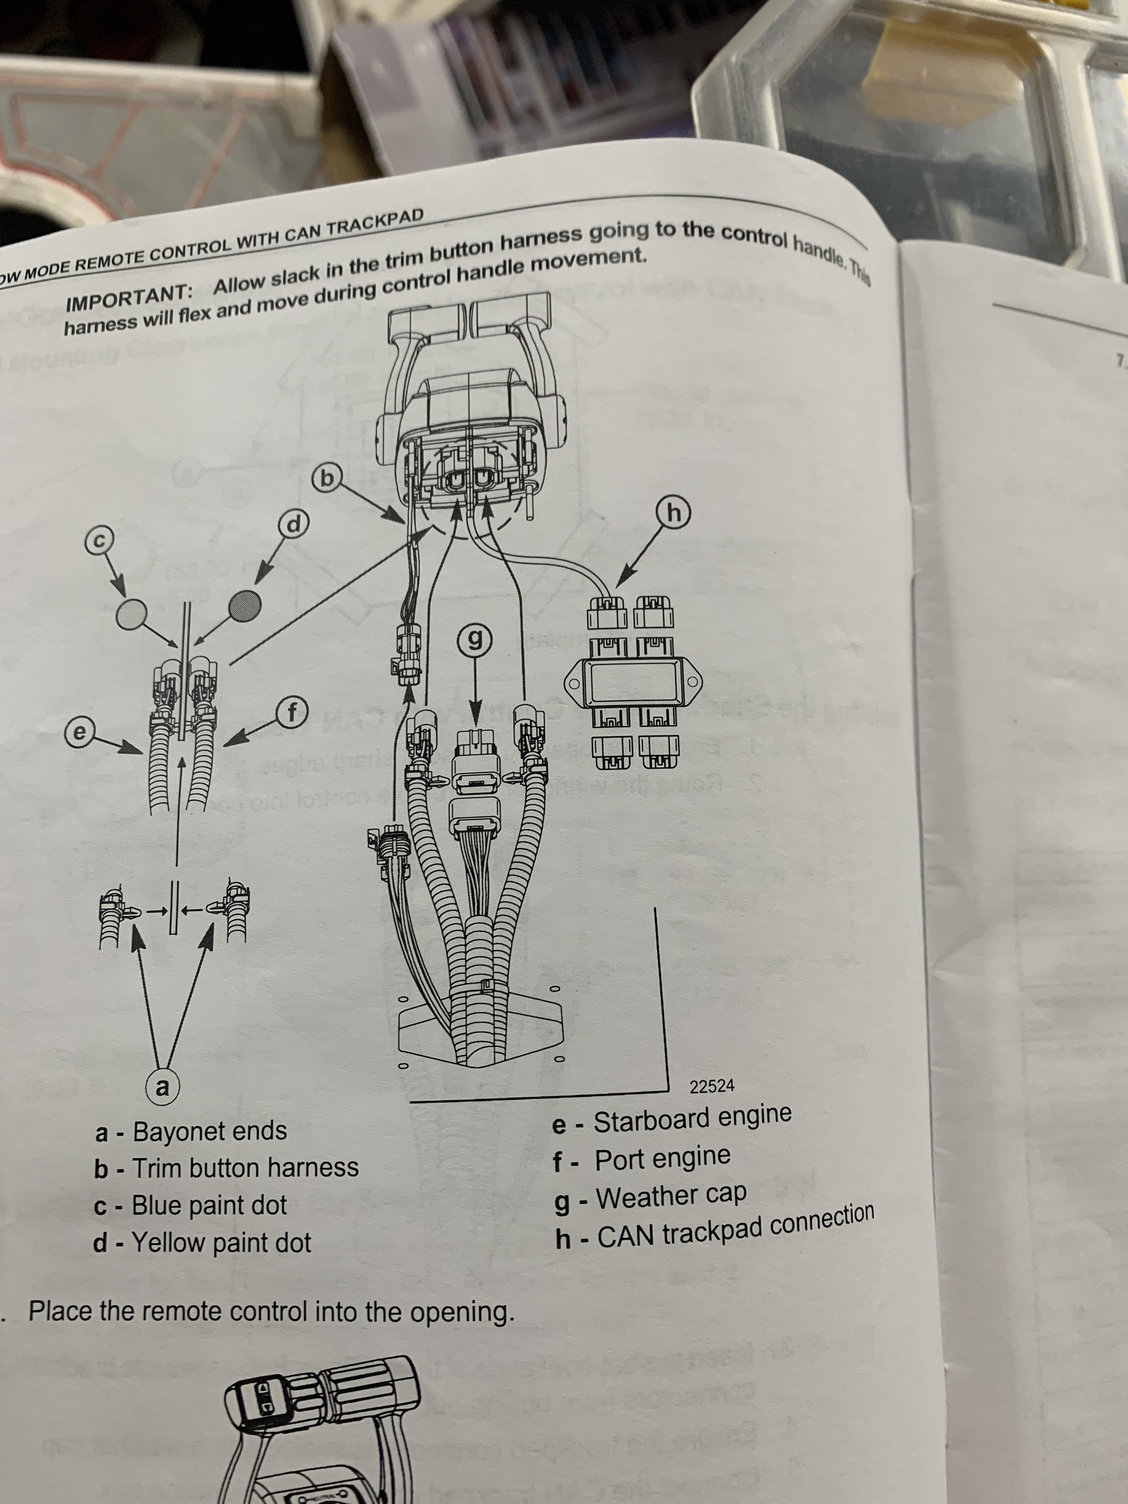
Wiring diagram for the throttles
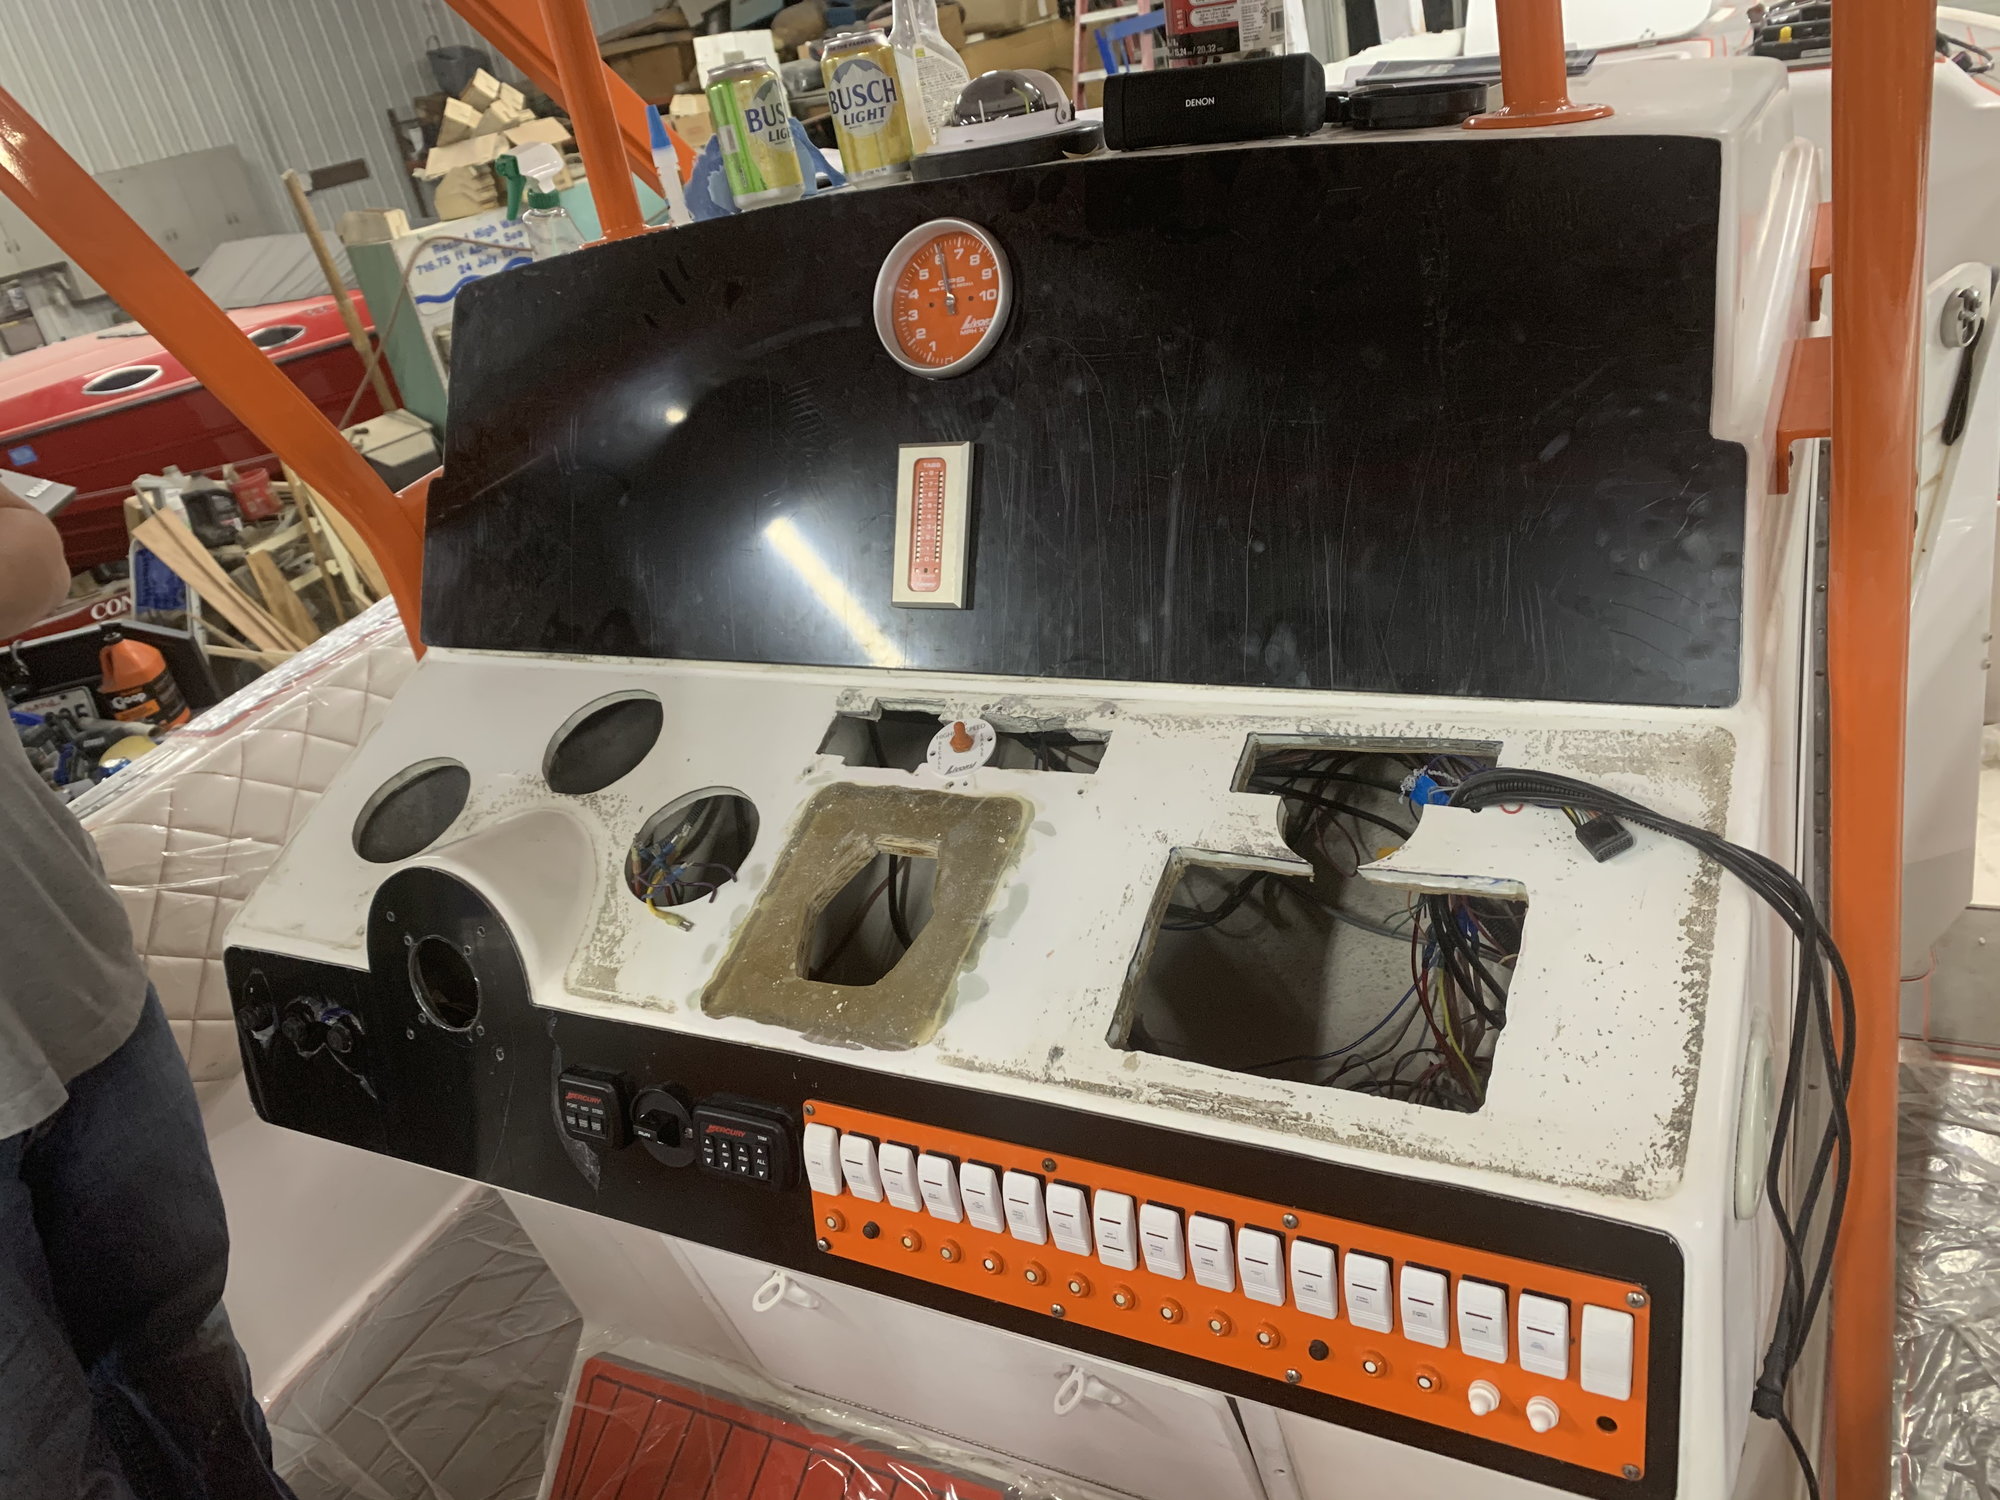
Back side of the helm. (L to R) Individual engine trim, Kill switch, Individual engine start stop, Individual engine key switch.

Steering helm installed.
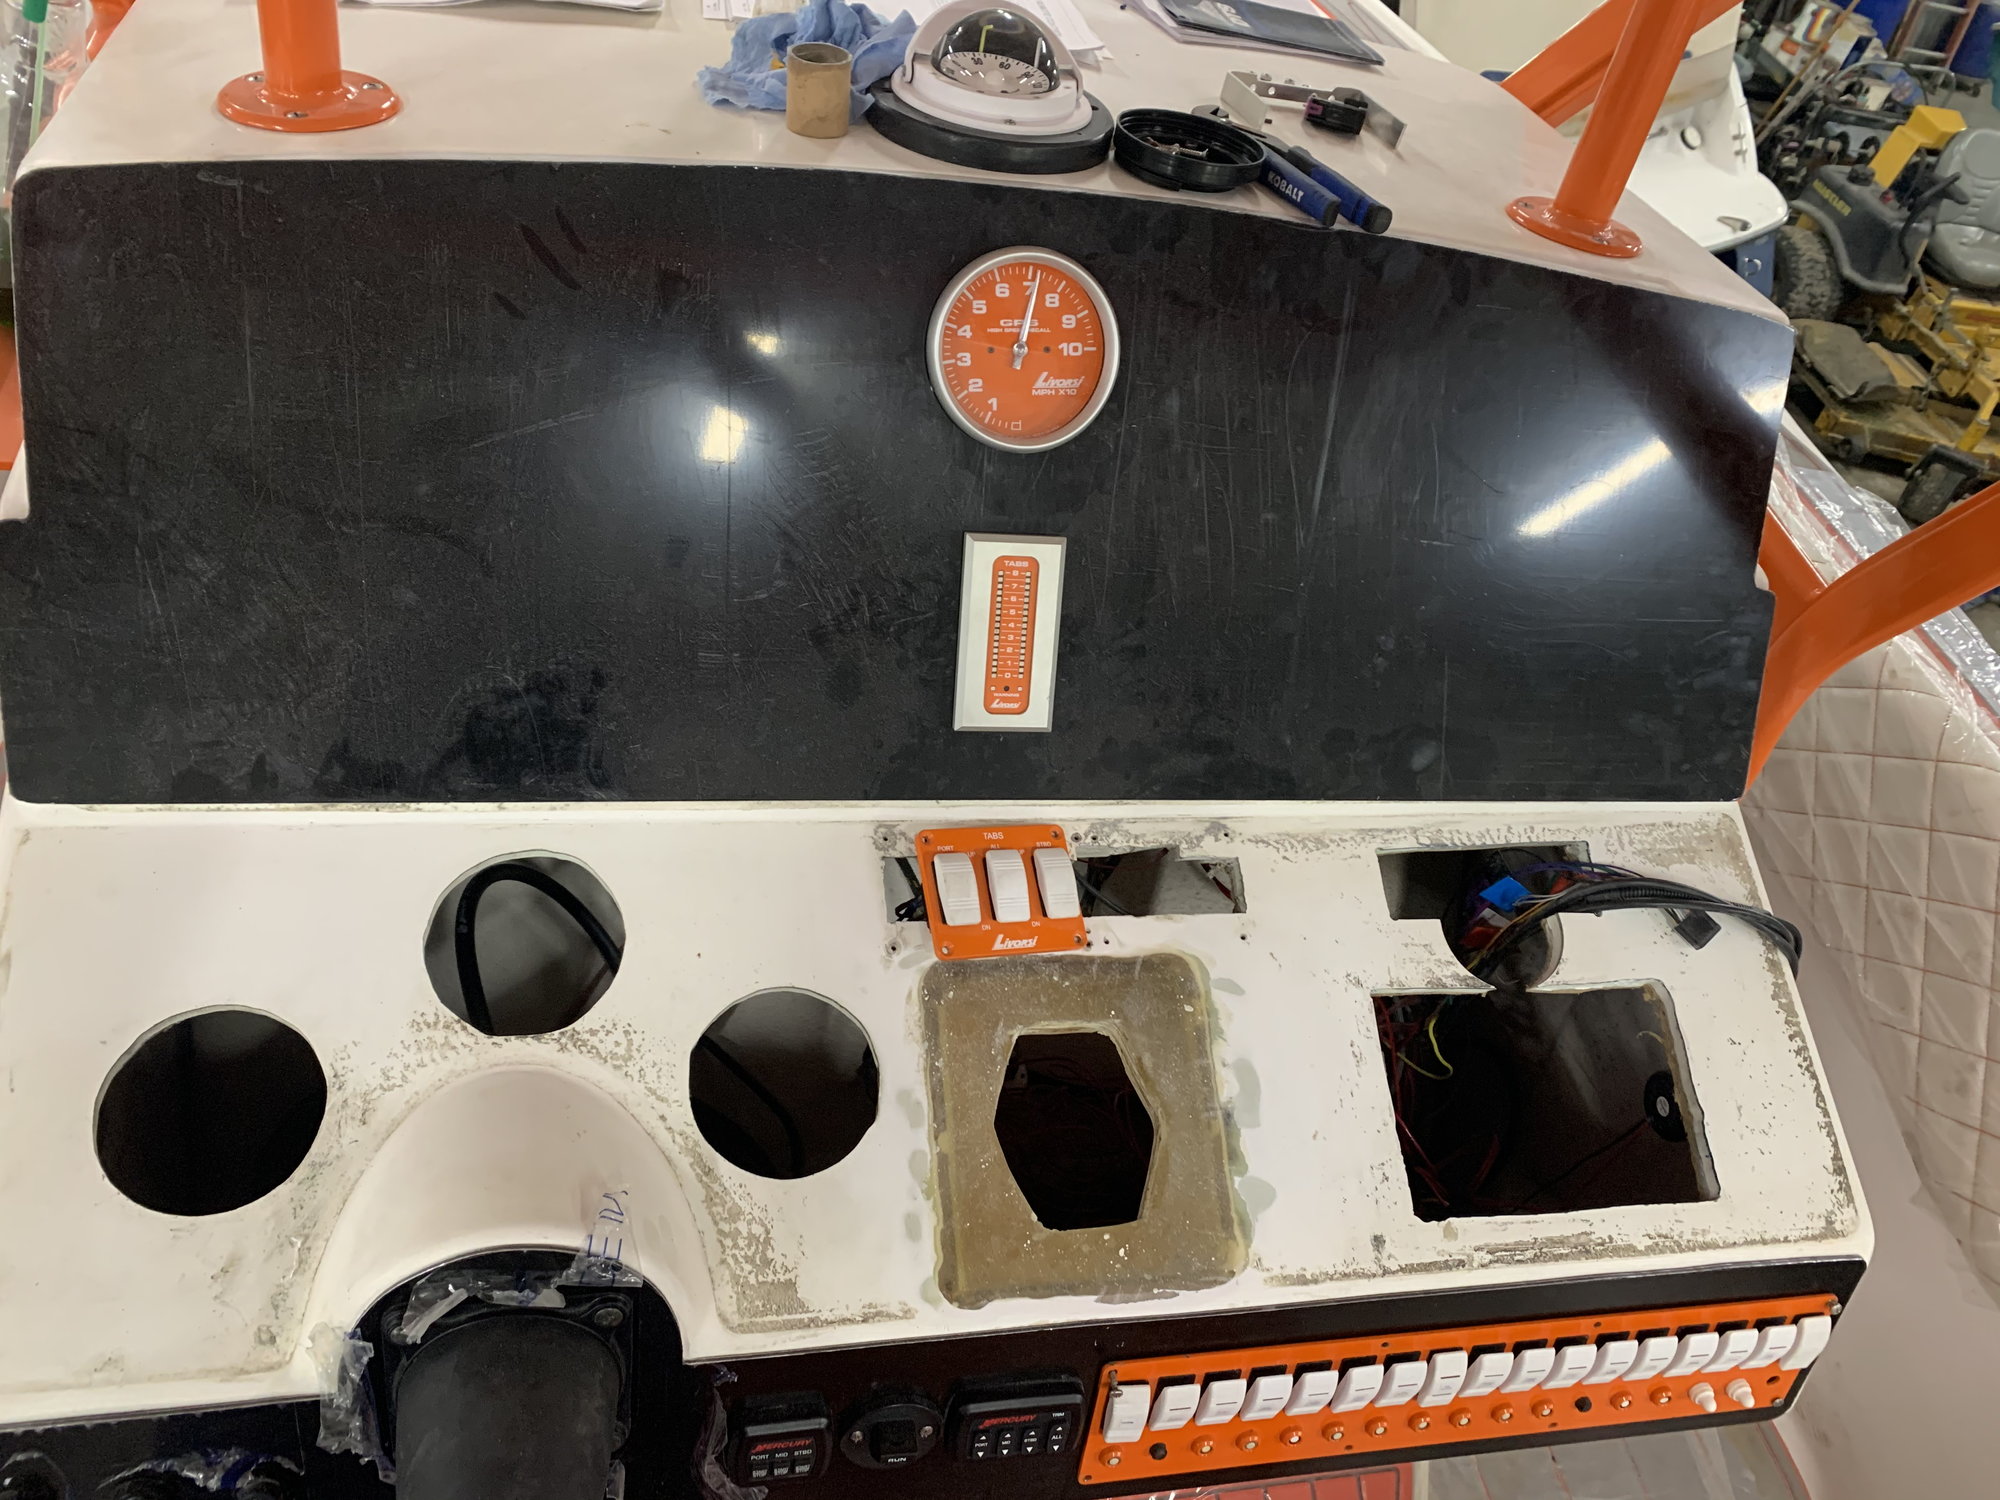
Lower dash and Trim tab switch location(this would get moved and the speedo recall/erase would go there in its place).
Last edited by iaoutlaw; 07-15-2020 at 11:31 AM.
07-16-2020, 01:33 PM
#23
Registered
Thread Starter
Final dash panel is cut now time to install everything and start hooking the electronics up.
Also starting on 2 more planned updates.

Center panel cut with the head unit and Vesselview in for testing. Sidebar Jeff has a pretty awesome shirt on although the reason for it is not so awesome.
All dash panels are on and electronics are hooked up
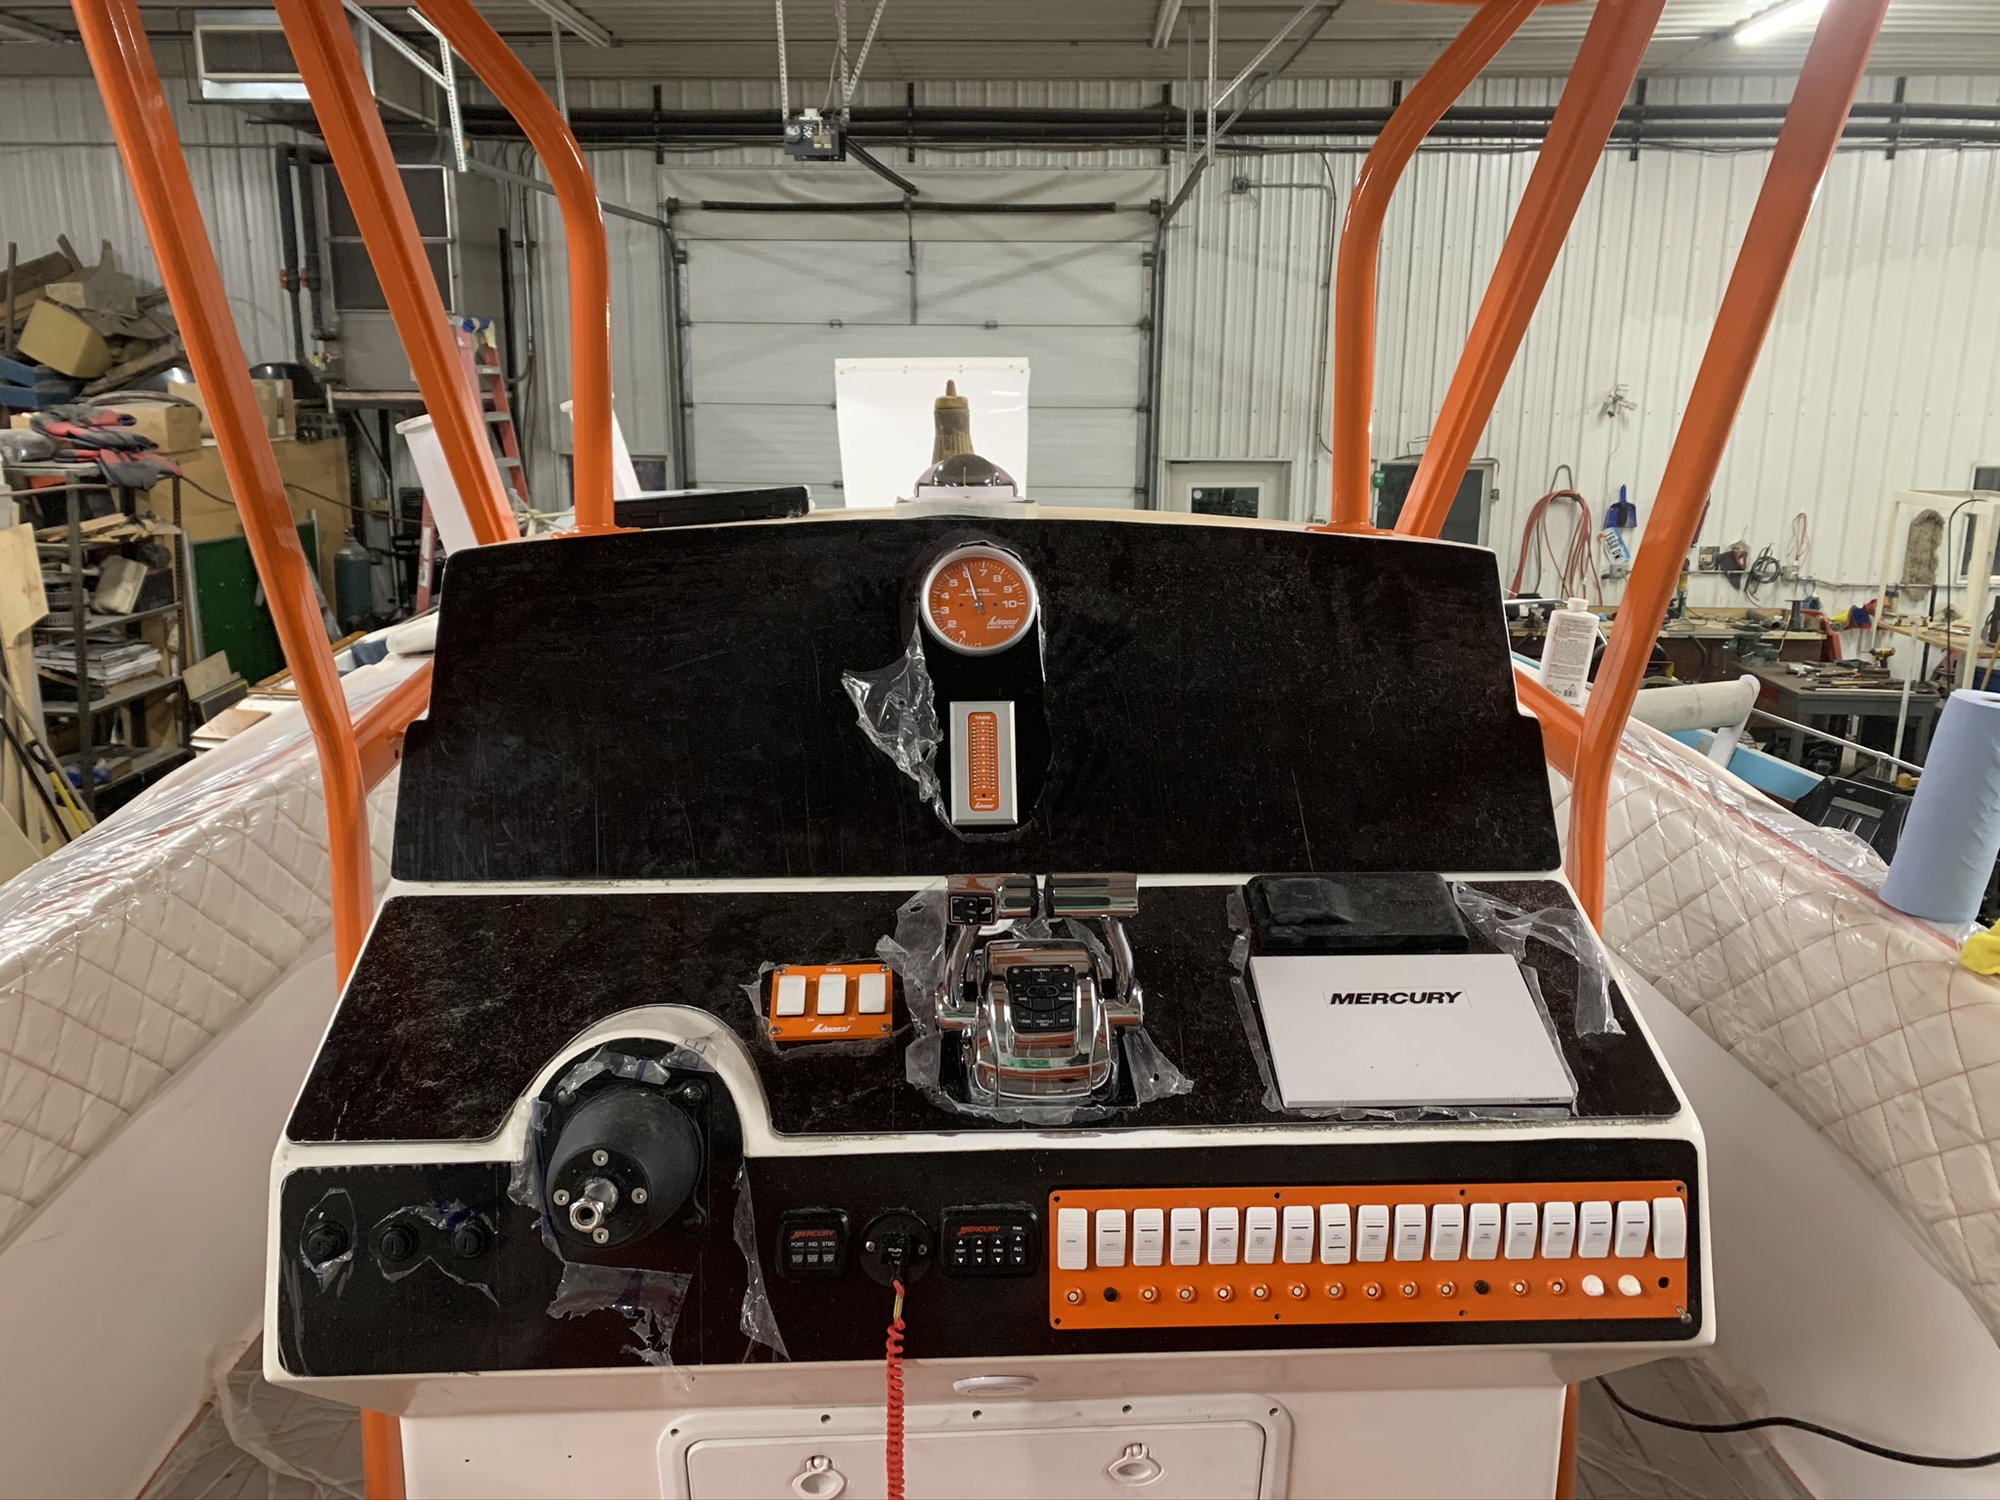
Only thing left is the steering wheel and finish rewiring all the switches
Rear swim platform idea

Rear bench idea
Also starting on 2 more planned updates.
Center panel cut with the head unit and Vesselview in for testing. Sidebar Jeff has a pretty awesome shirt on although the reason for it is not so awesome.
All dash panels are on and electronics are hooked up
Only thing left is the steering wheel and finish rewiring all the switches
Rear swim platform idea
Rear bench idea
Last edited by iaoutlaw; 07-16-2020 at 01:55 PM.
07-20-2020, 11:32 AM
#24
Registered
Thread Starter
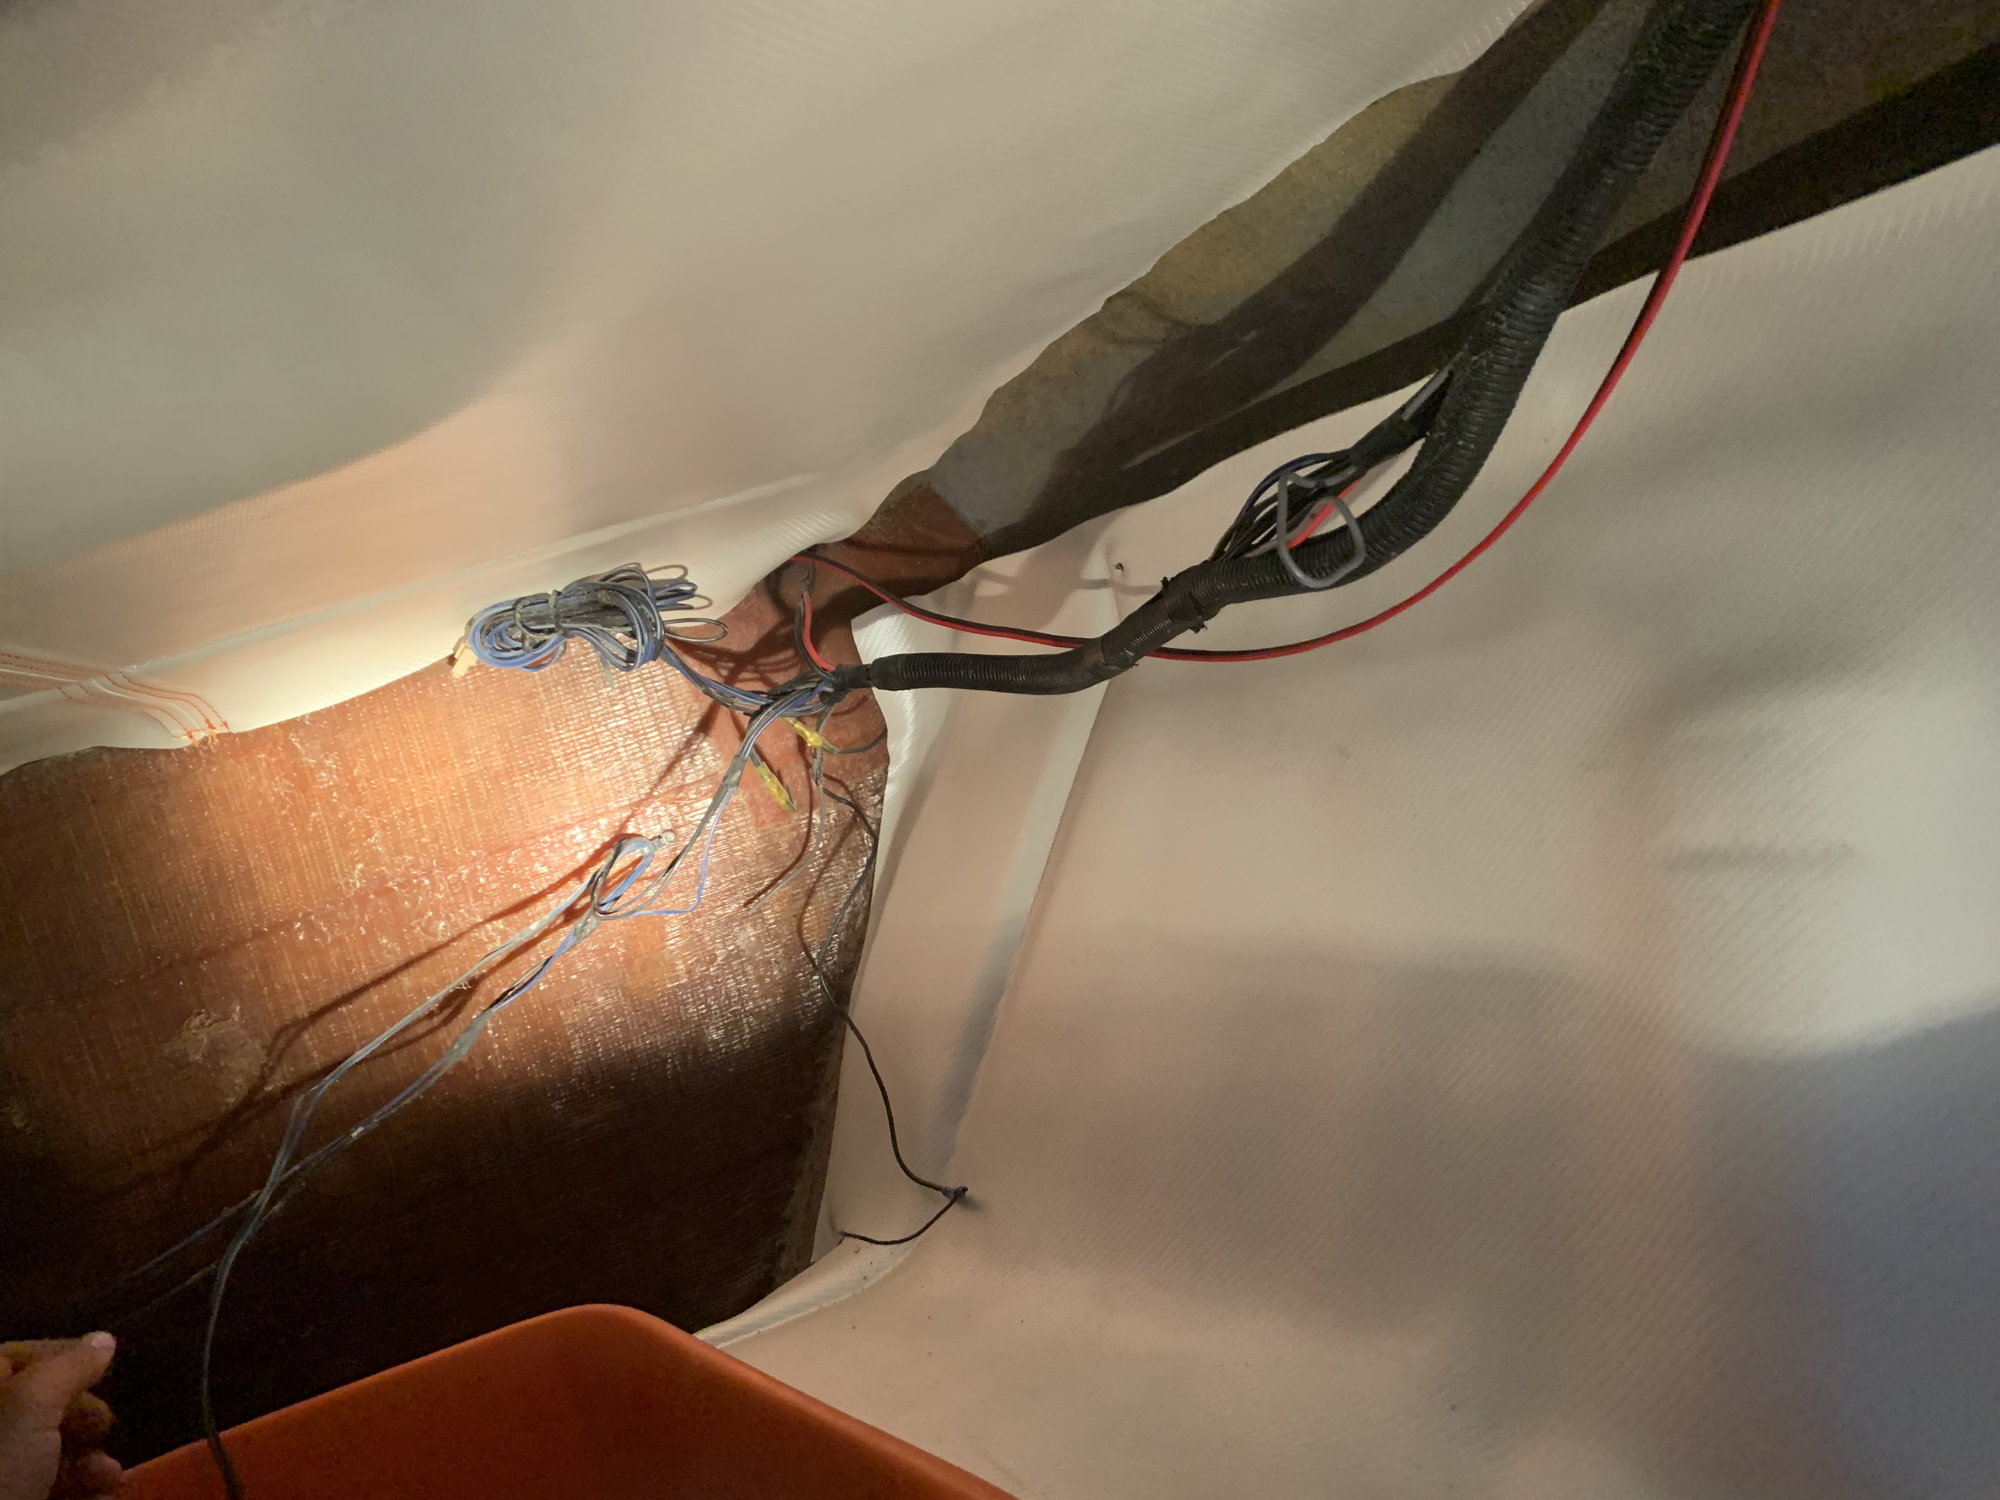
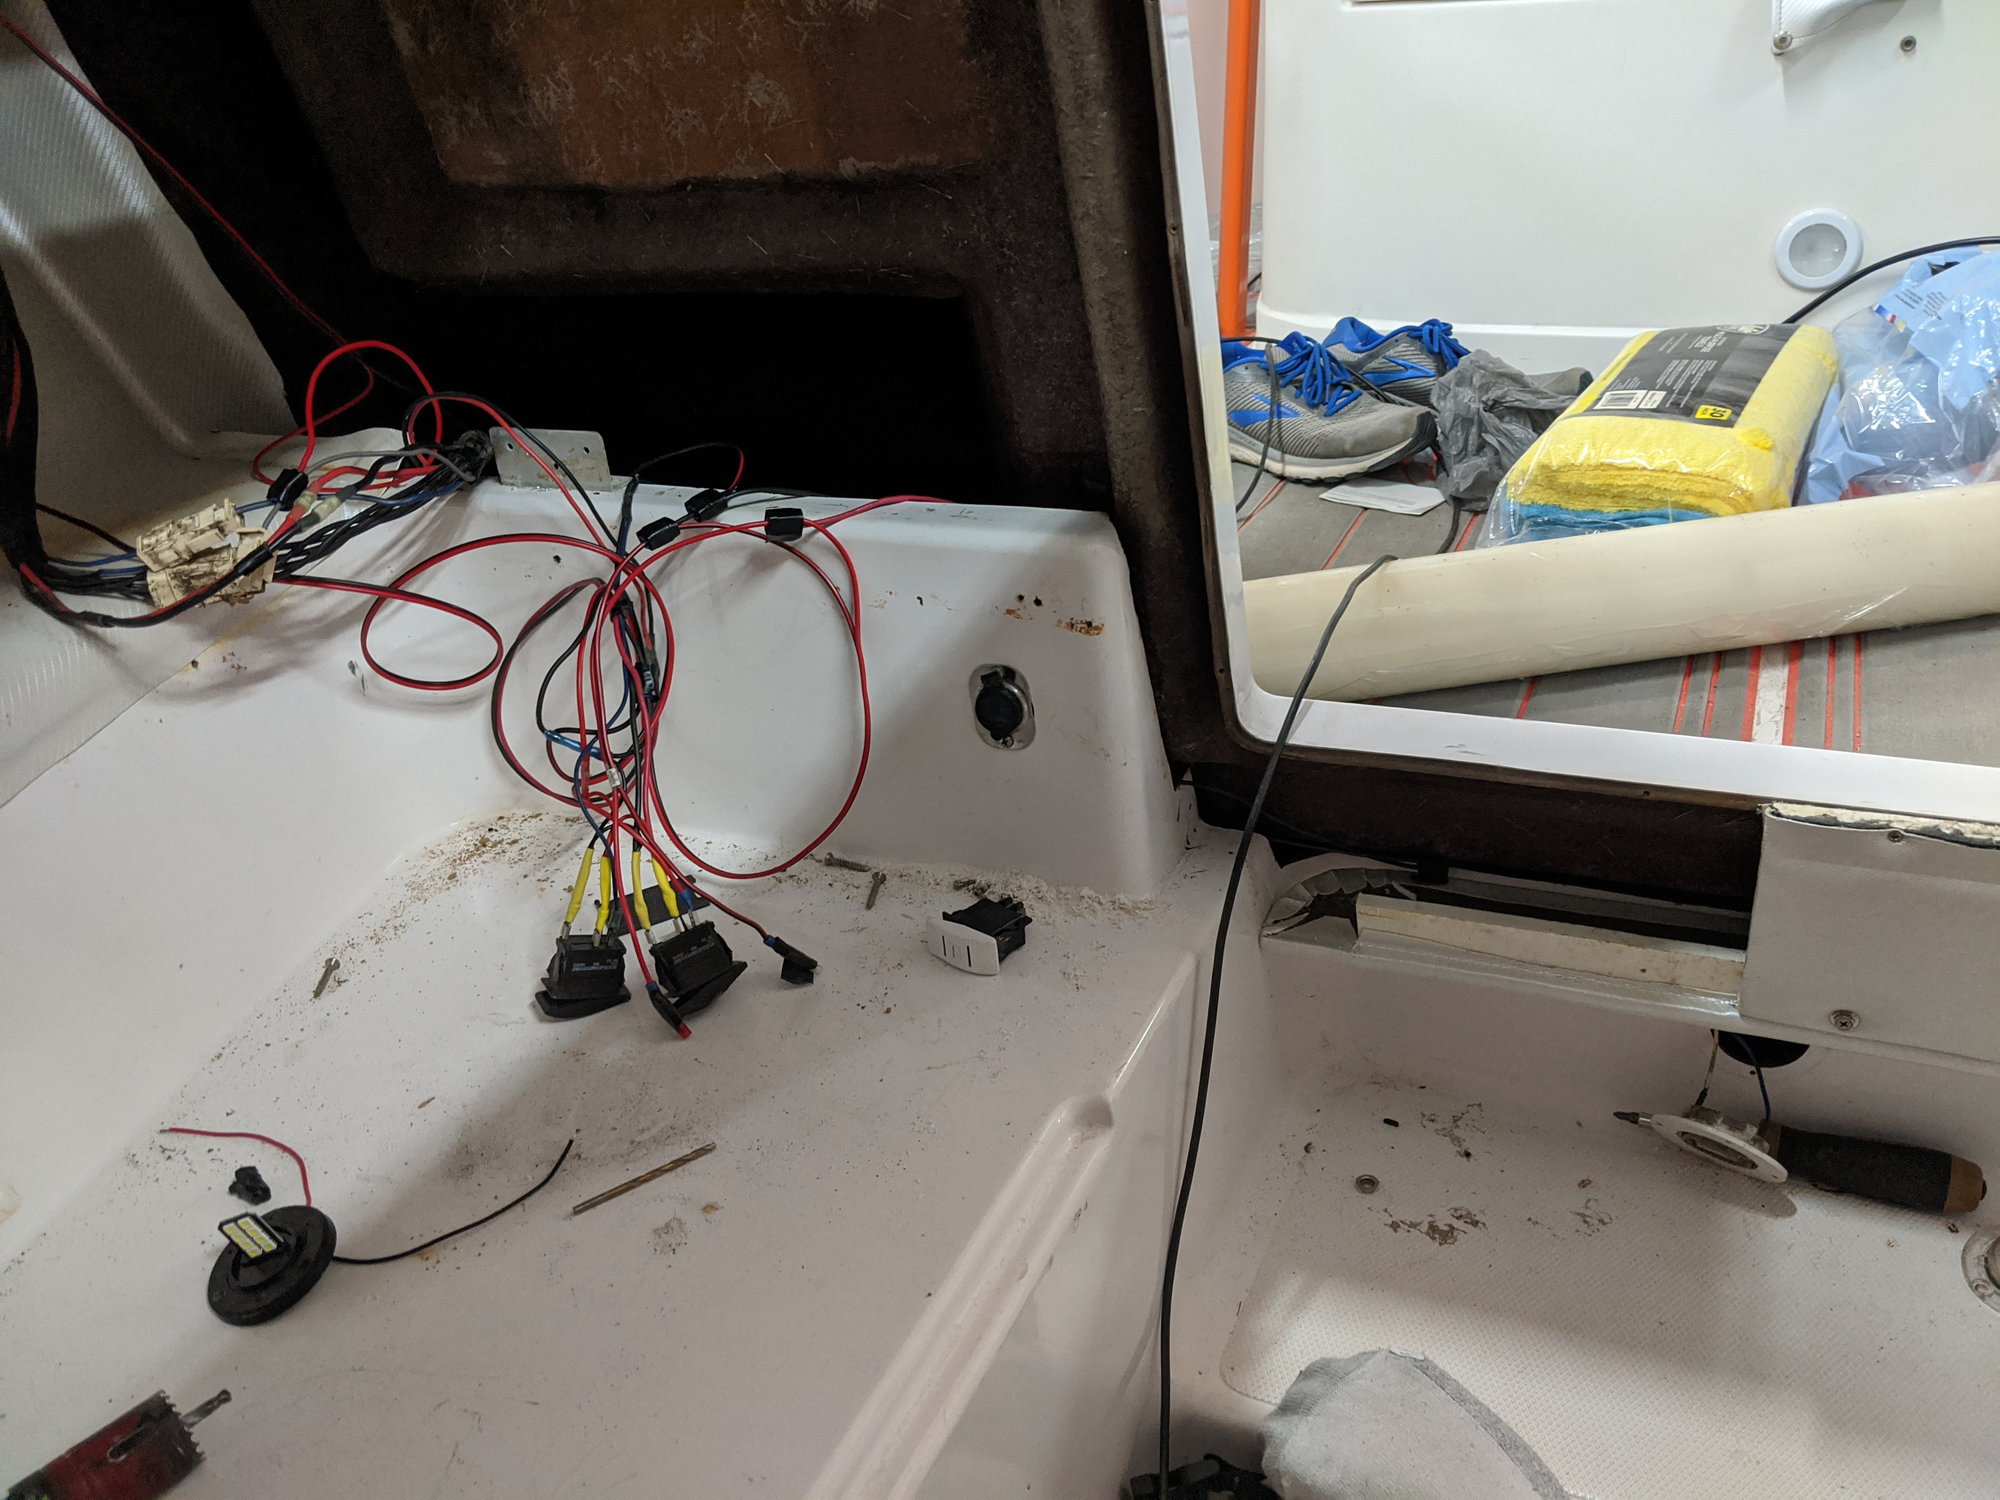
More wiring to replace.. Common theme in this boat. Hooked up new cabin lights and only one worked so the entire cuddy panels came off and ran new wire. Also finished rewiring all the switches and cleaned up and removed all the old wire below the dash.
Mess of old wire.. the number of splices is ridiculous.
Panels out and new wires run
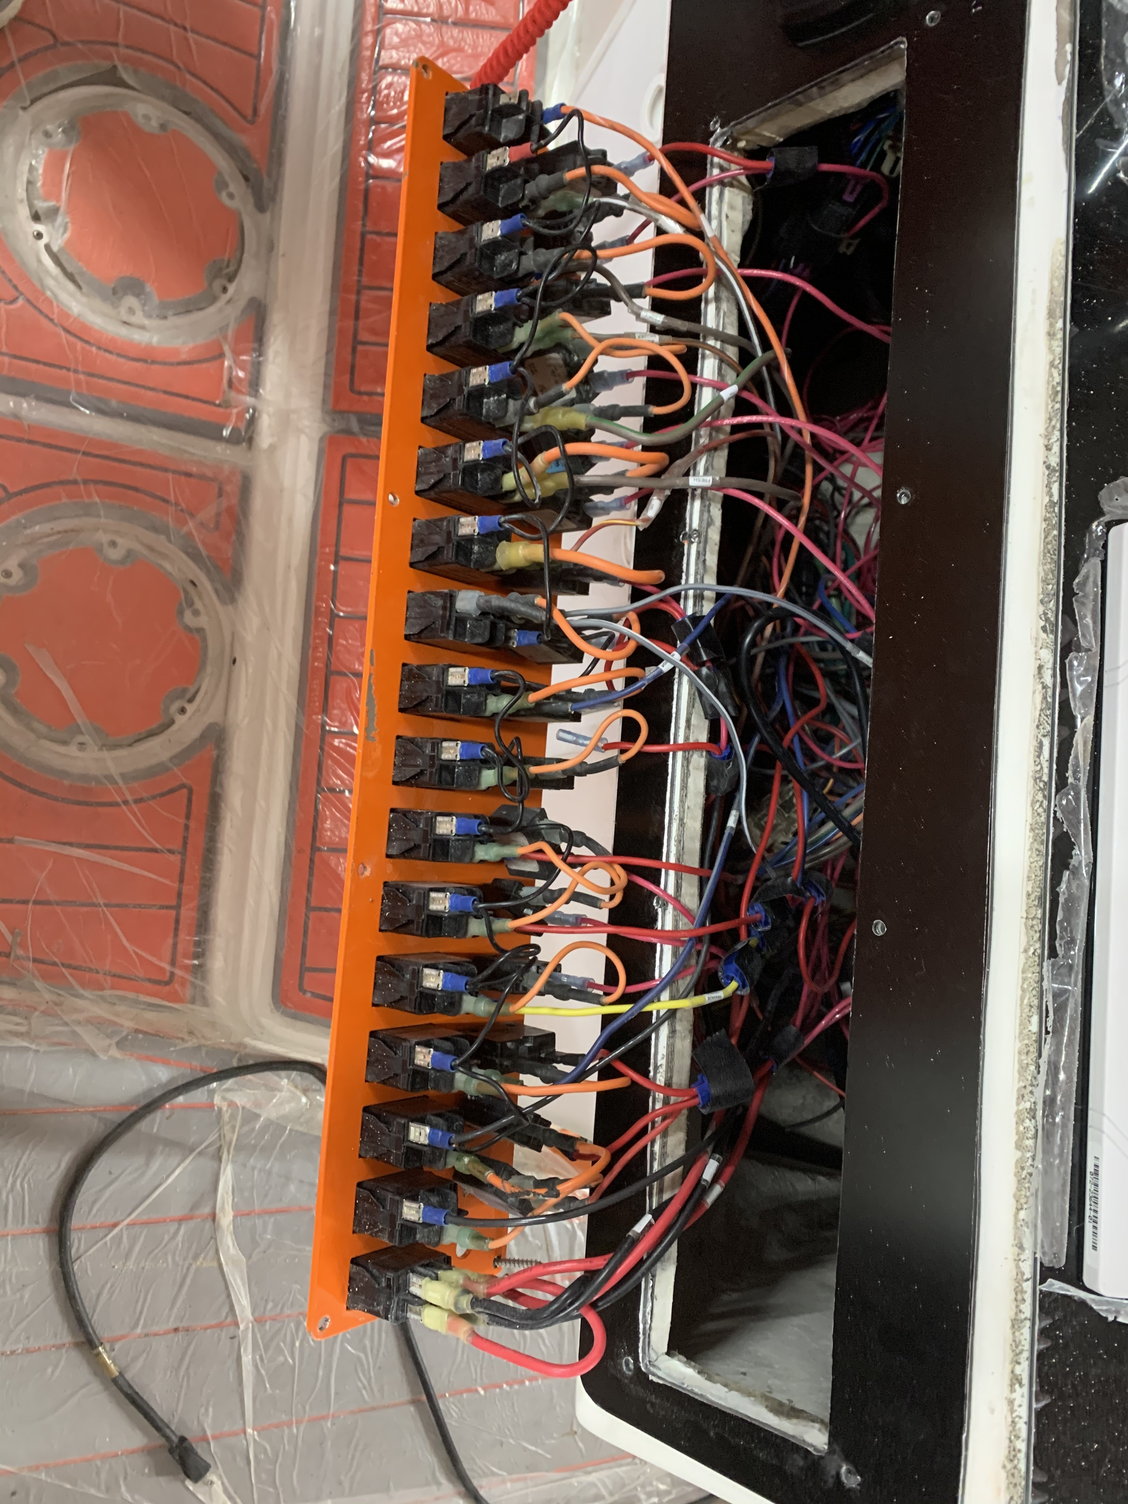
All the orange wires are completely corroded
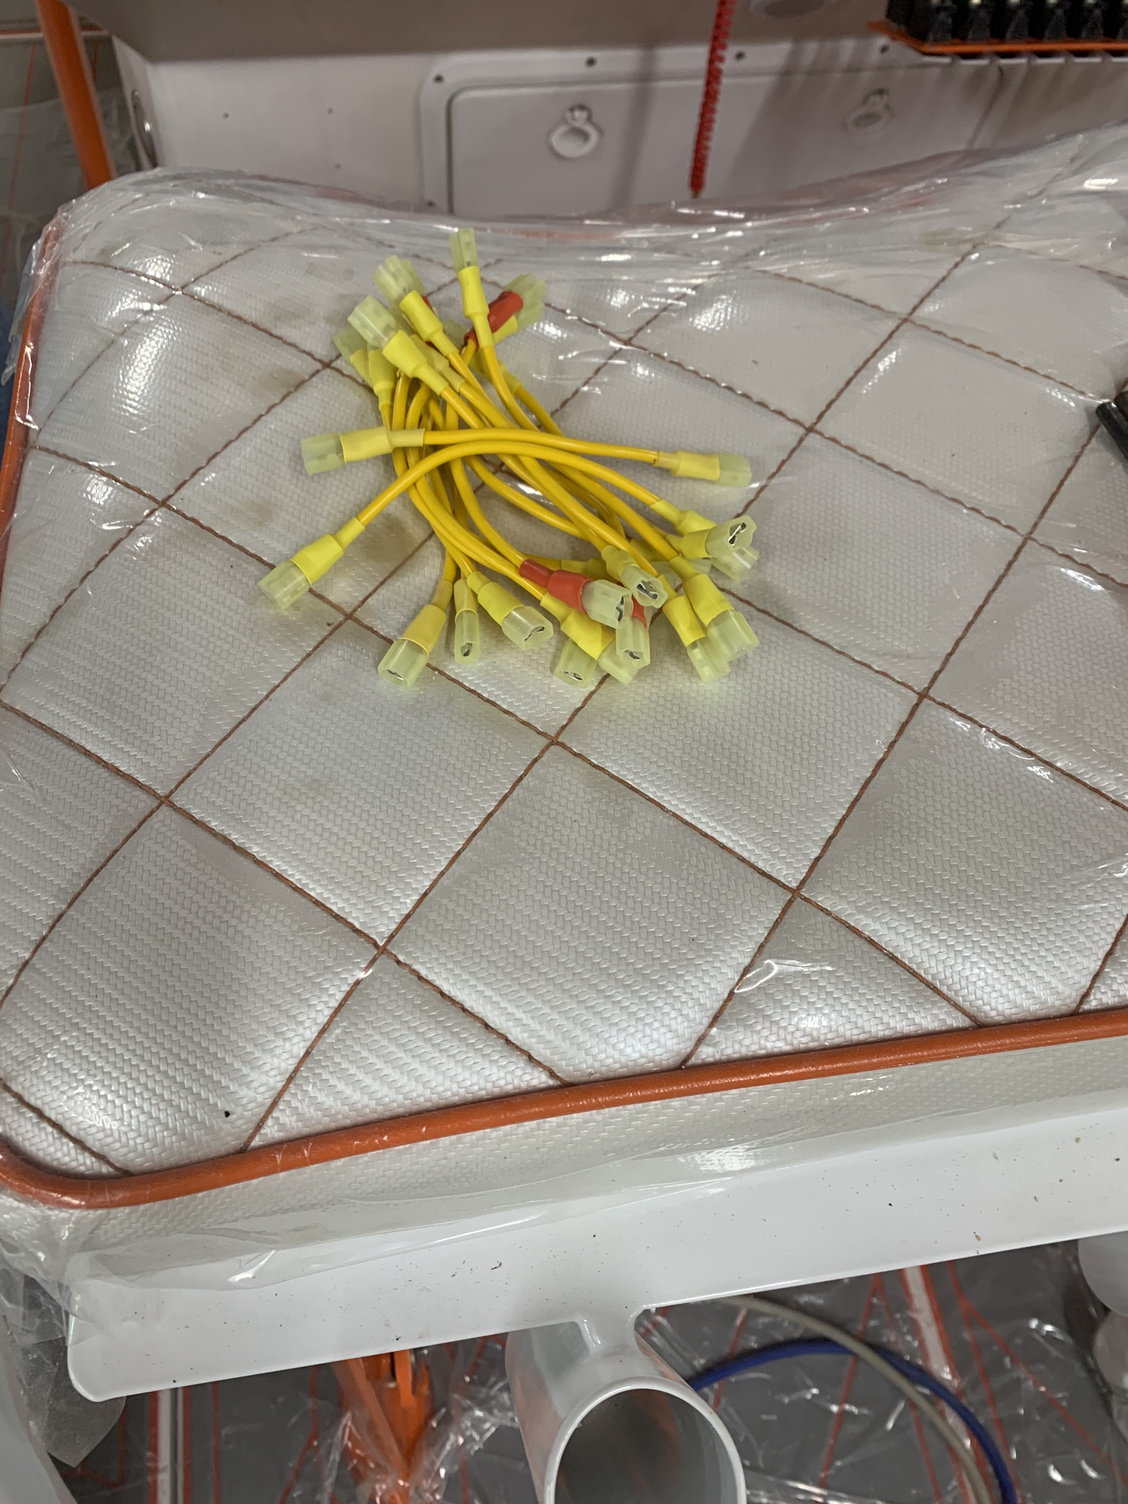
New pile of wires made To replace the old ones
Front panel reinstalled with new lights
New wiring under the dash

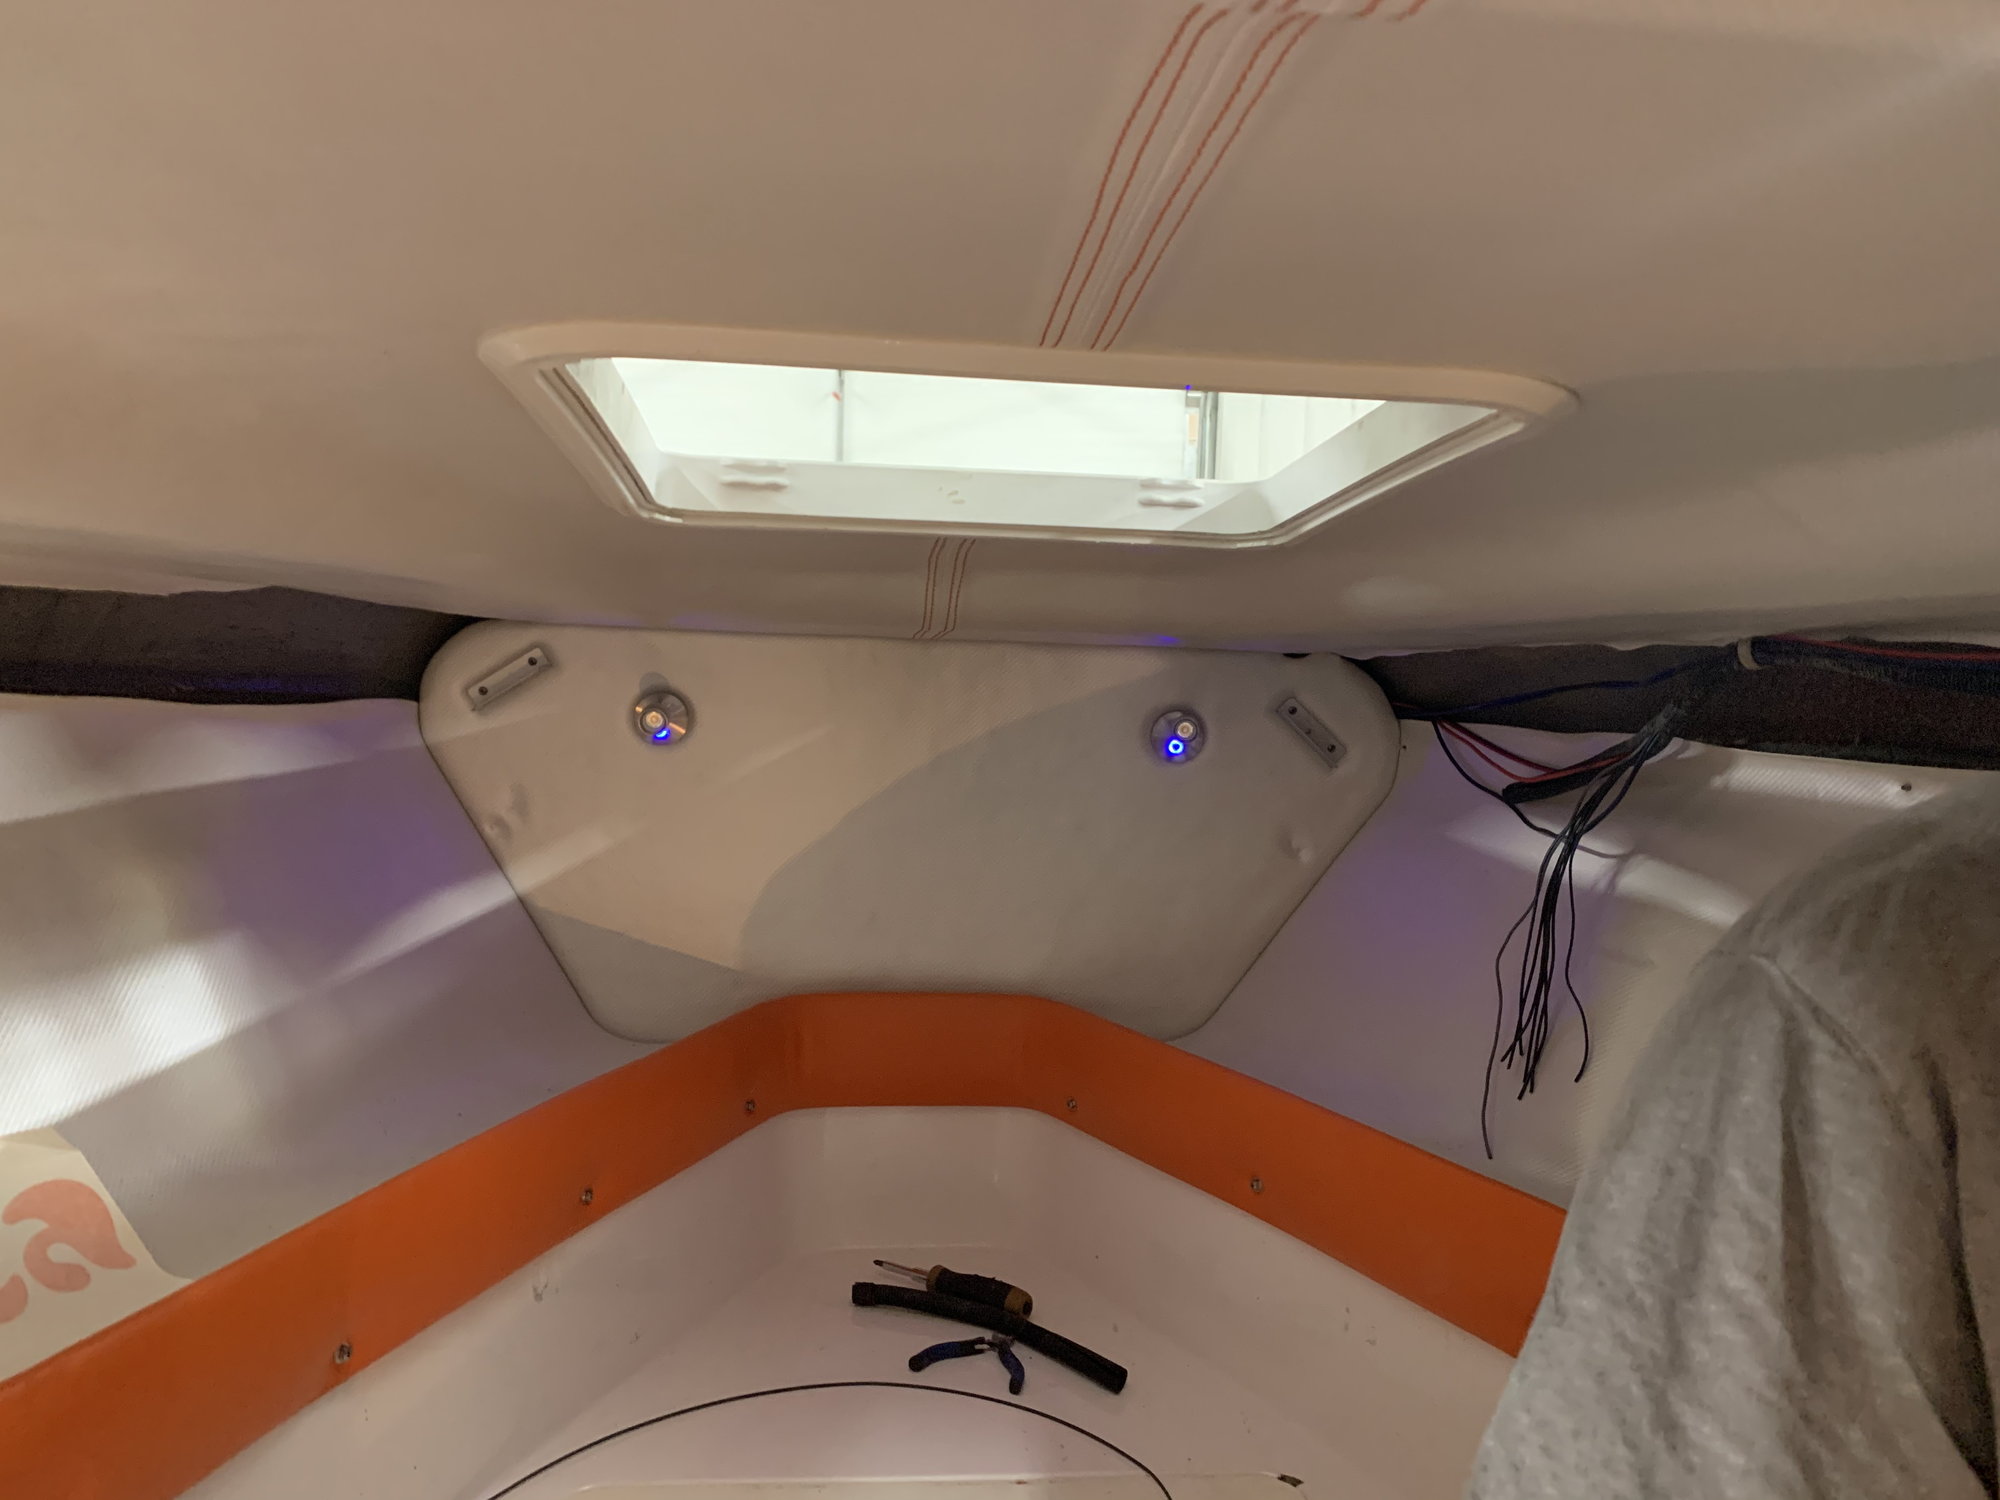
Also decided to add USB ports in the cuddy.
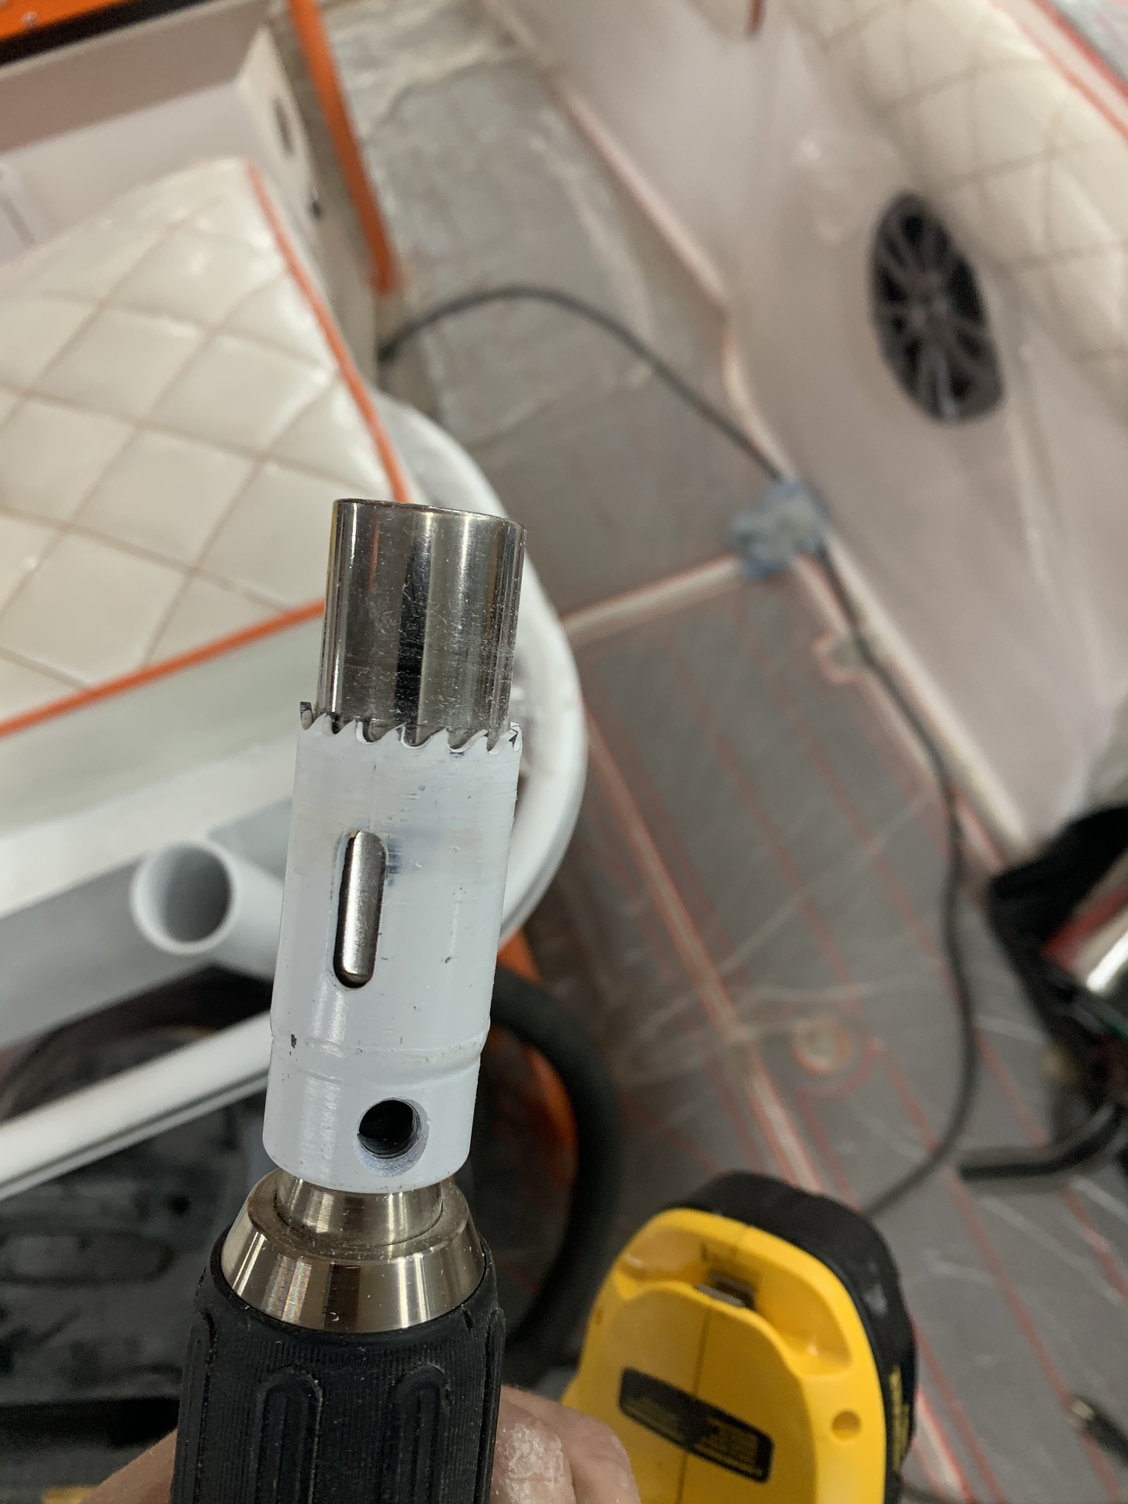
Minor problem they didn�t fit thru the existing hole so I came up with a solution to keep the hole saw centered in the original cutout

Worked pretty well
Mess of old wire.. the number of splices is ridiculous.
Panels out and new wires run
All the orange wires are completely corroded
New pile of wires made To replace the old ones
Front panel reinstalled with new lights
New wiring under the dash
Also decided to add USB ports in the cuddy.
Minor problem they didn�t fit thru the existing hole so I came up with a solution to keep the hole saw centered in the original cutout
Worked pretty well
07-22-2020, 09:26 AM
#25
Registered
Thread Starter
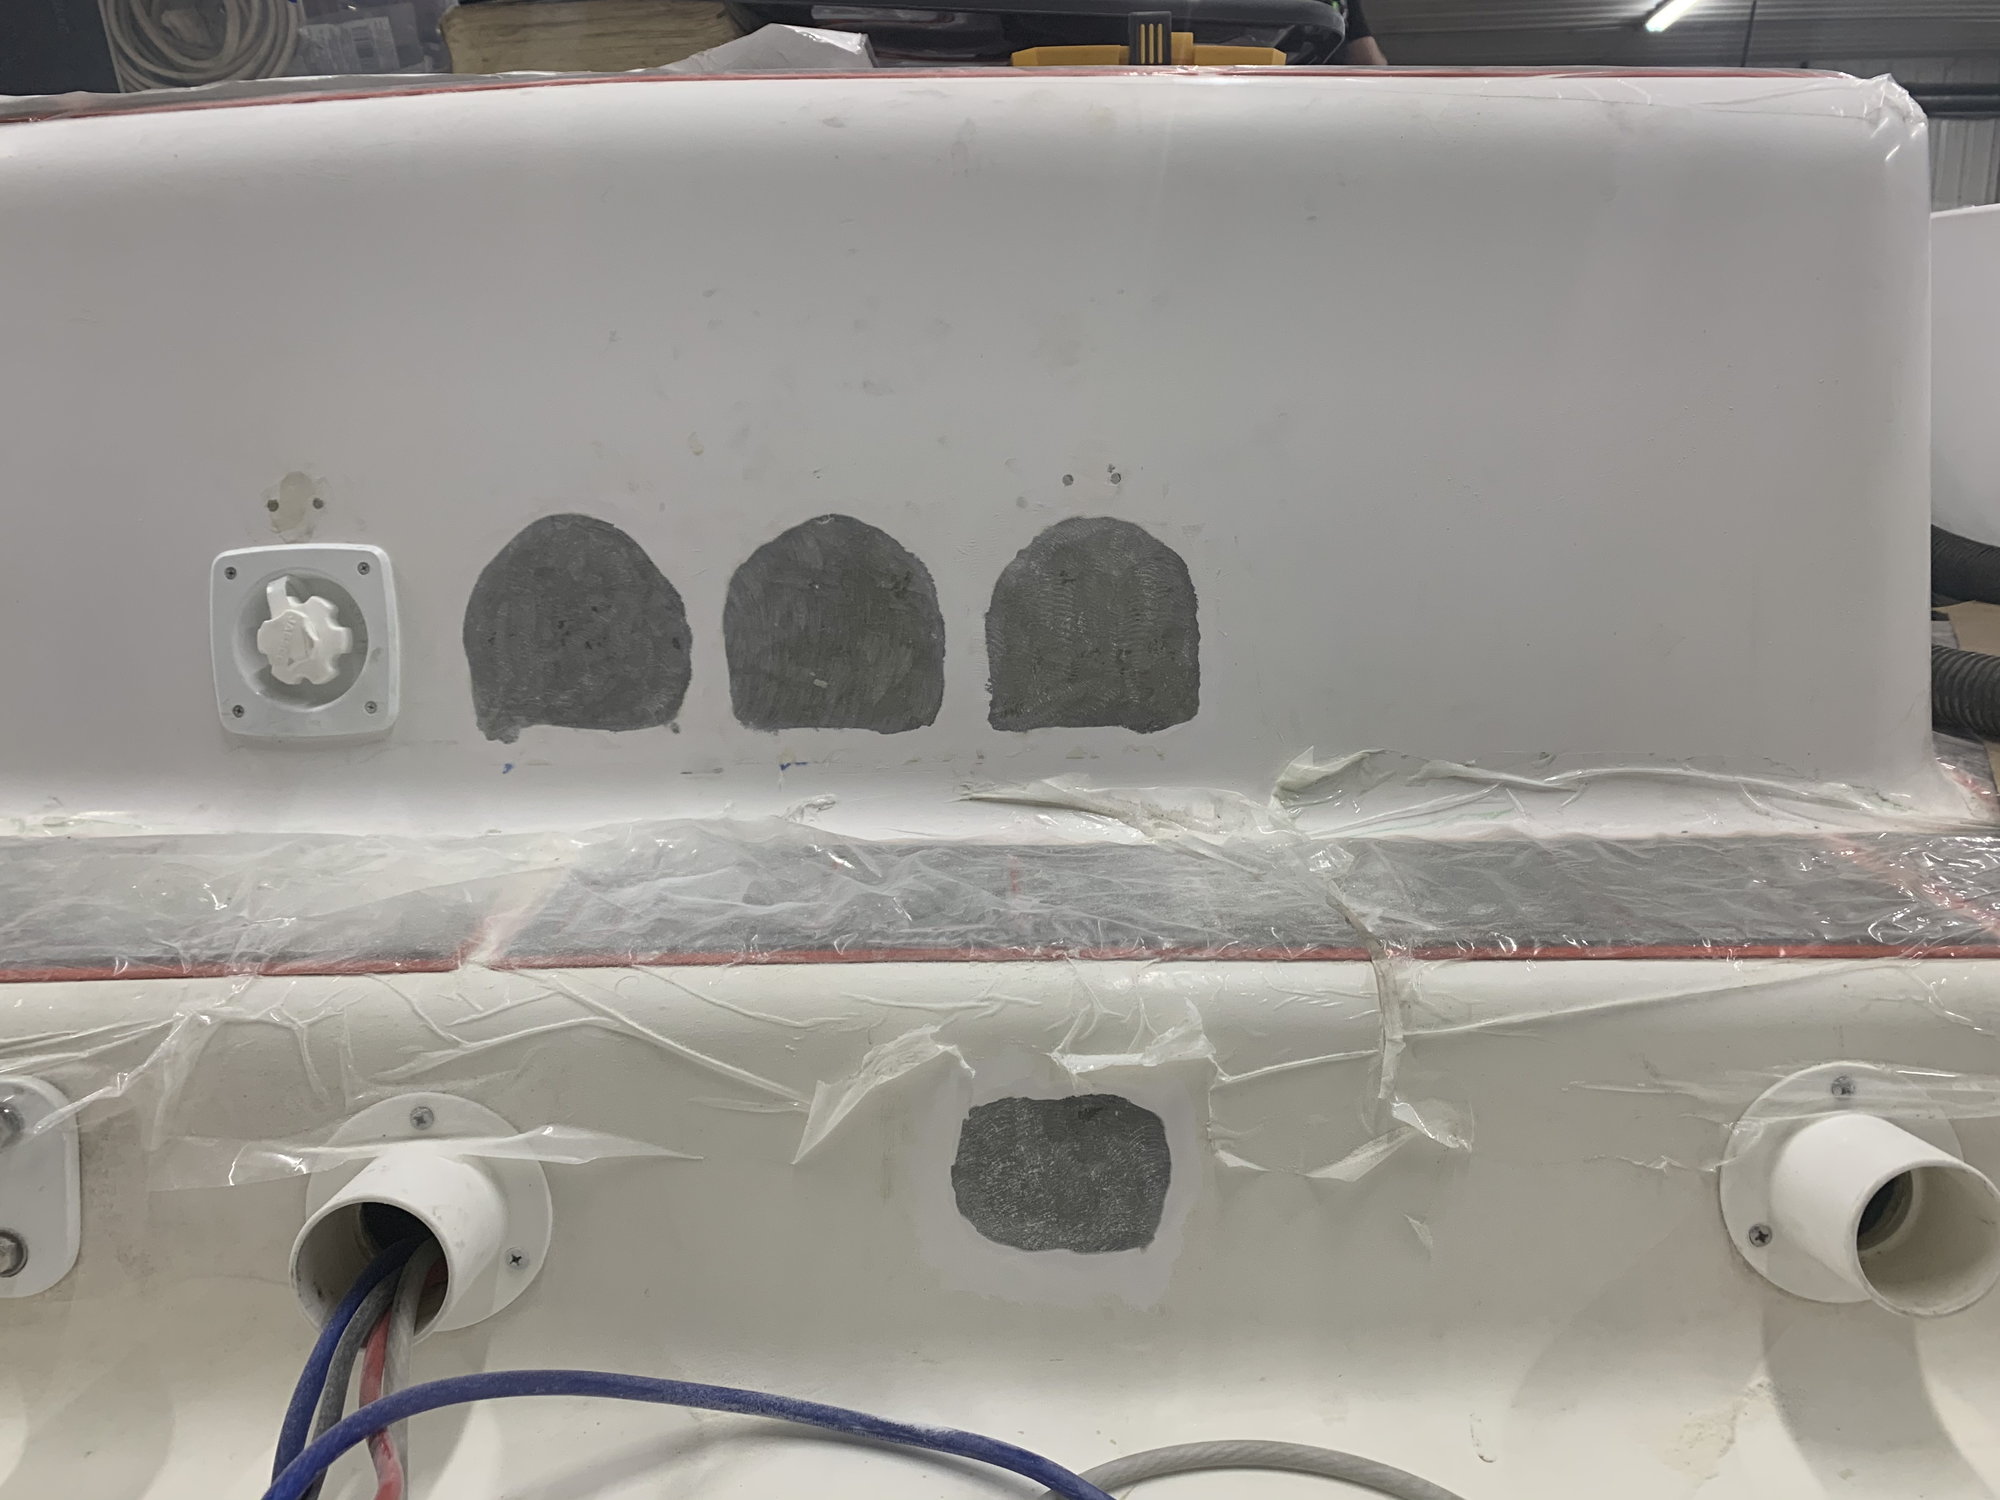
Today�s update some glass and gel work.
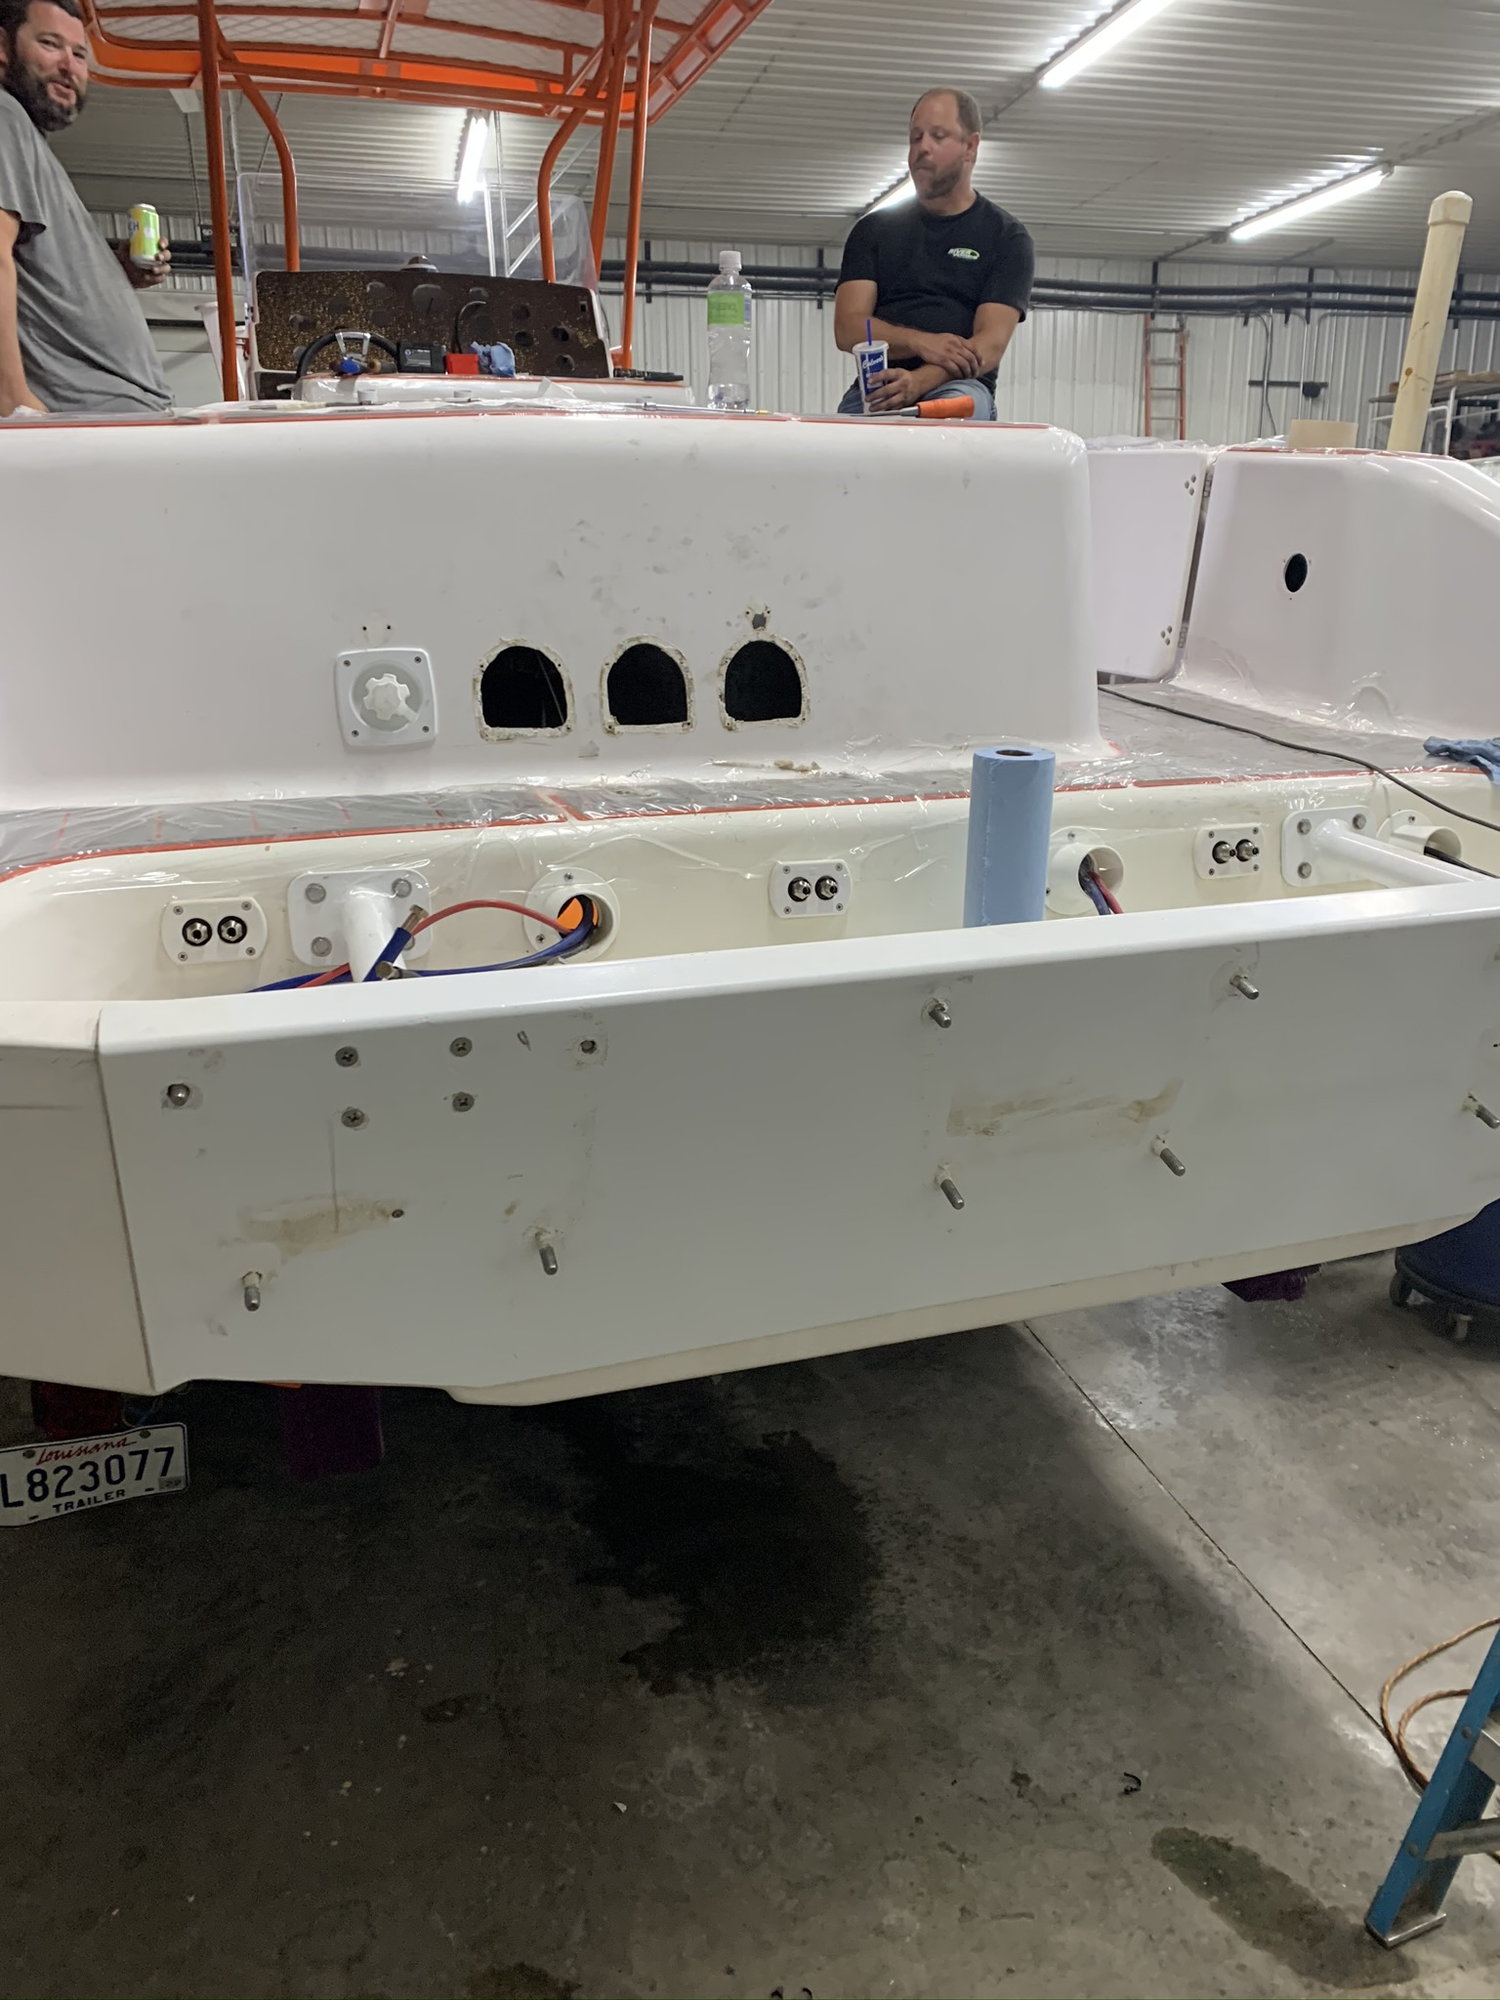
Holes where the oil fills use to be, the center hydraulic thru hull(Triple Verado setup just uses 2 steering actuators and uses the tie bar to turn the center engine), and small screw holes that held the ladder will get glassed **** then covered with gelcoat.
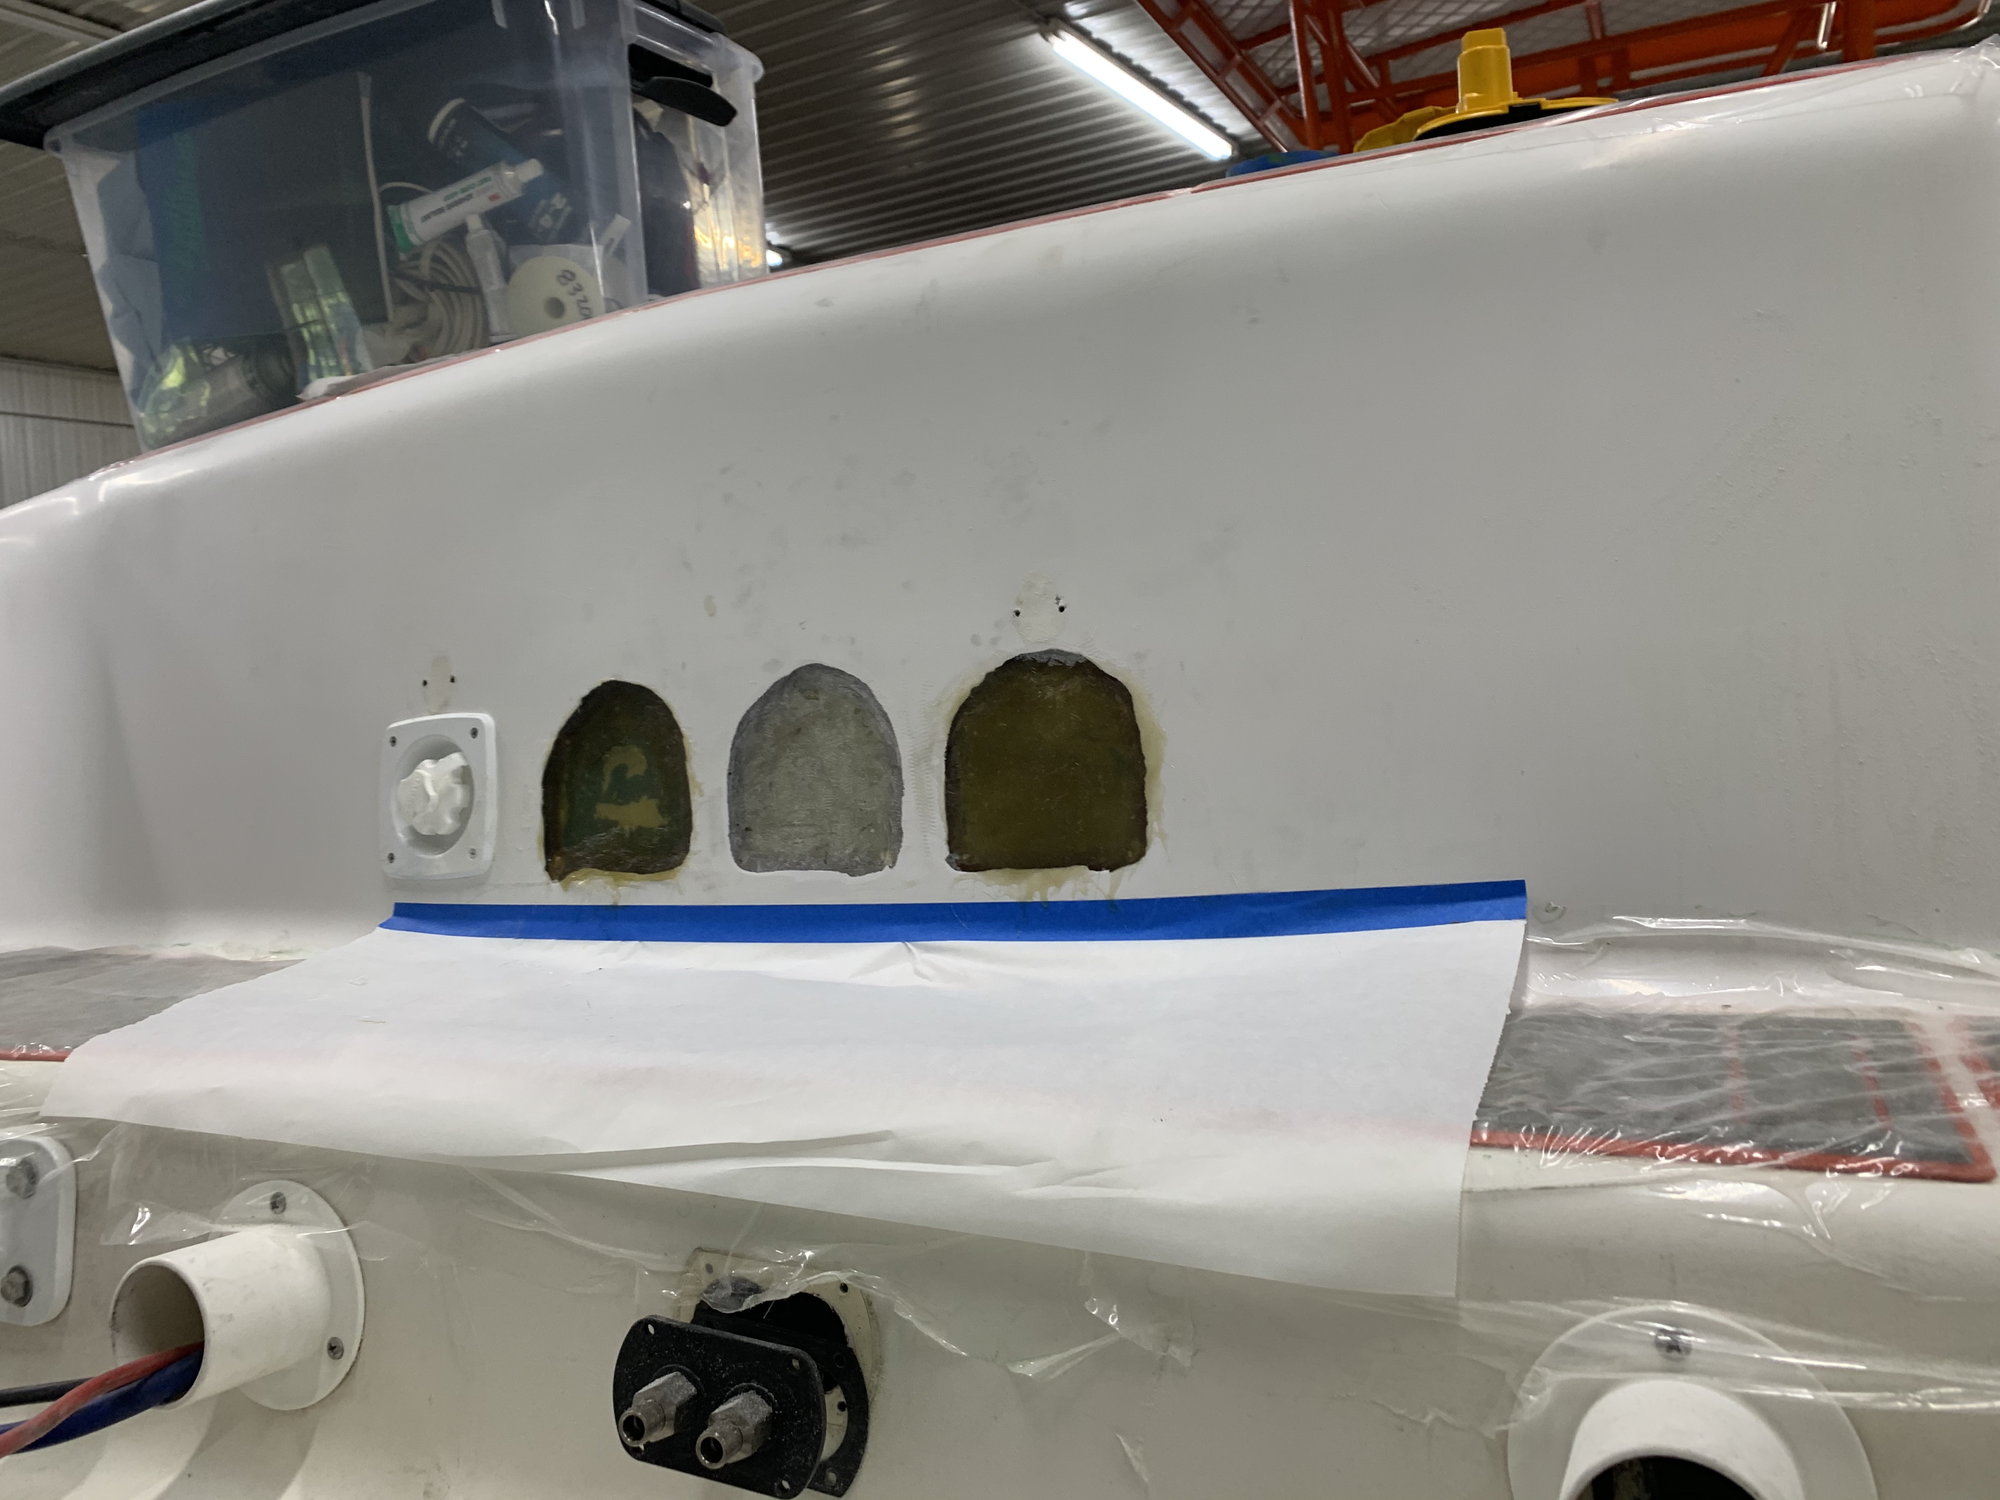
First layer of glass in where the oil fill used to be. The thru hull is next to come out.
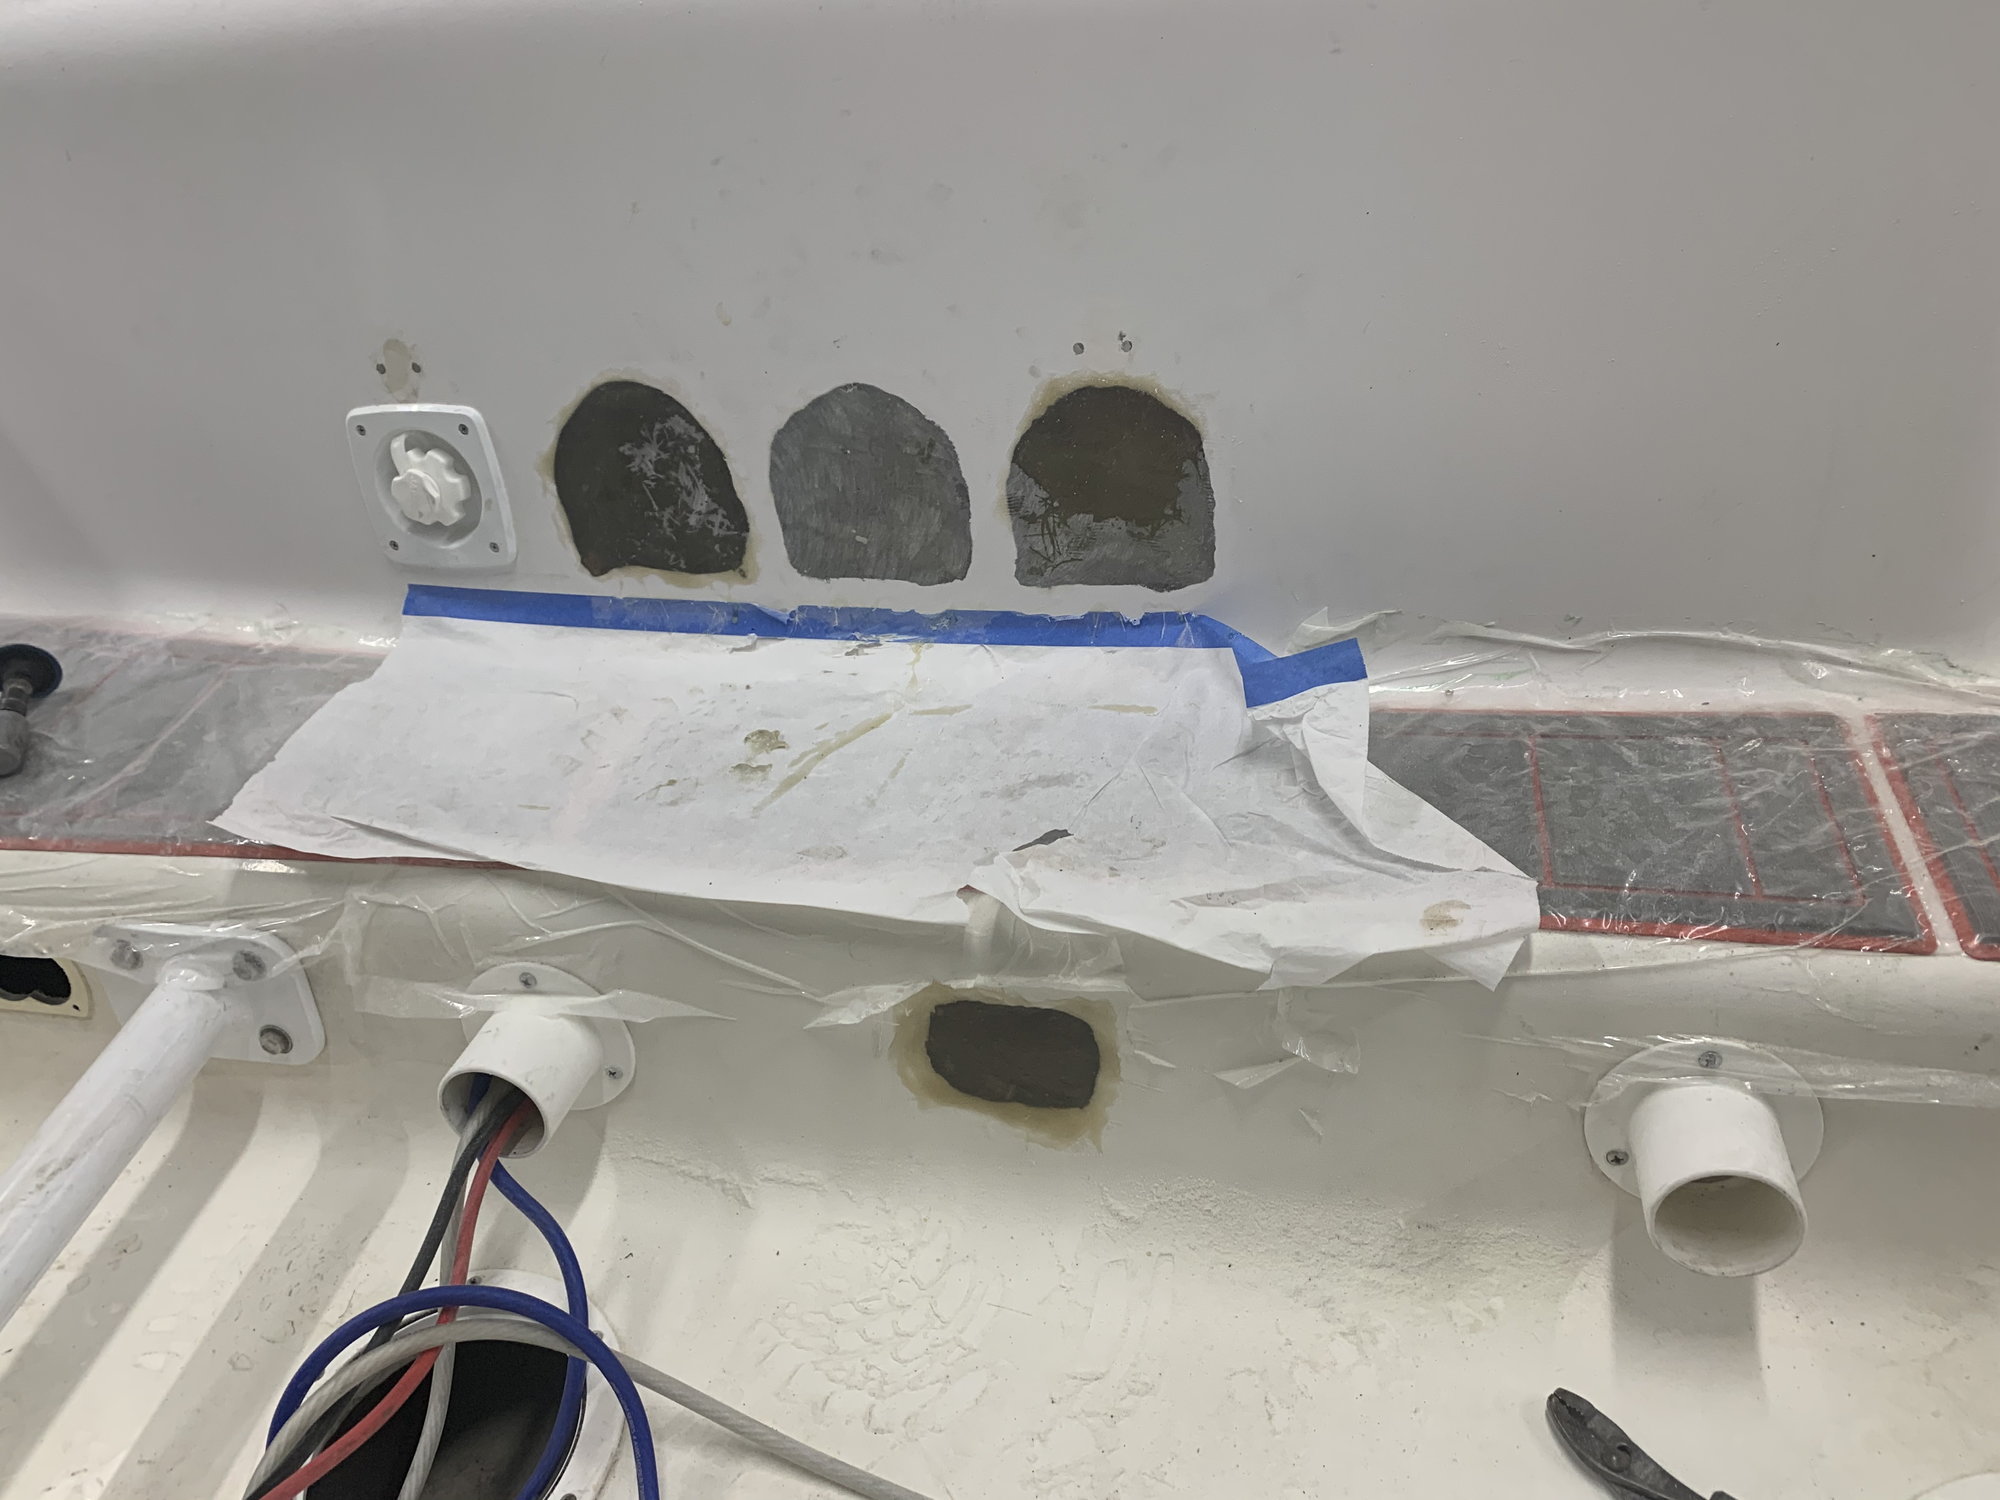
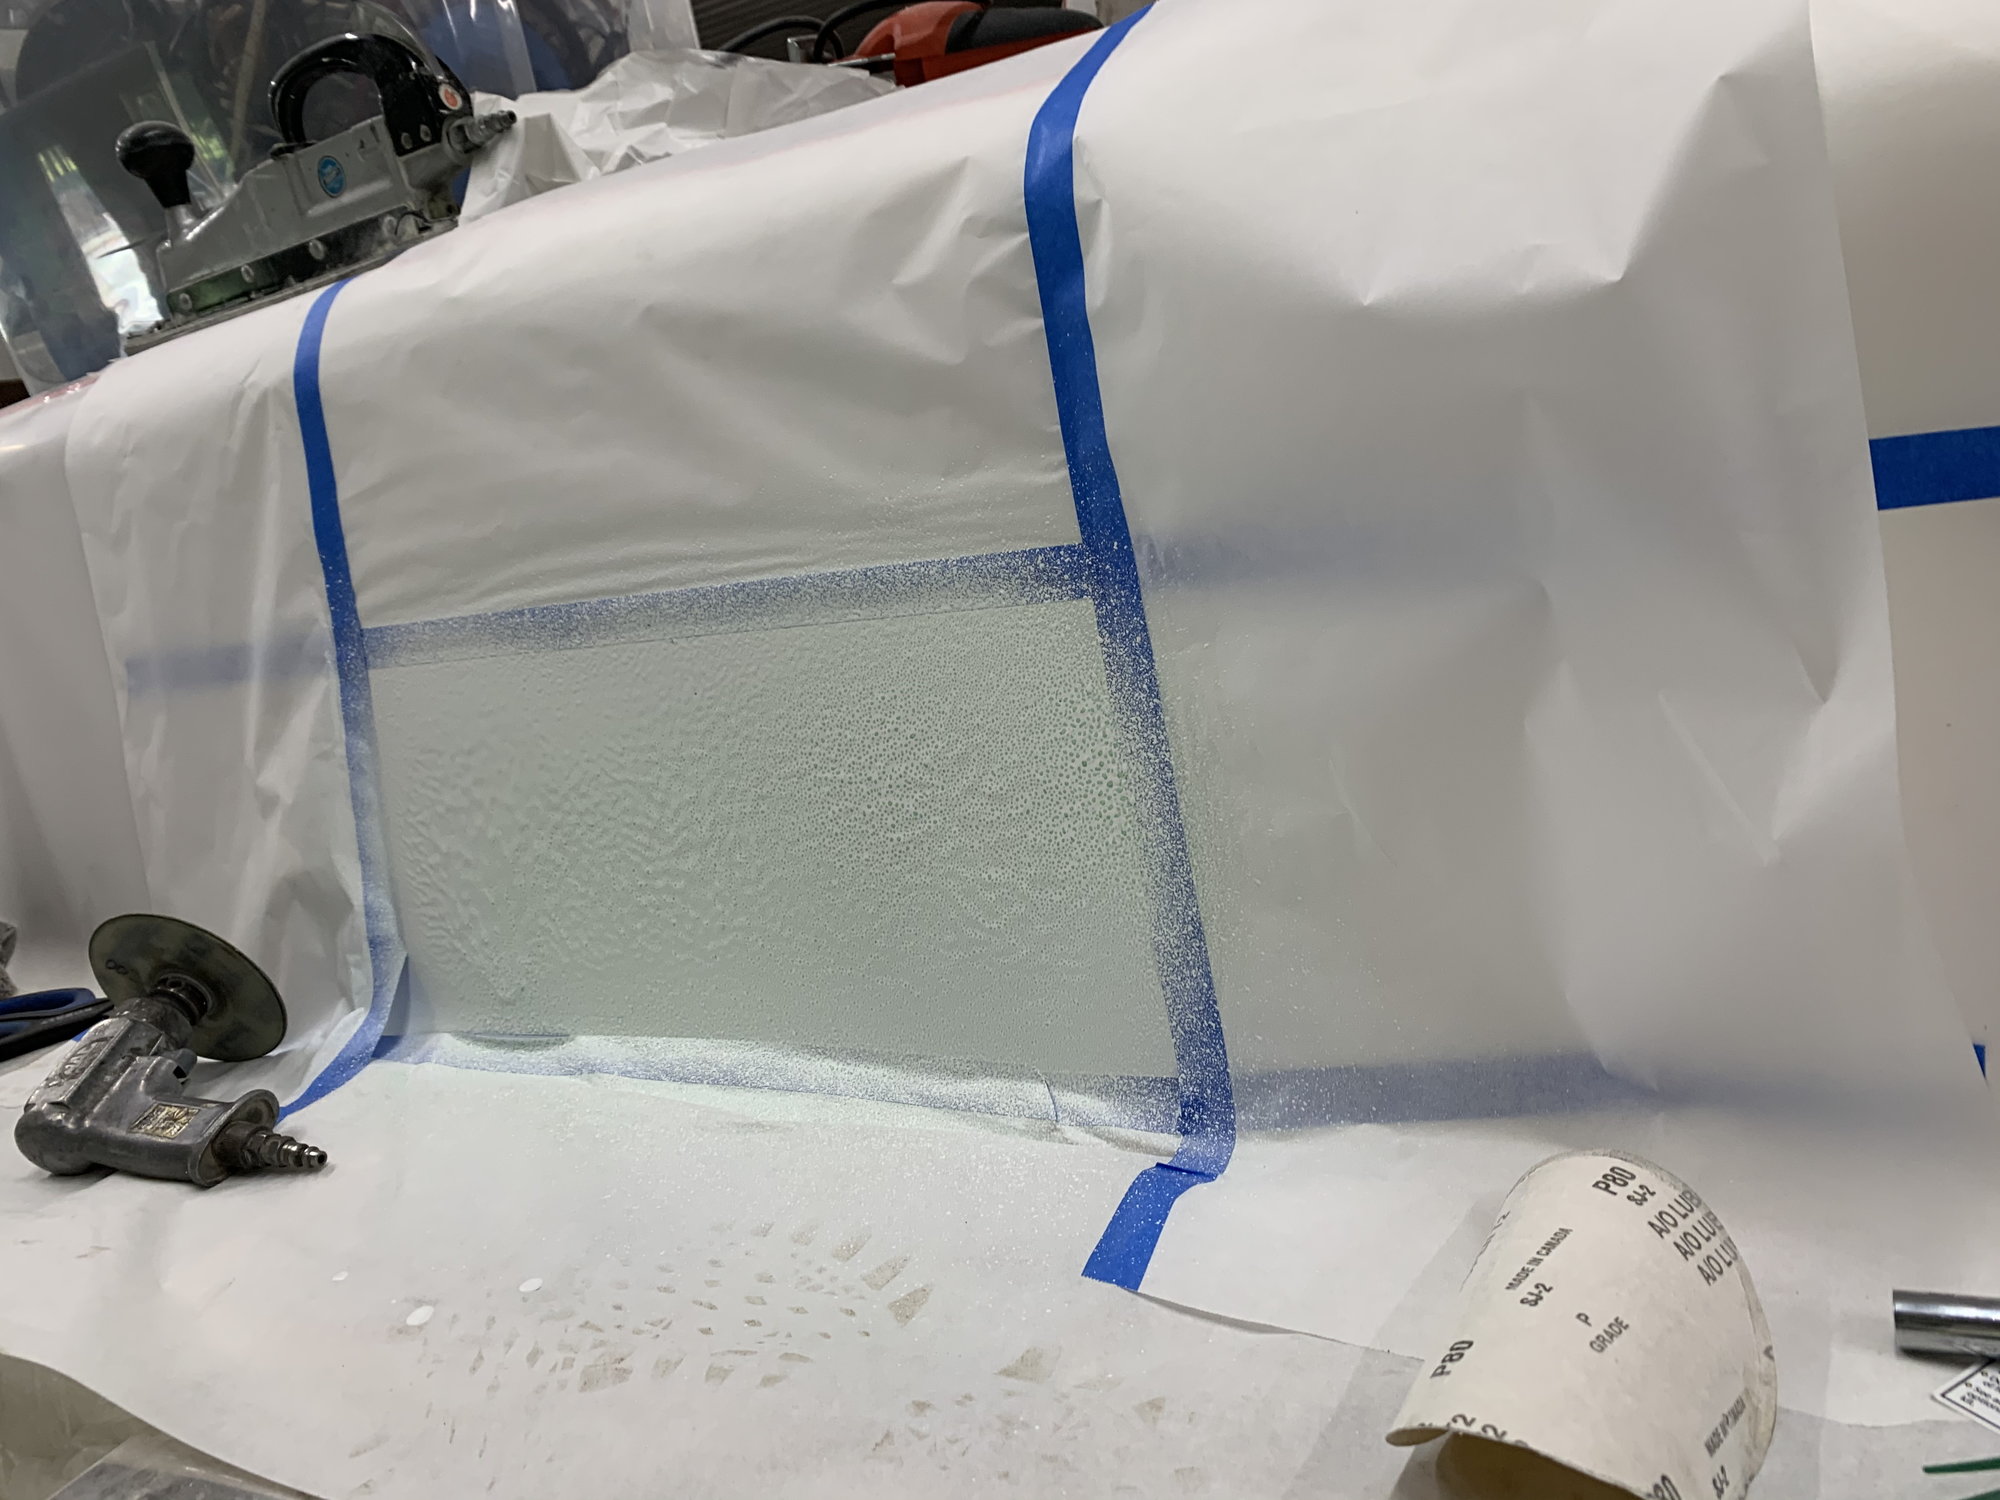
Layer 4 or 5 of glass in both the oil fills and the hydraulic thru hull location. It�s built up enough that we are able to start sanding the high spots down.
Glass work is done and sanded smooth... now time to put gelcoat over it.
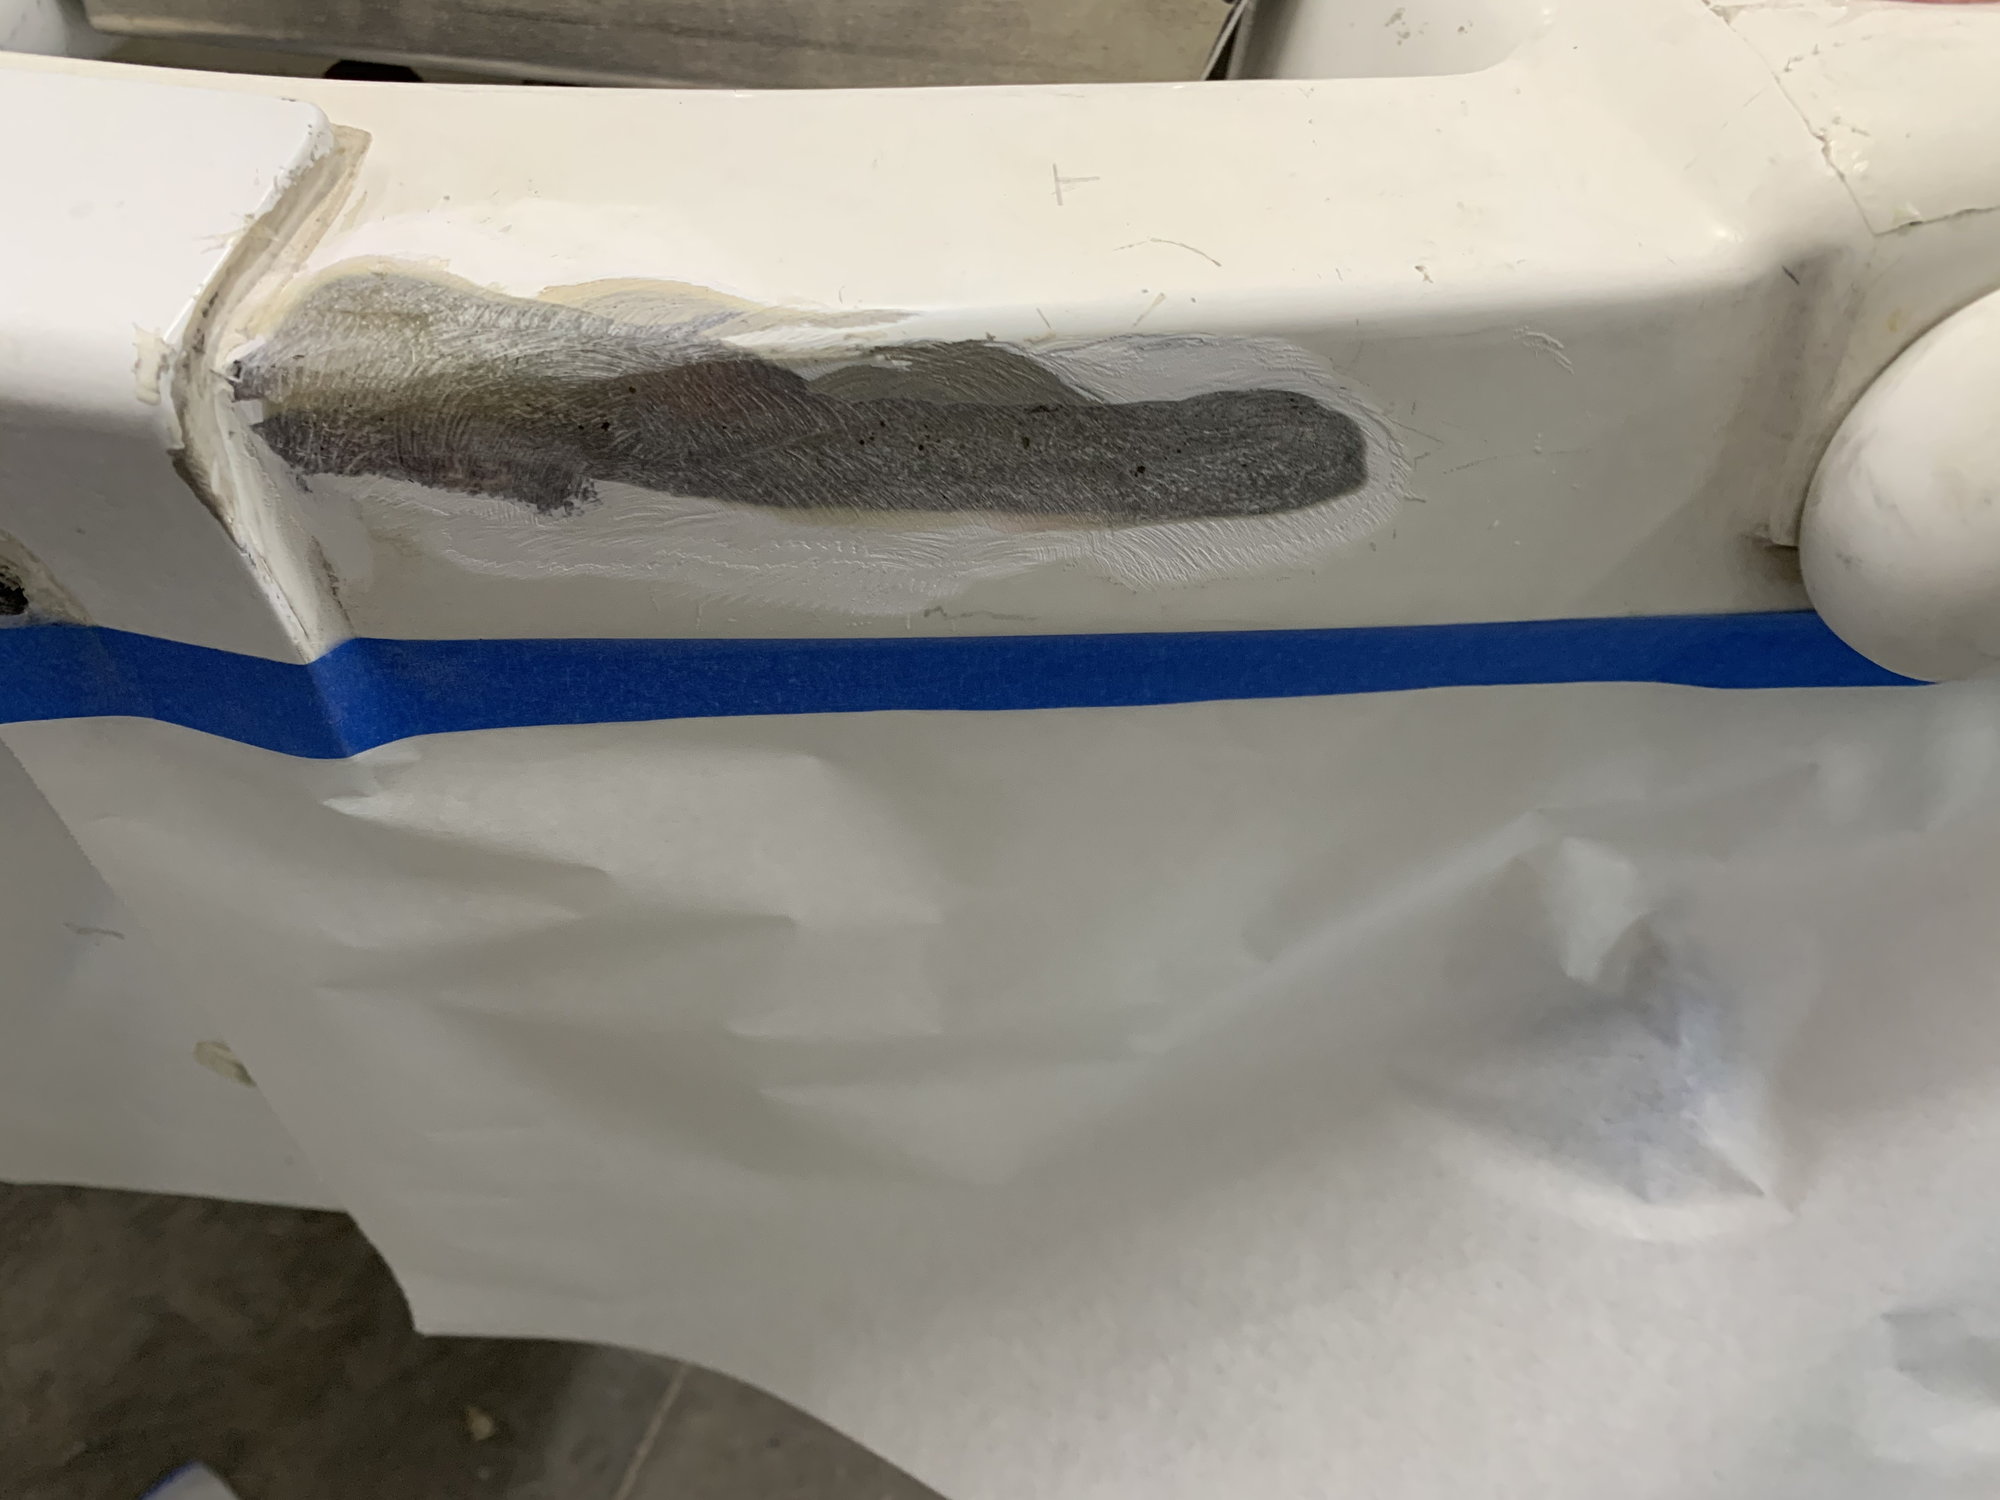
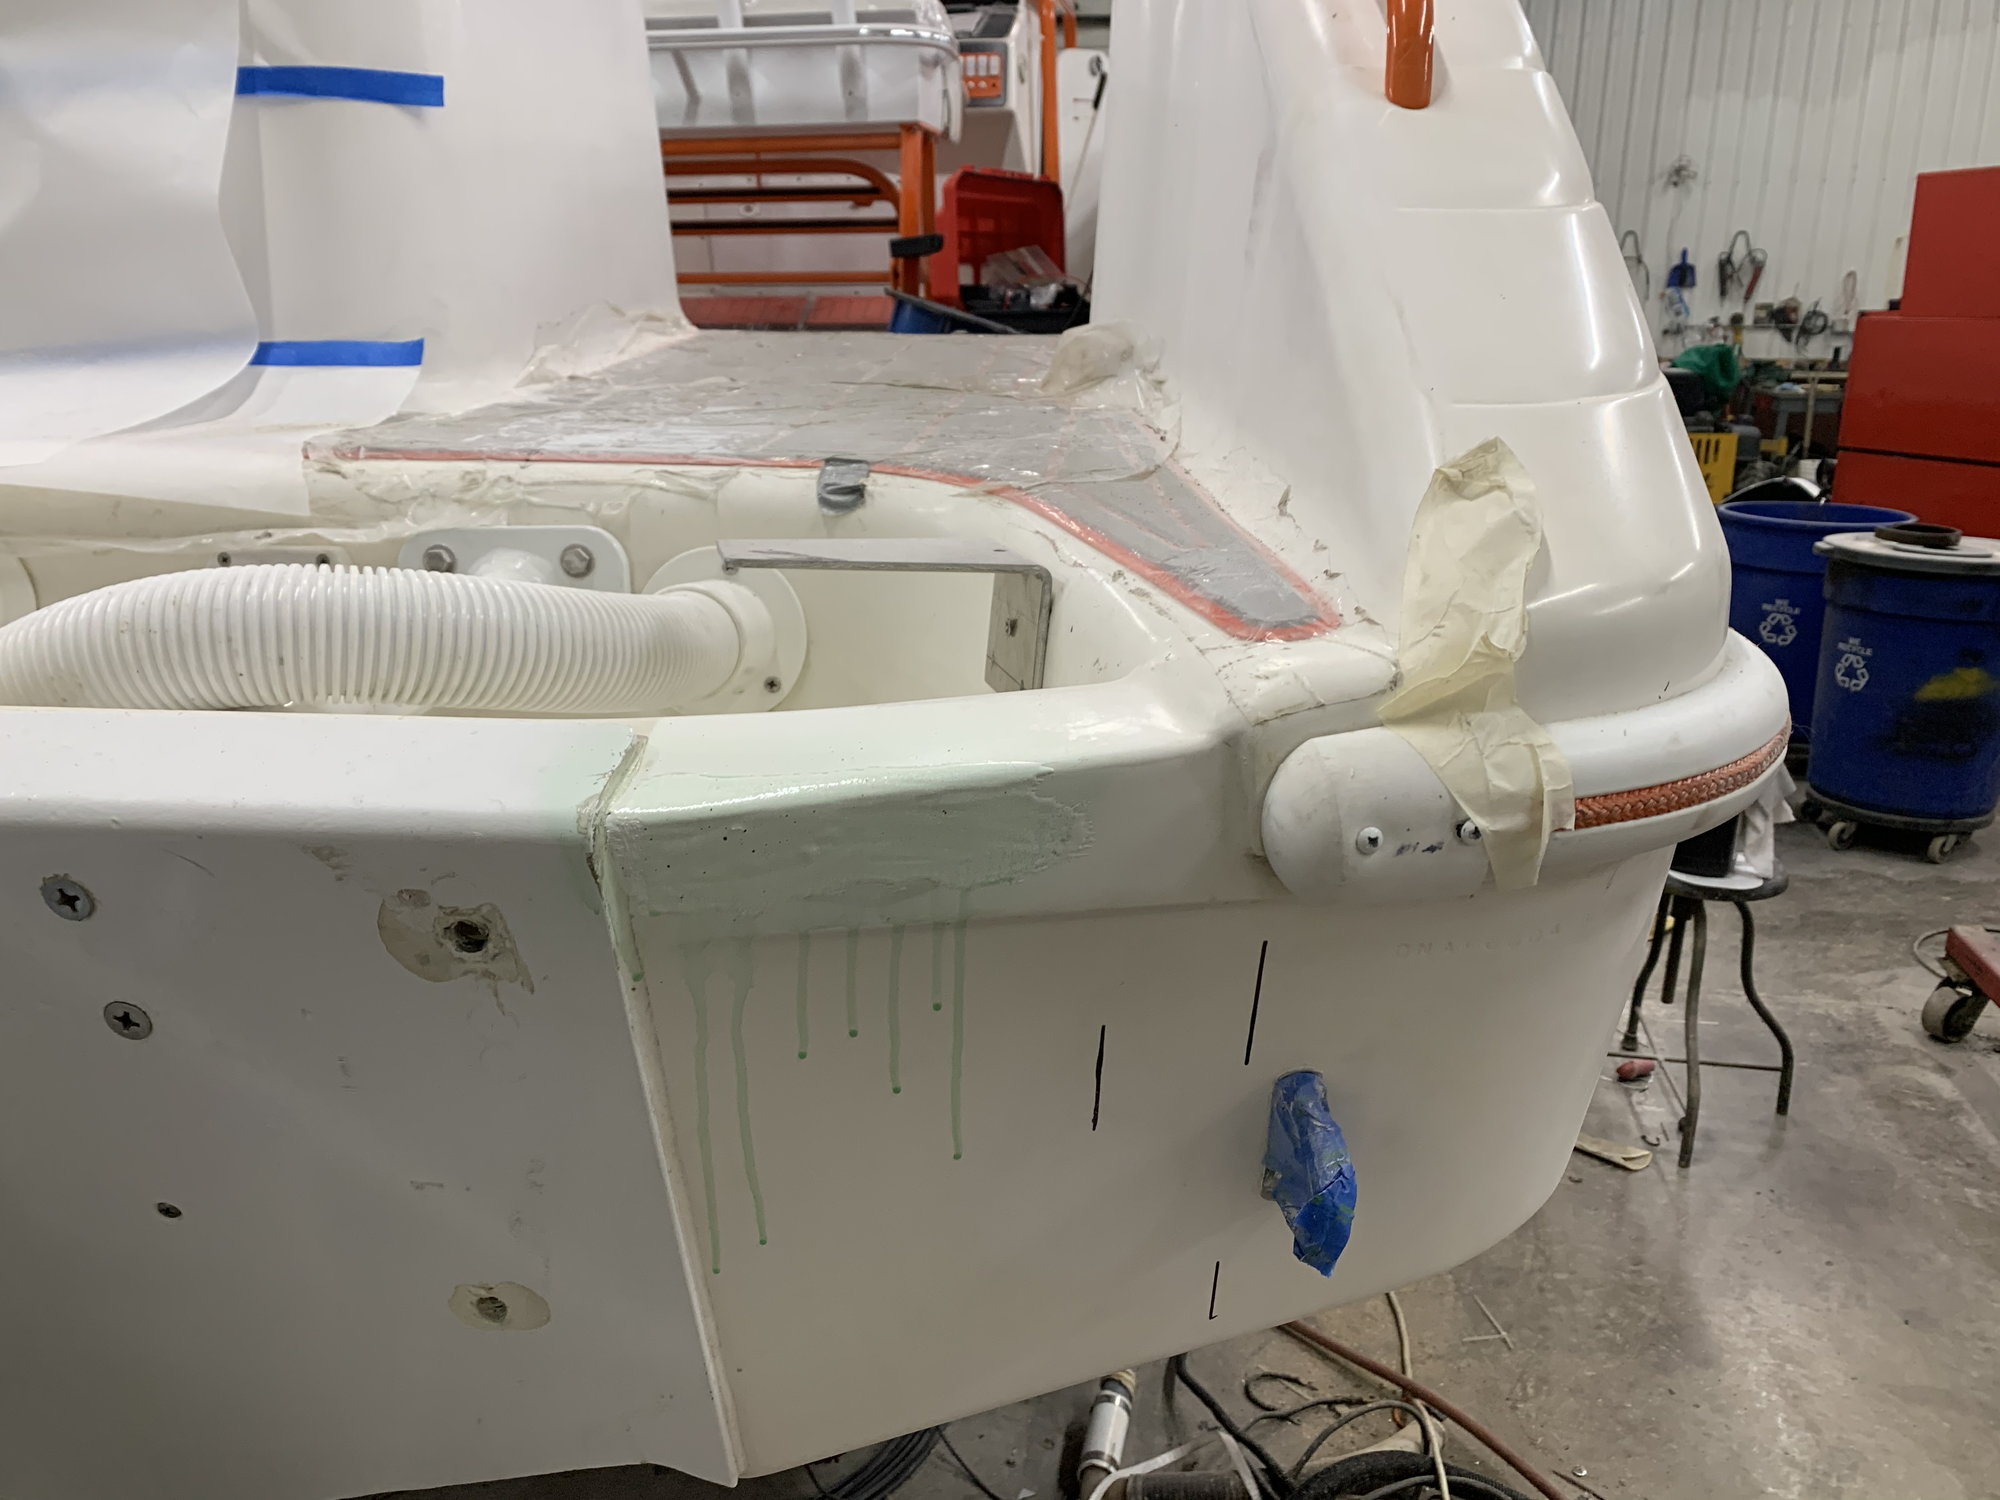
Transom corners had stress cracks from where the top cap met the hull so we ground them out and reglassed it.
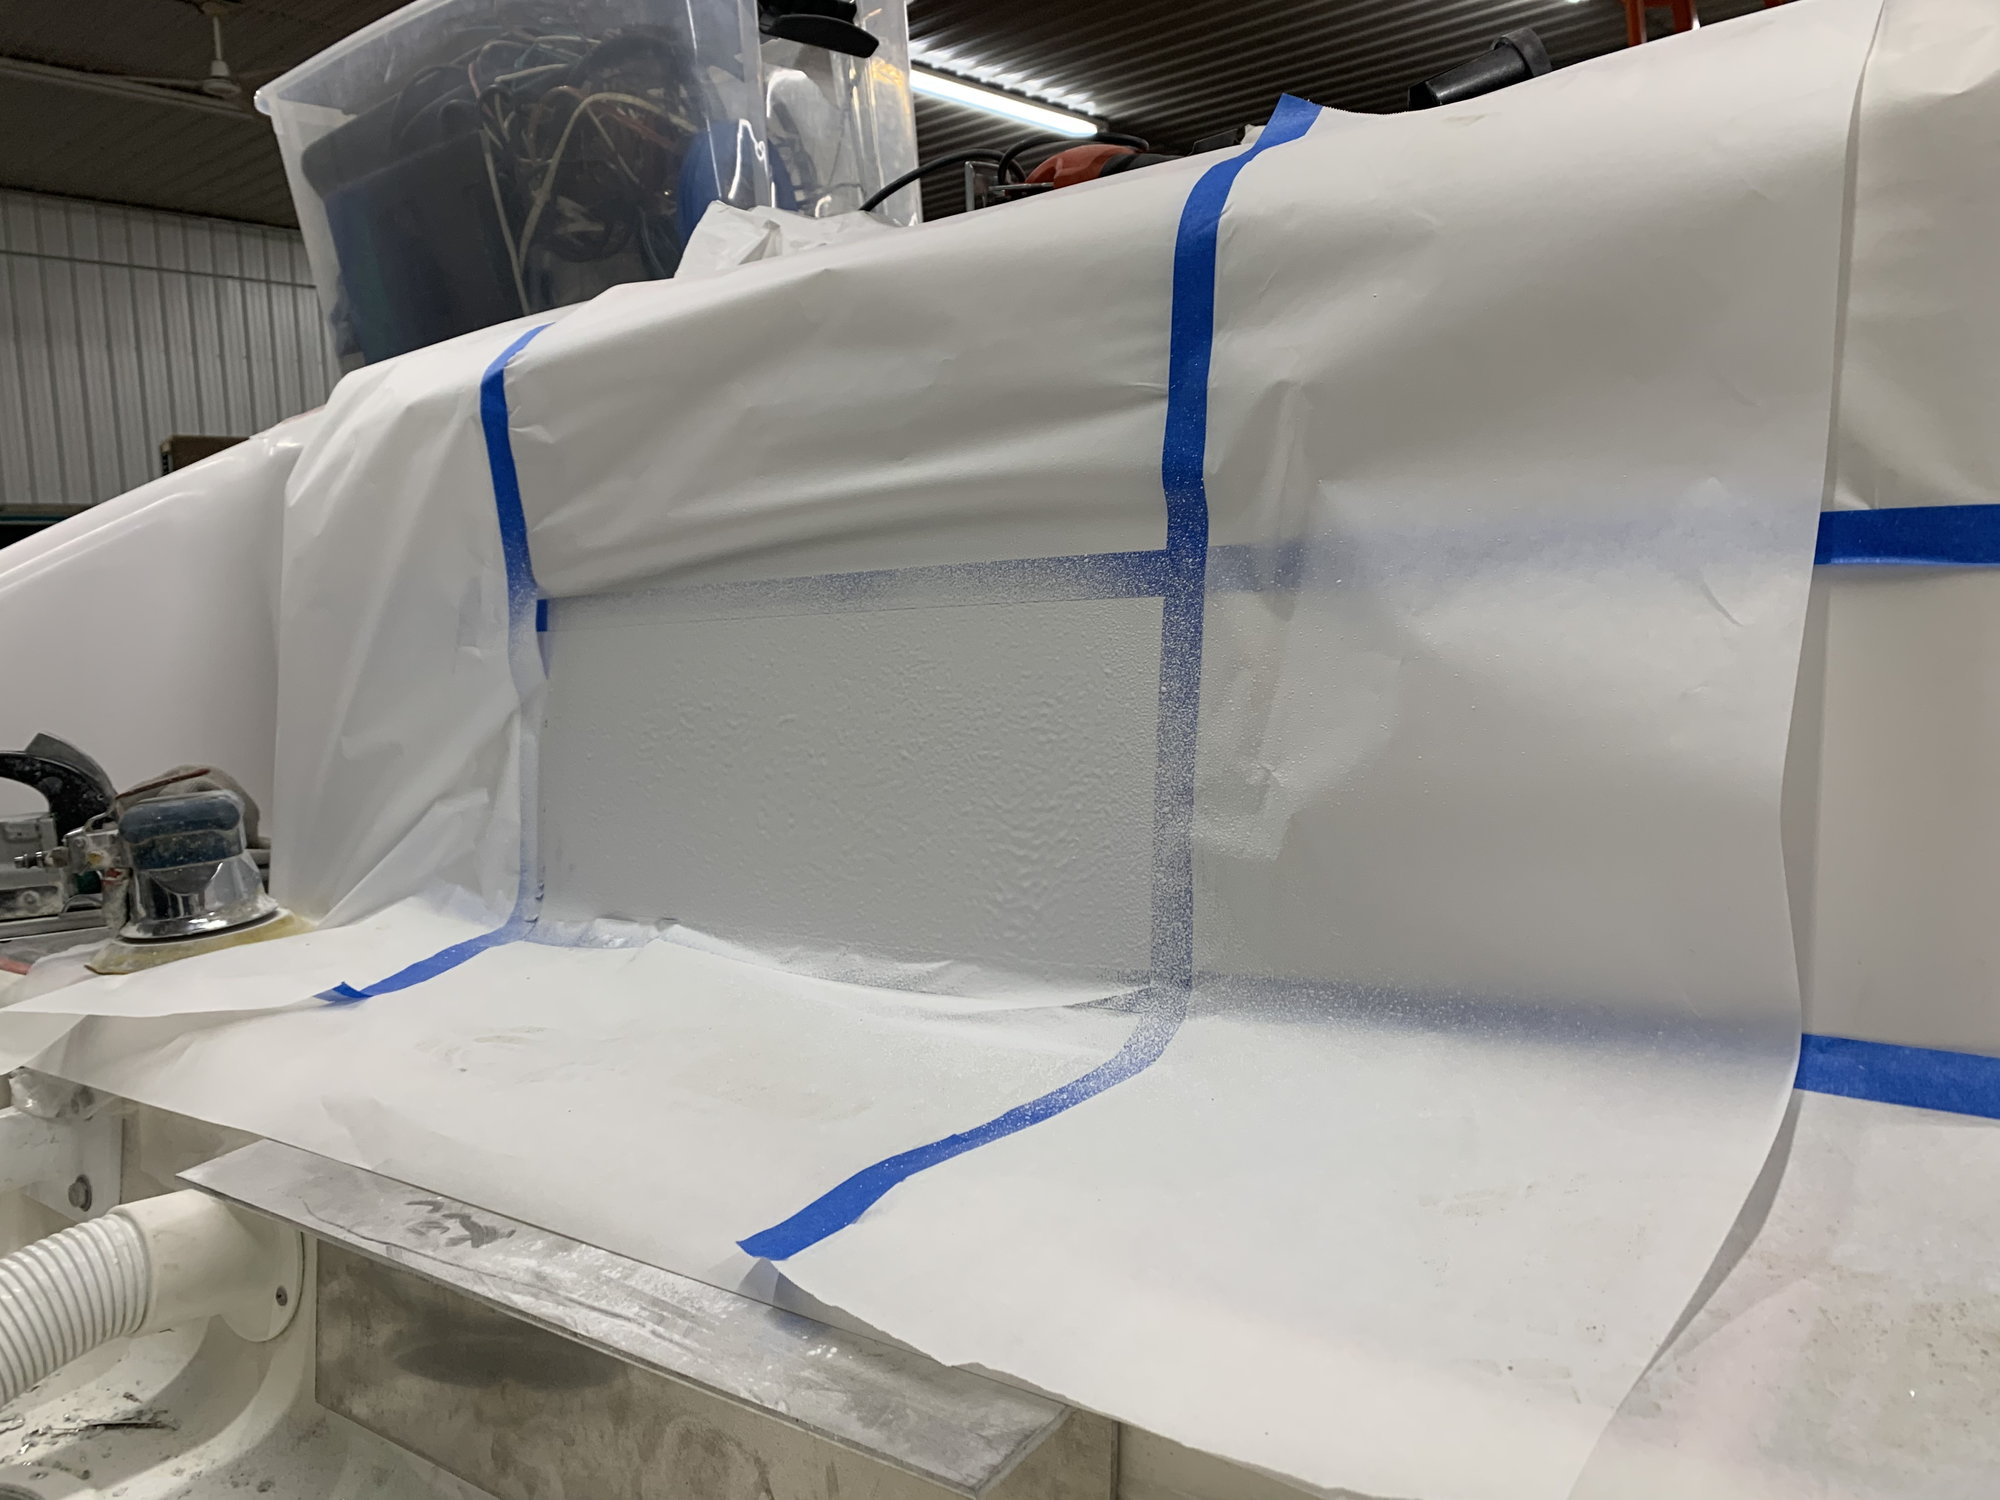
First layer of gelcoat sprayed on.
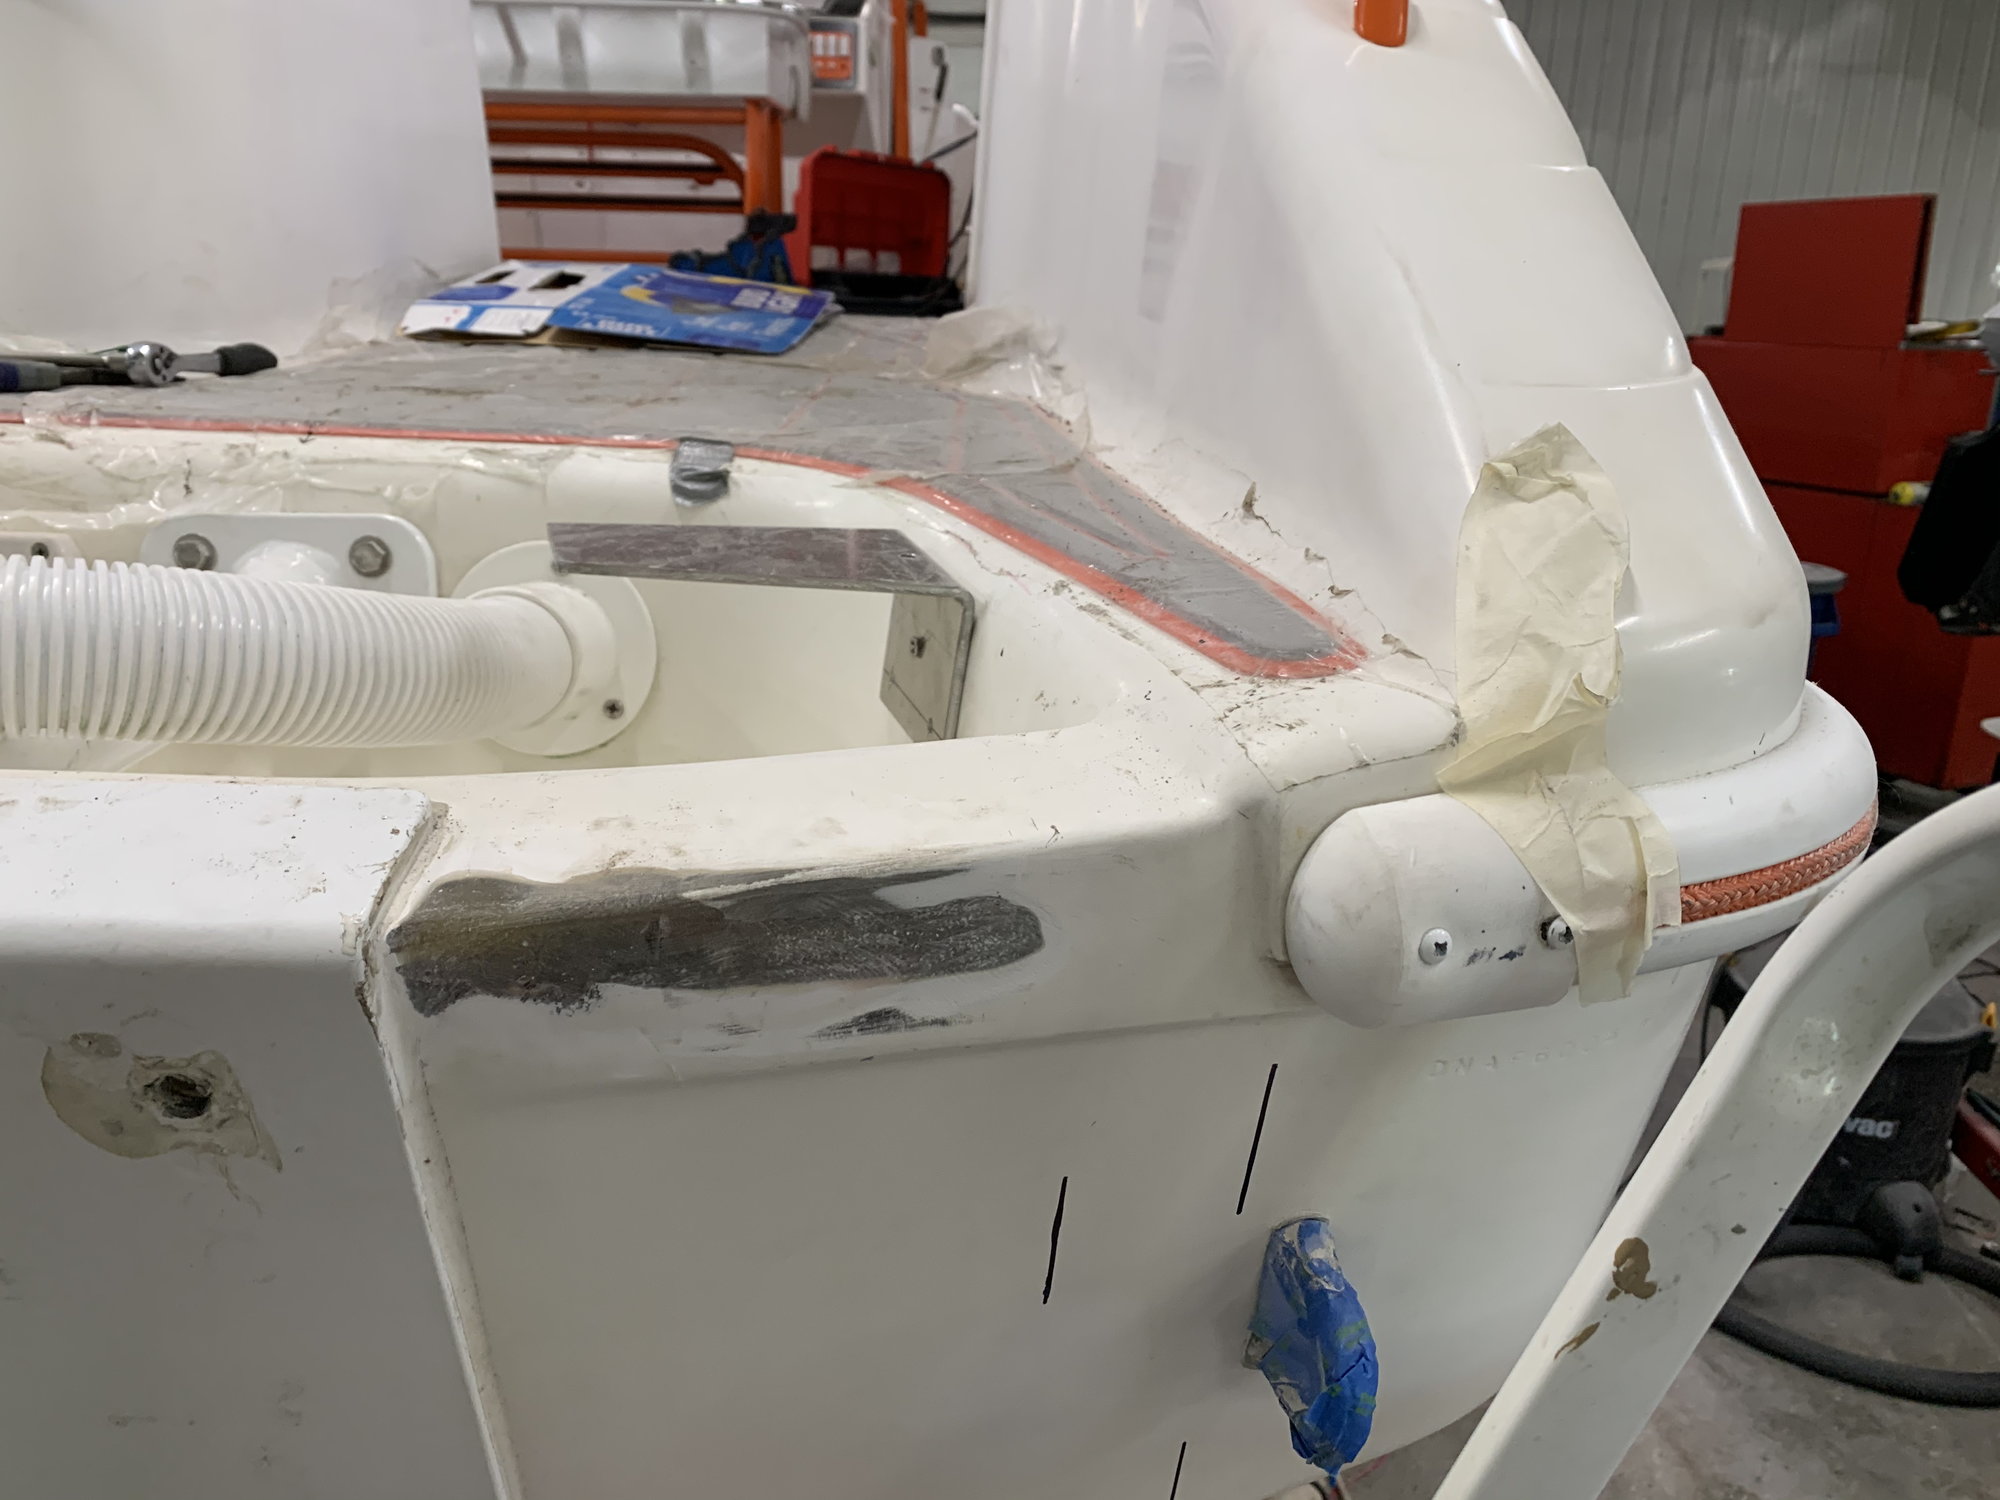
Glass work is done in the corner.
First layer of gel is on.
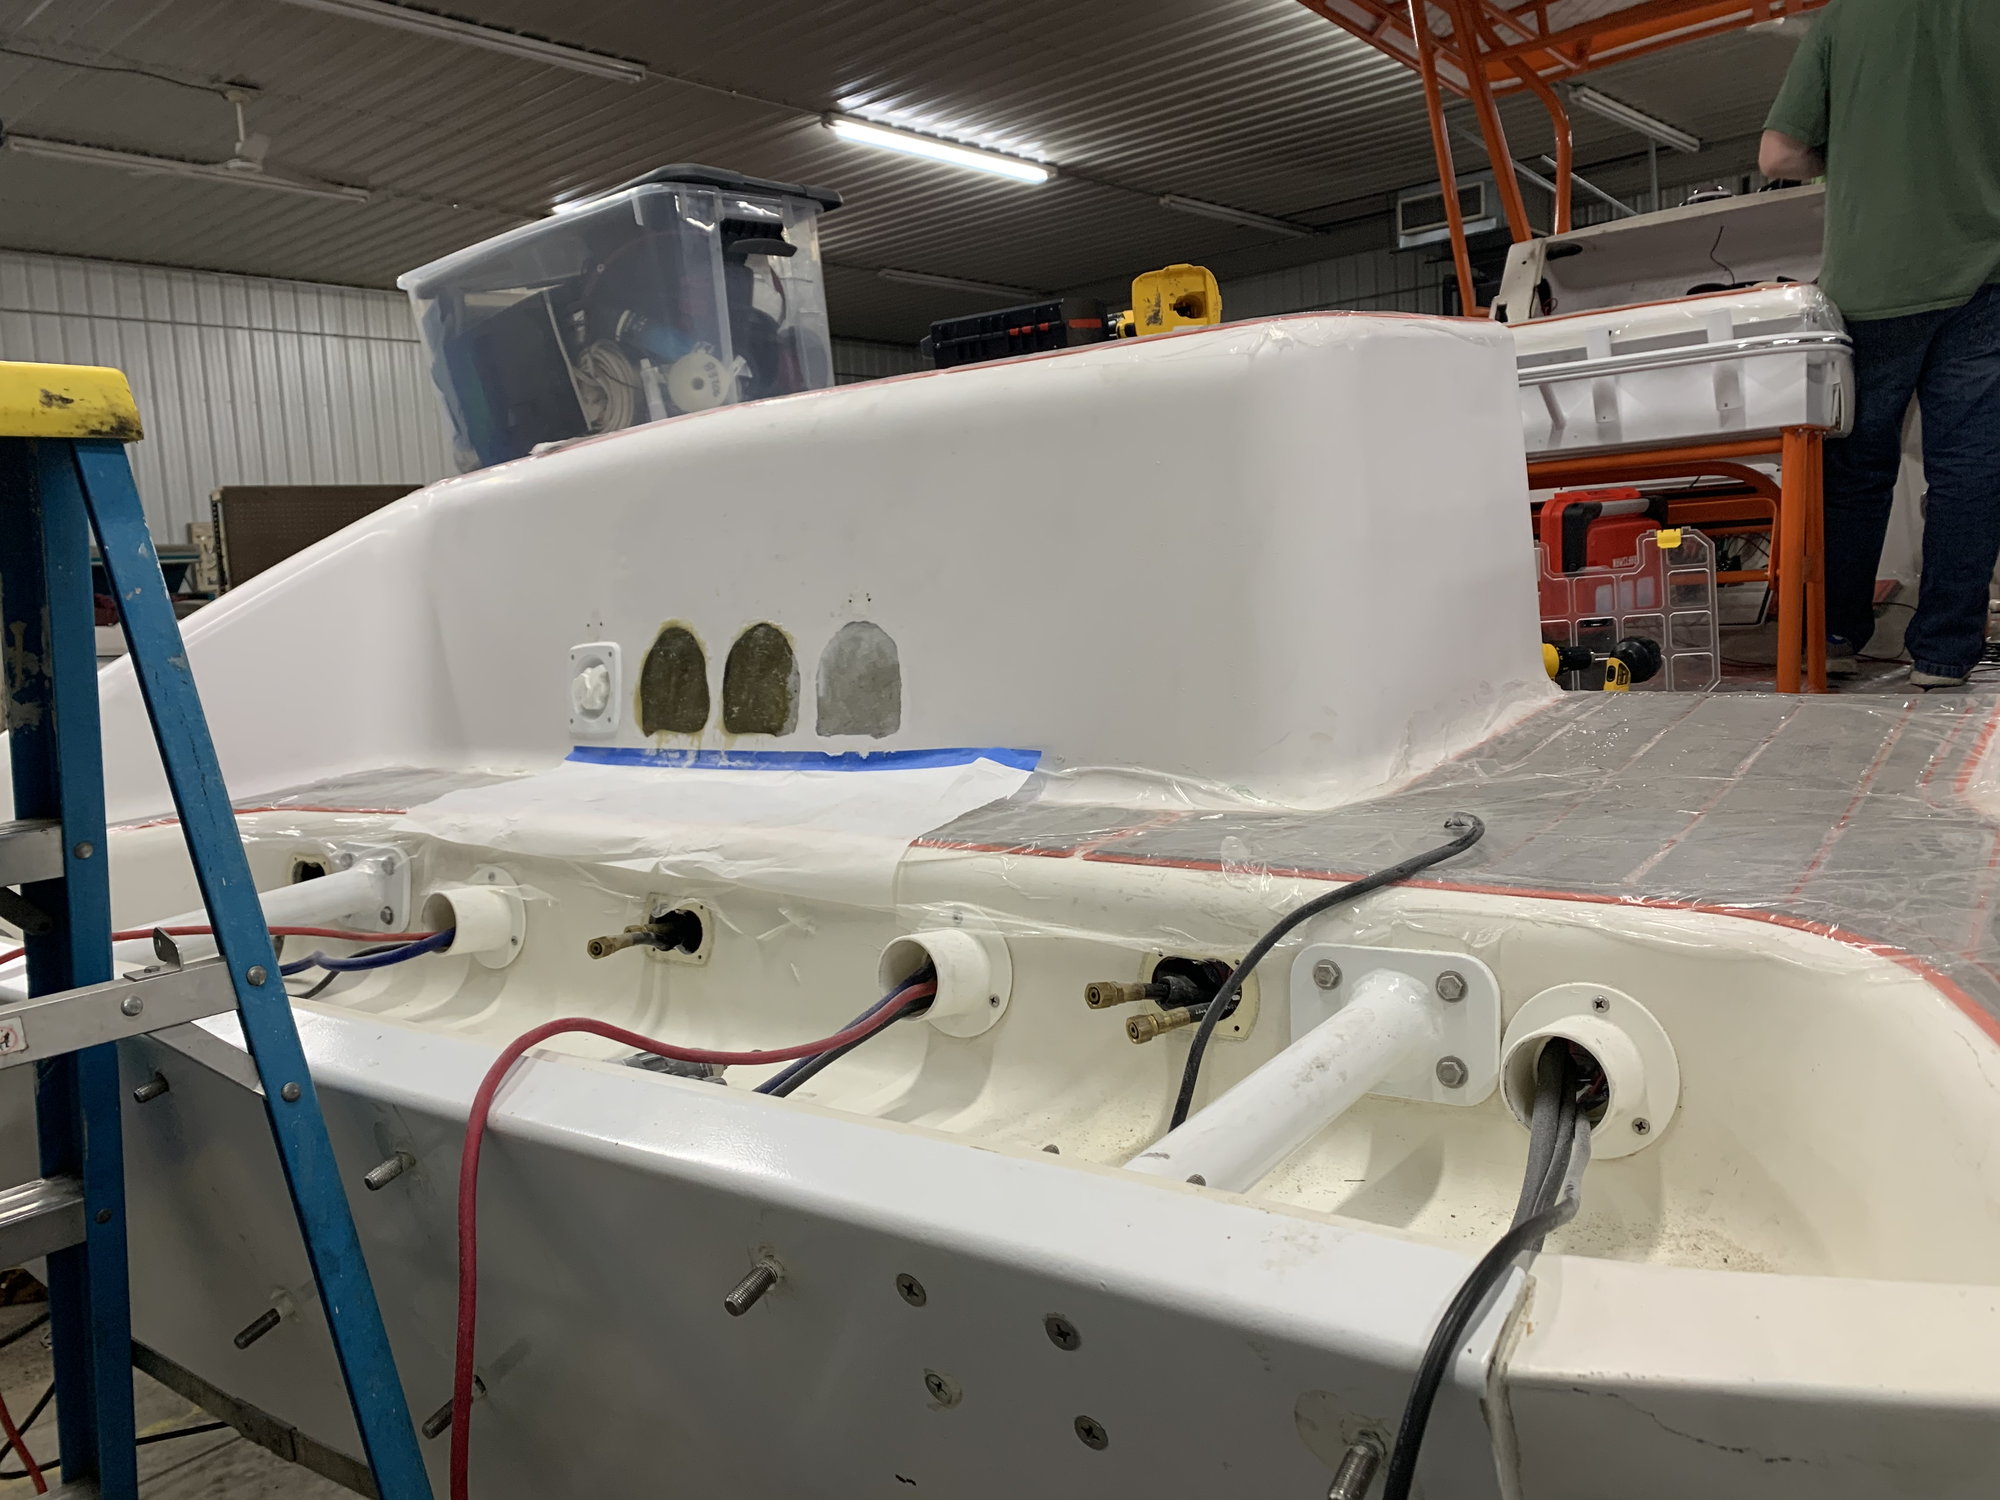
Holes where the oil fills use to be, the center hydraulic thru hull(Triple Verado setup just uses 2 steering actuators and uses the tie bar to turn the center engine), and small screw holes that held the ladder will get glassed **** then covered with gelcoat.
First layer of glass in where the oil fill used to be. The thru hull is next to come out.
Layer 4 or 5 of glass in both the oil fills and the hydraulic thru hull location. It�s built up enough that we are able to start sanding the high spots down.
Glass work is done and sanded smooth... now time to put gelcoat over it.
Transom corners had stress cracks from where the top cap met the hull so we ground them out and reglassed it.
First layer of gelcoat sprayed on.
Glass work is done in the corner.
First layer of gel is on.
The following users liked this post:
JKetels (07-22-2020)
07-22-2020, 10:31 PM
#26
VIP Member
Looking good! I�m impressed with the speed things are moving! Keep up the great work and thanks for posting. I enjoyfollowing your progress.
Last edited by SUPERSTITIOUS; 07-22-2020 at 10:34 PM.
The following users liked this post:
iaoutlaw (07-23-2020)
07-22-2020, 10:33 PM
#27
VIP Member
Oops double post
The following users liked this post:
iaoutlaw (07-23-2020)
07-23-2020, 03:13 PM
#29
Registered
Thread Starter
Thanks guys, it�s been a ton of work and learning curve but it�ll be worth it in the end.
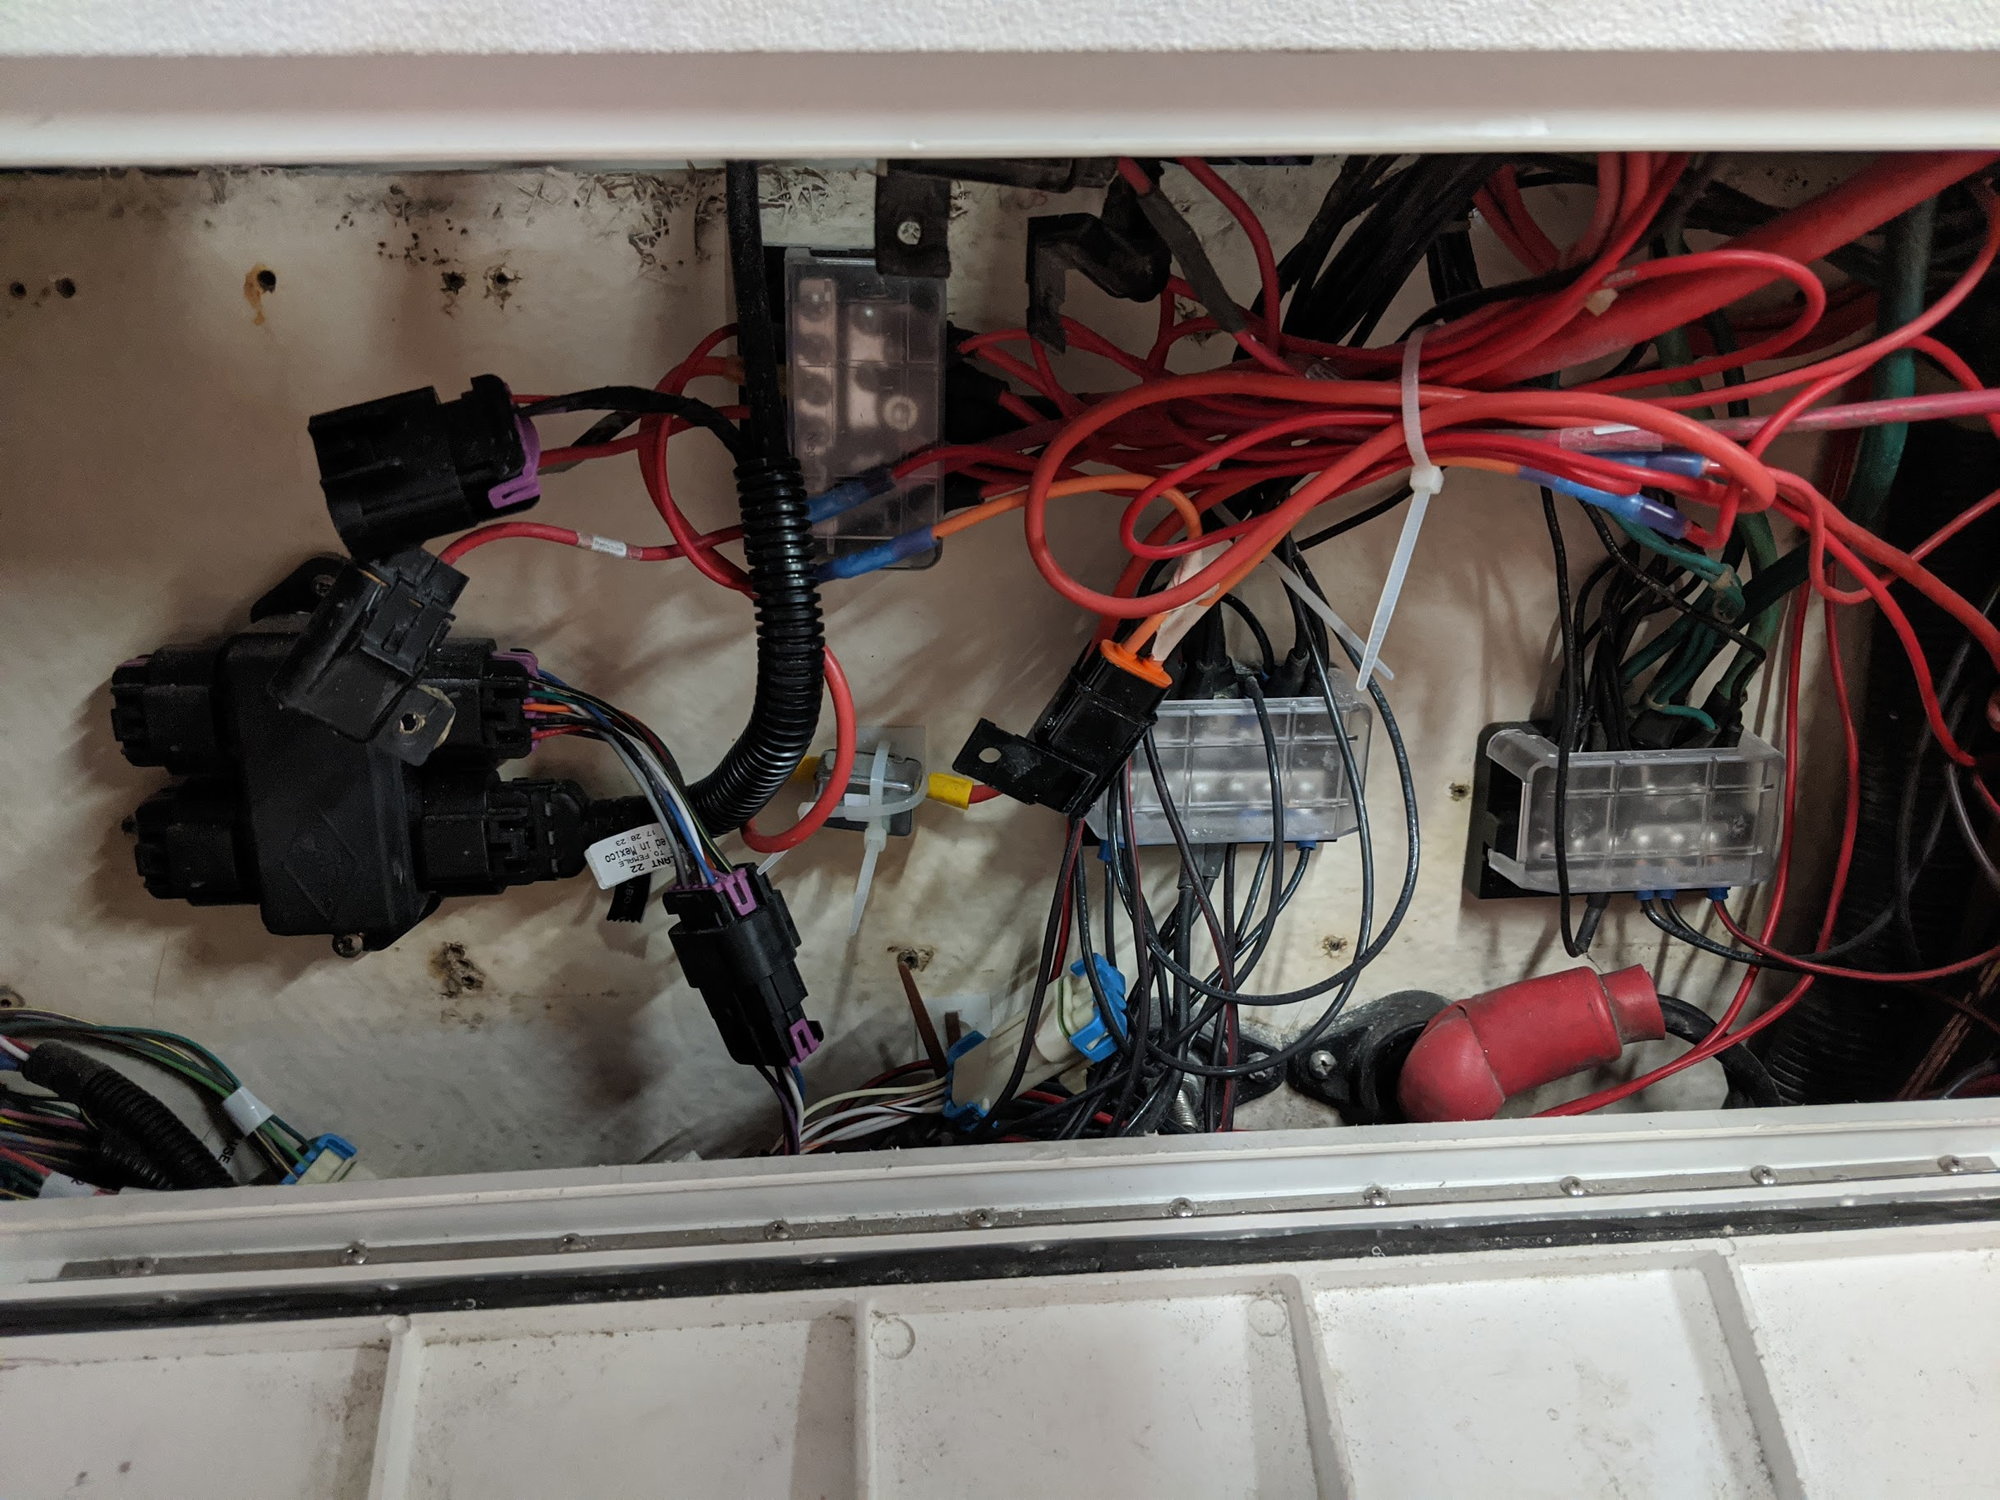
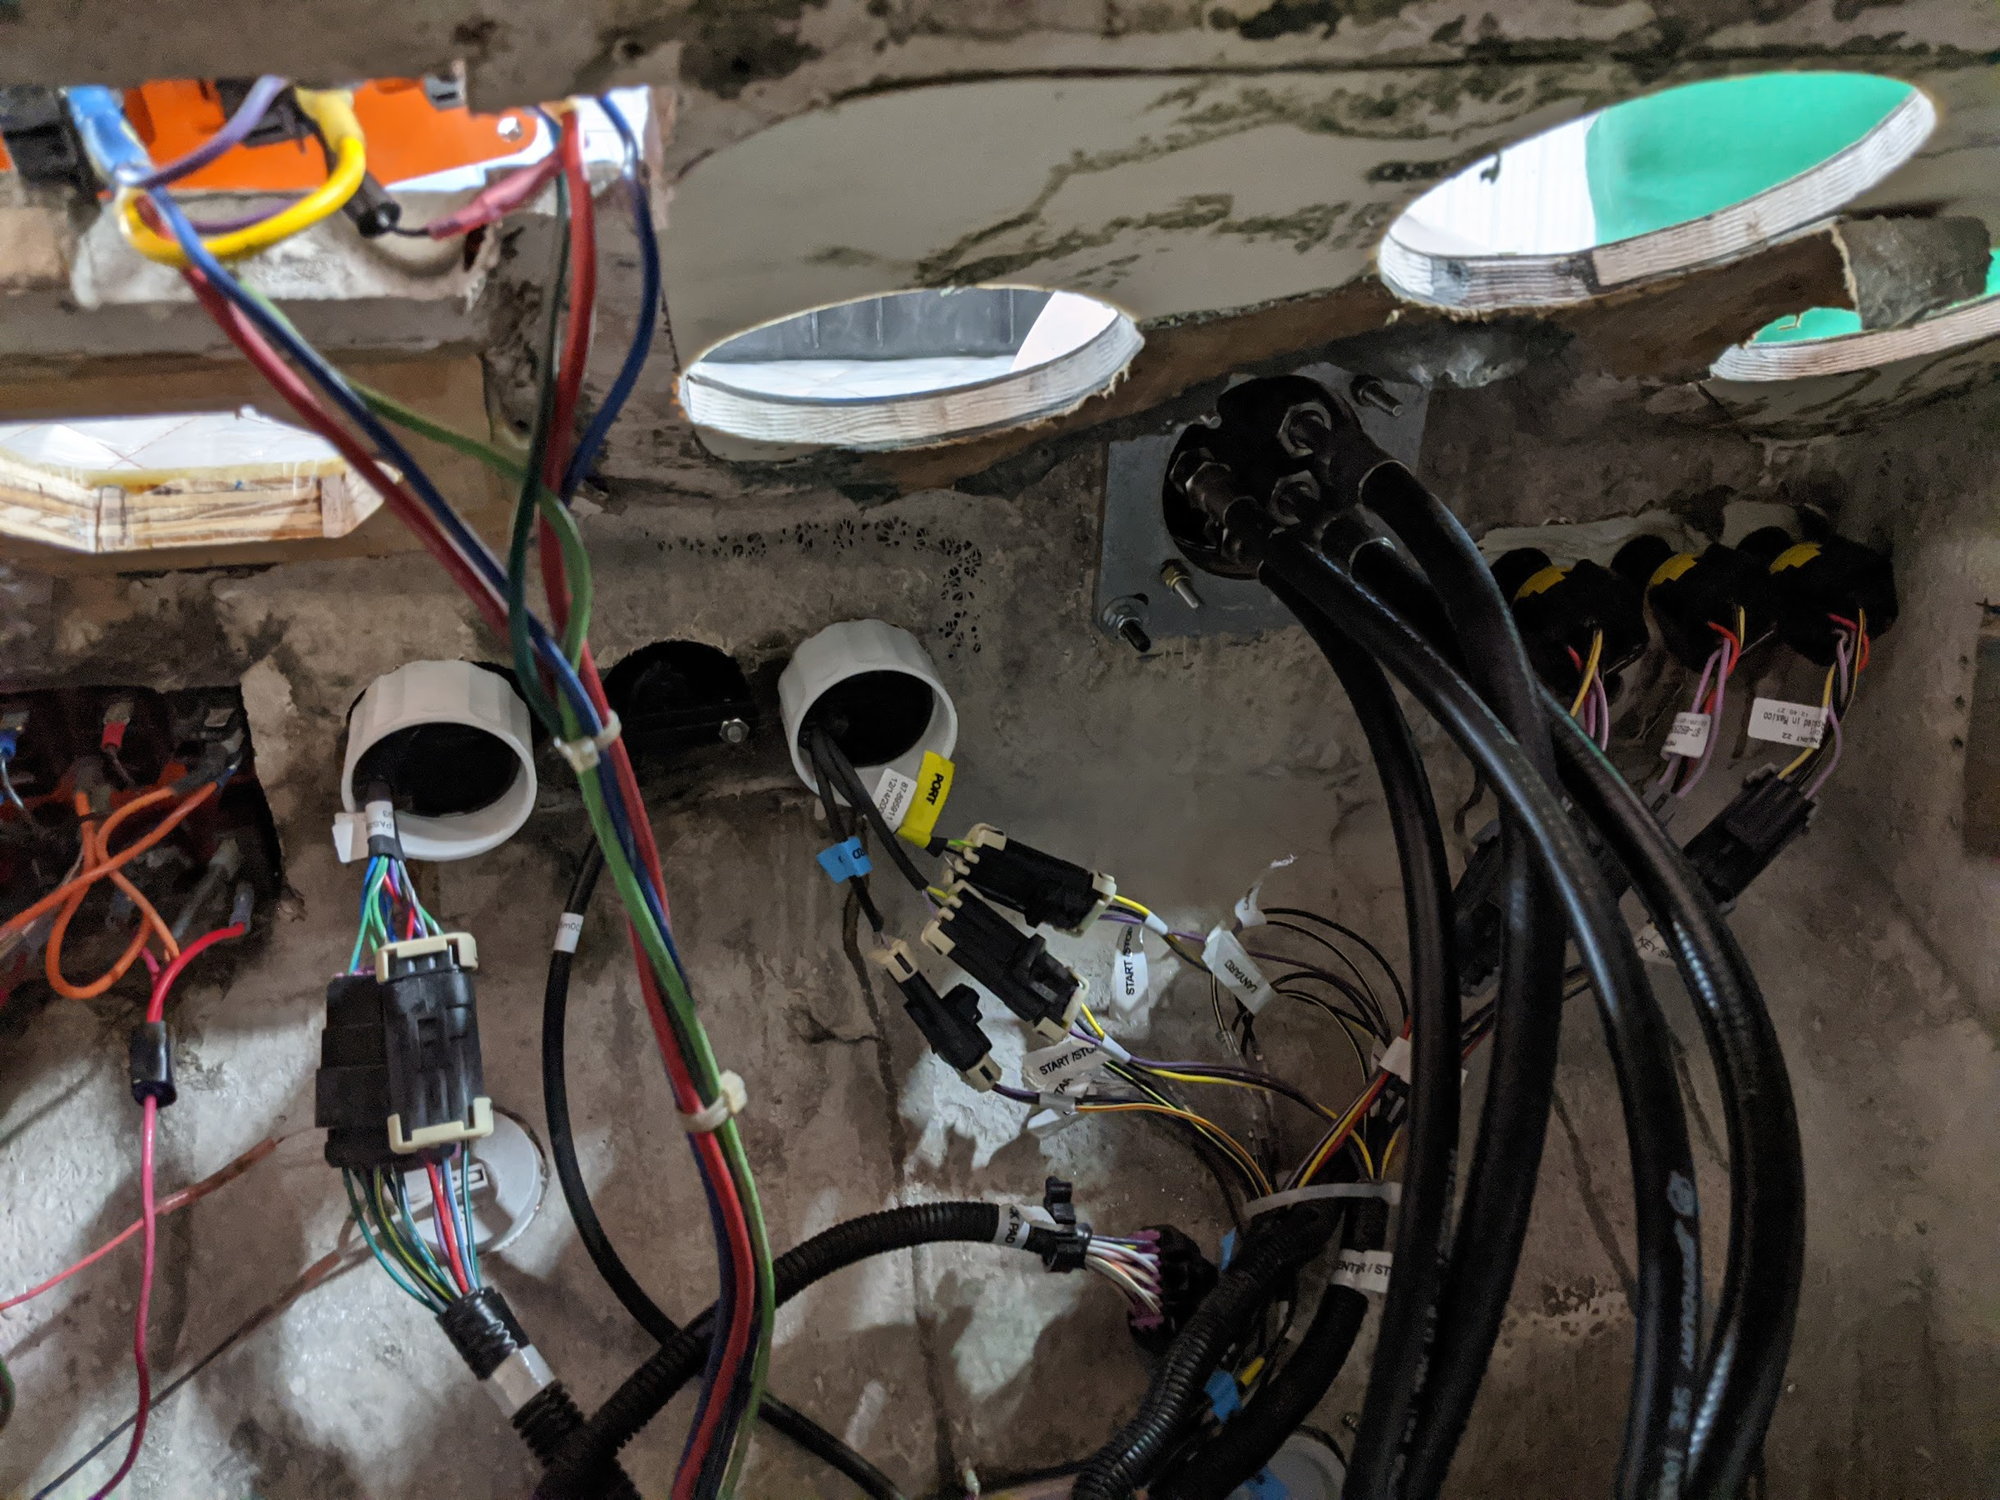
We got the Power steering lines hooked up to the helm, shower bilge pump put back together, engine harness run & hooked up to the CCM�s as well as all the wiring harness from the CCM�s to the dash. Also the 4th battery placement and power steering pump location figured out.
Hydraulic lines are done at the helm.
Still not perfect but the wiring is starting to get sorted out. All electronics will be run off the 4th battery in the center.
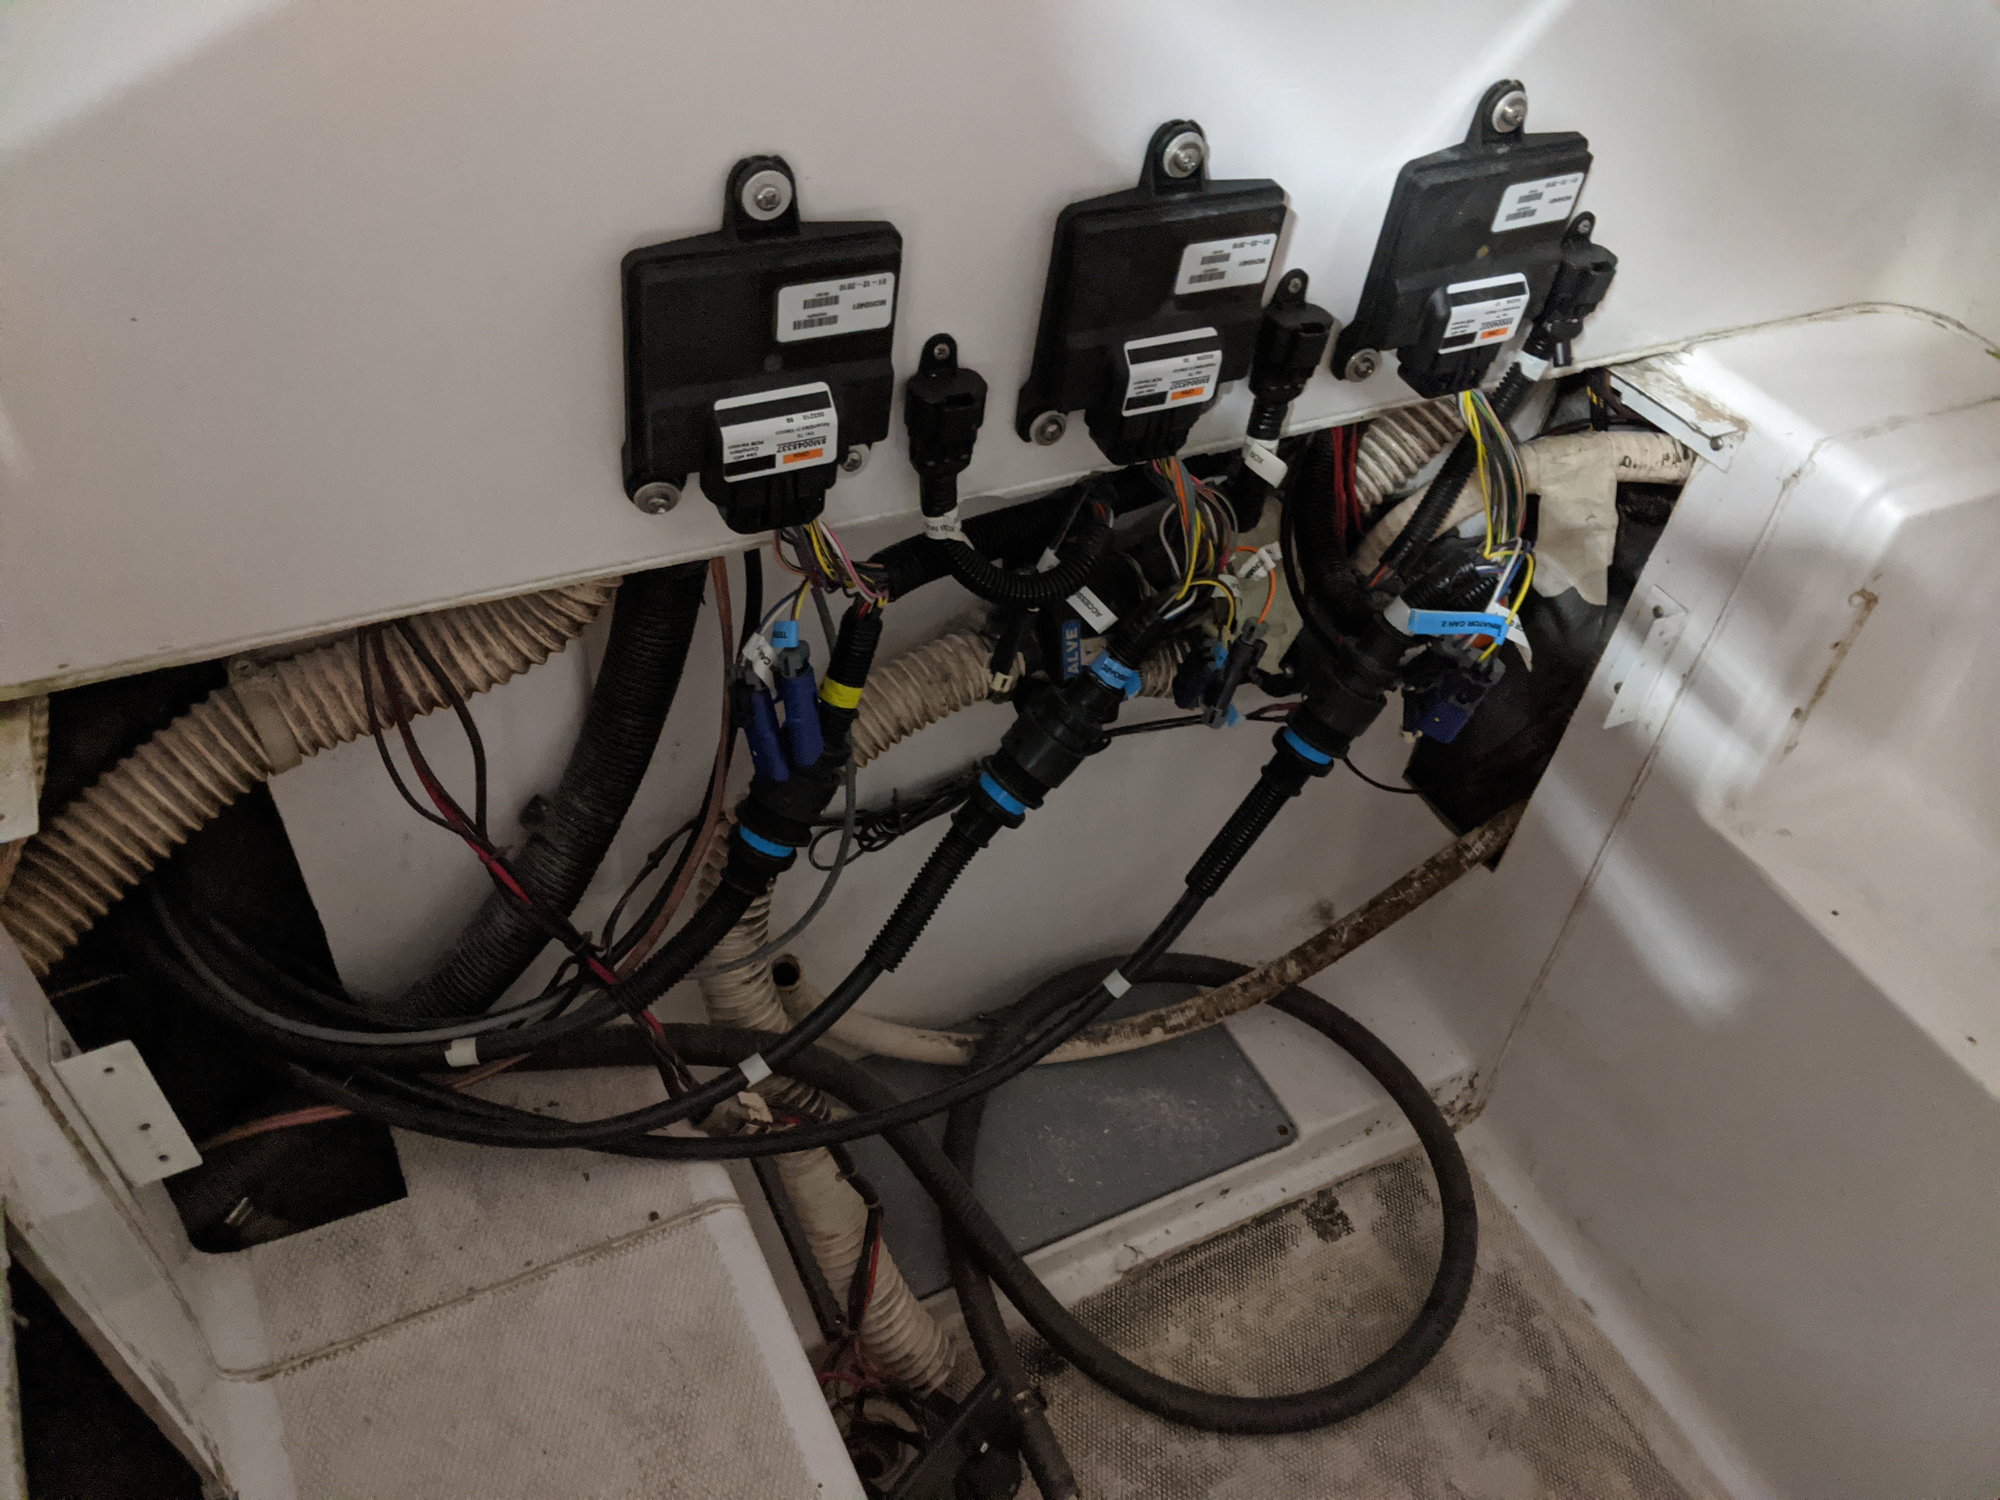
Control module�s installed

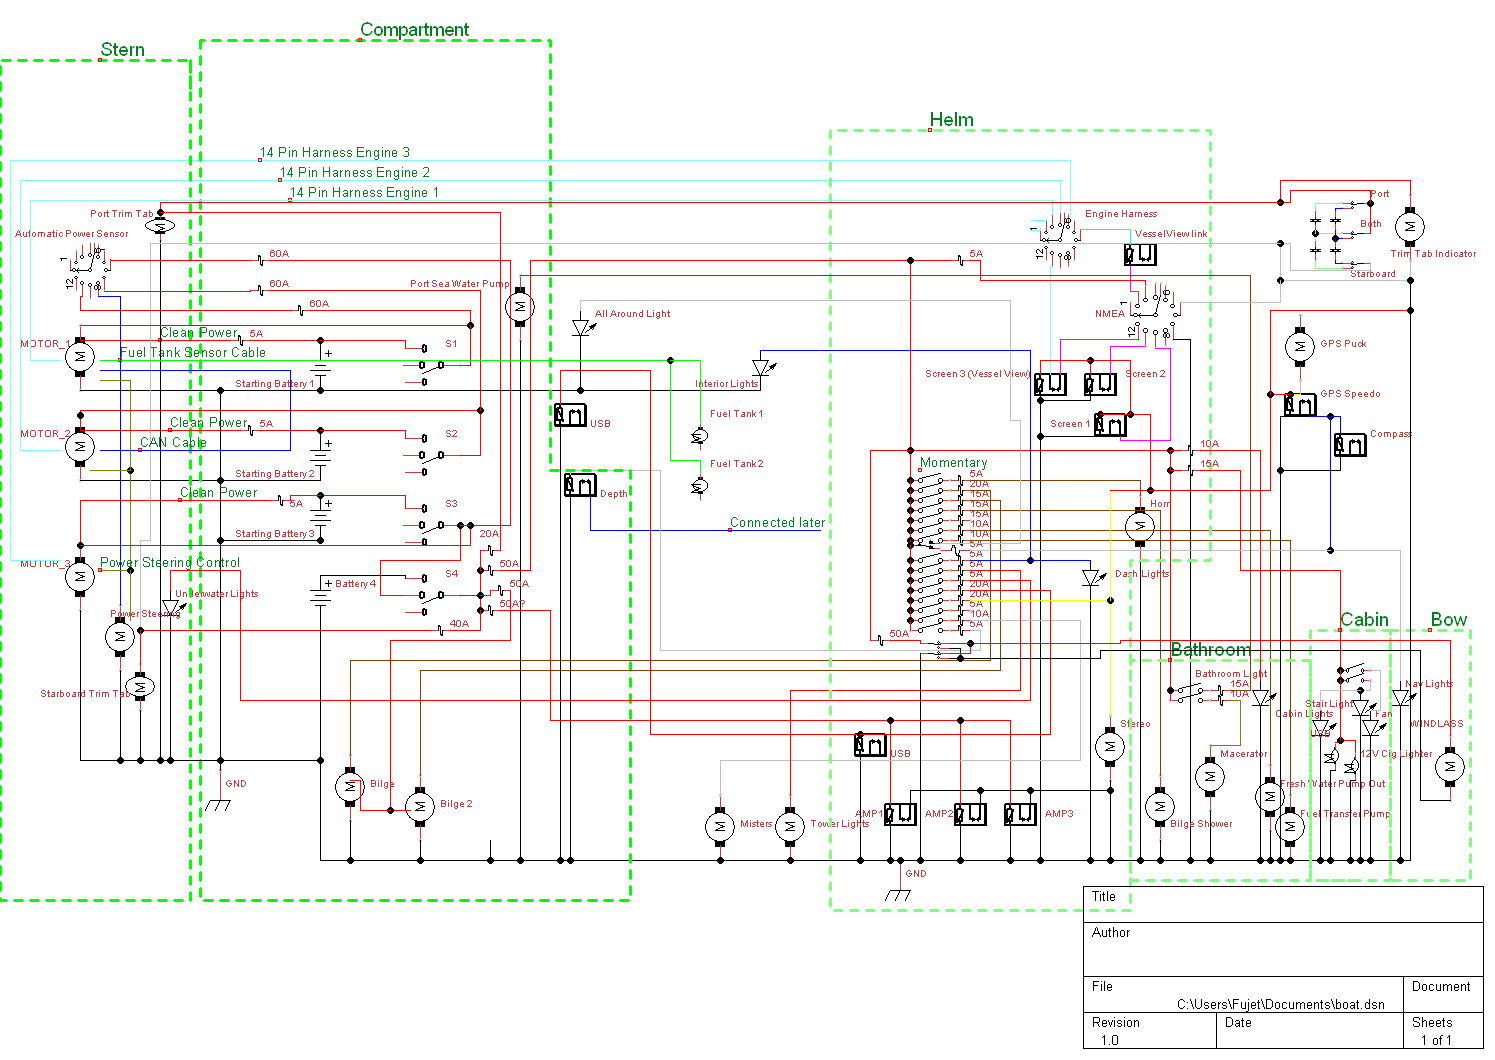
Wiring schematic one of the guys made so we know what�s going on should something ever fail.
We got the Power steering lines hooked up to the helm, shower bilge pump put back together, engine harness run & hooked up to the CCM�s as well as all the wiring harness from the CCM�s to the dash. Also the 4th battery placement and power steering pump location figured out.
Hydraulic lines are done at the helm.
Still not perfect but the wiring is starting to get sorted out. All electronics will be run off the 4th battery in the center.
Control module�s installed
Wiring schematic one of the guys made so we know what�s going on should something ever fail.
The following users liked this post:
JKetels (07-24-2020)
07-27-2020, 12:45 PM
#30
Registered
Thread Starter
Monday update:
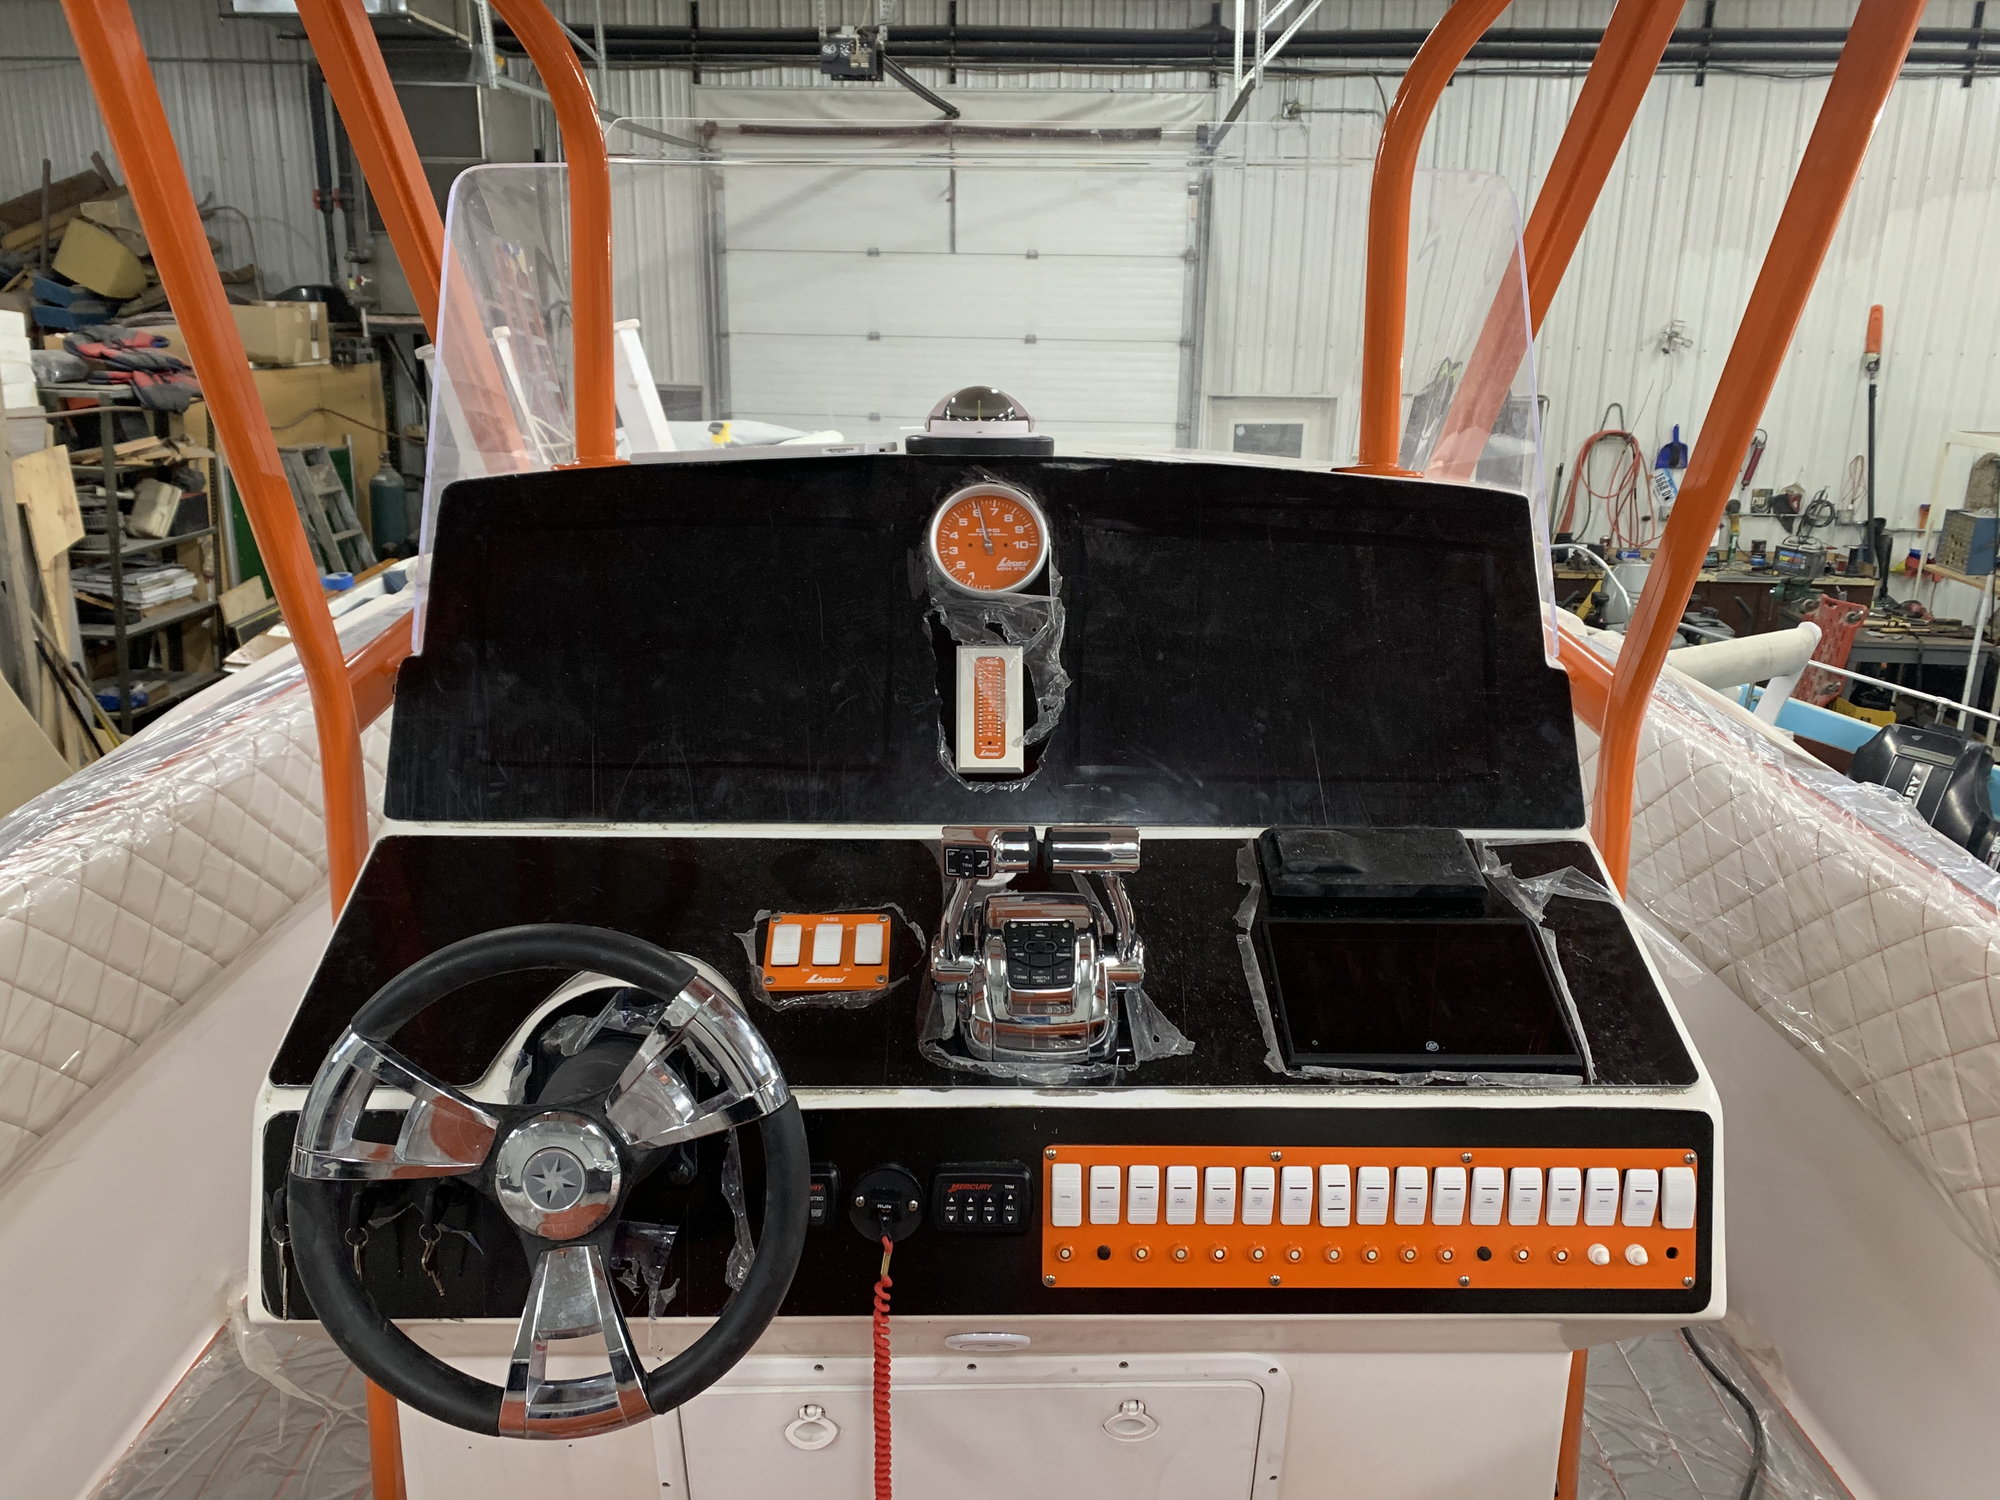
Finally got the Steering wheel Off the old hub and put on the new one.
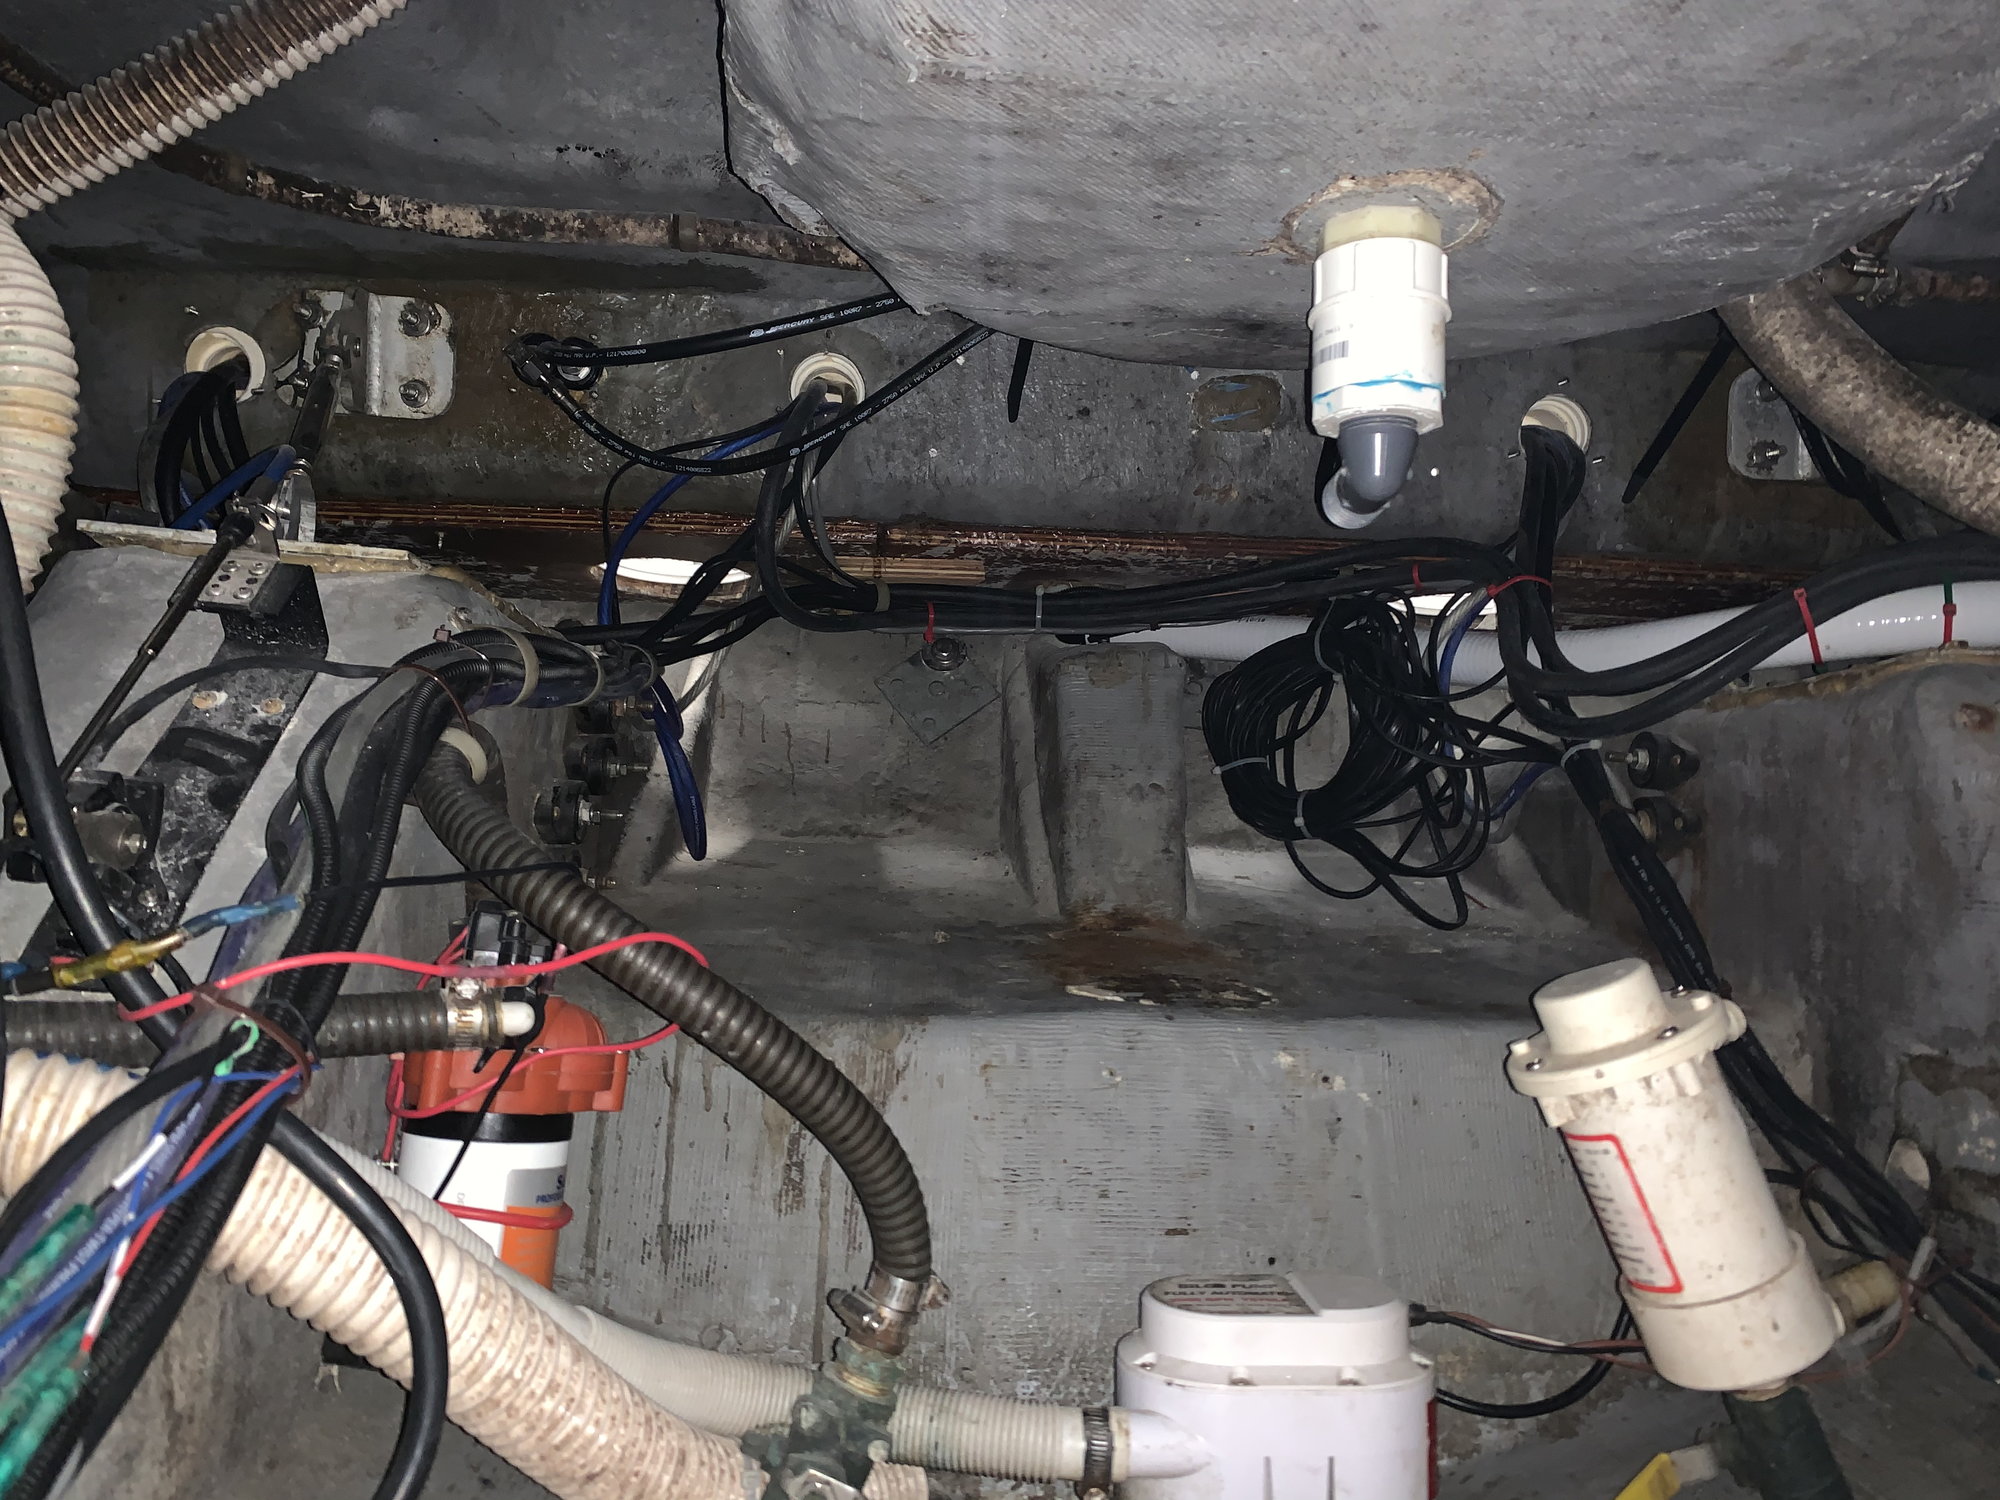
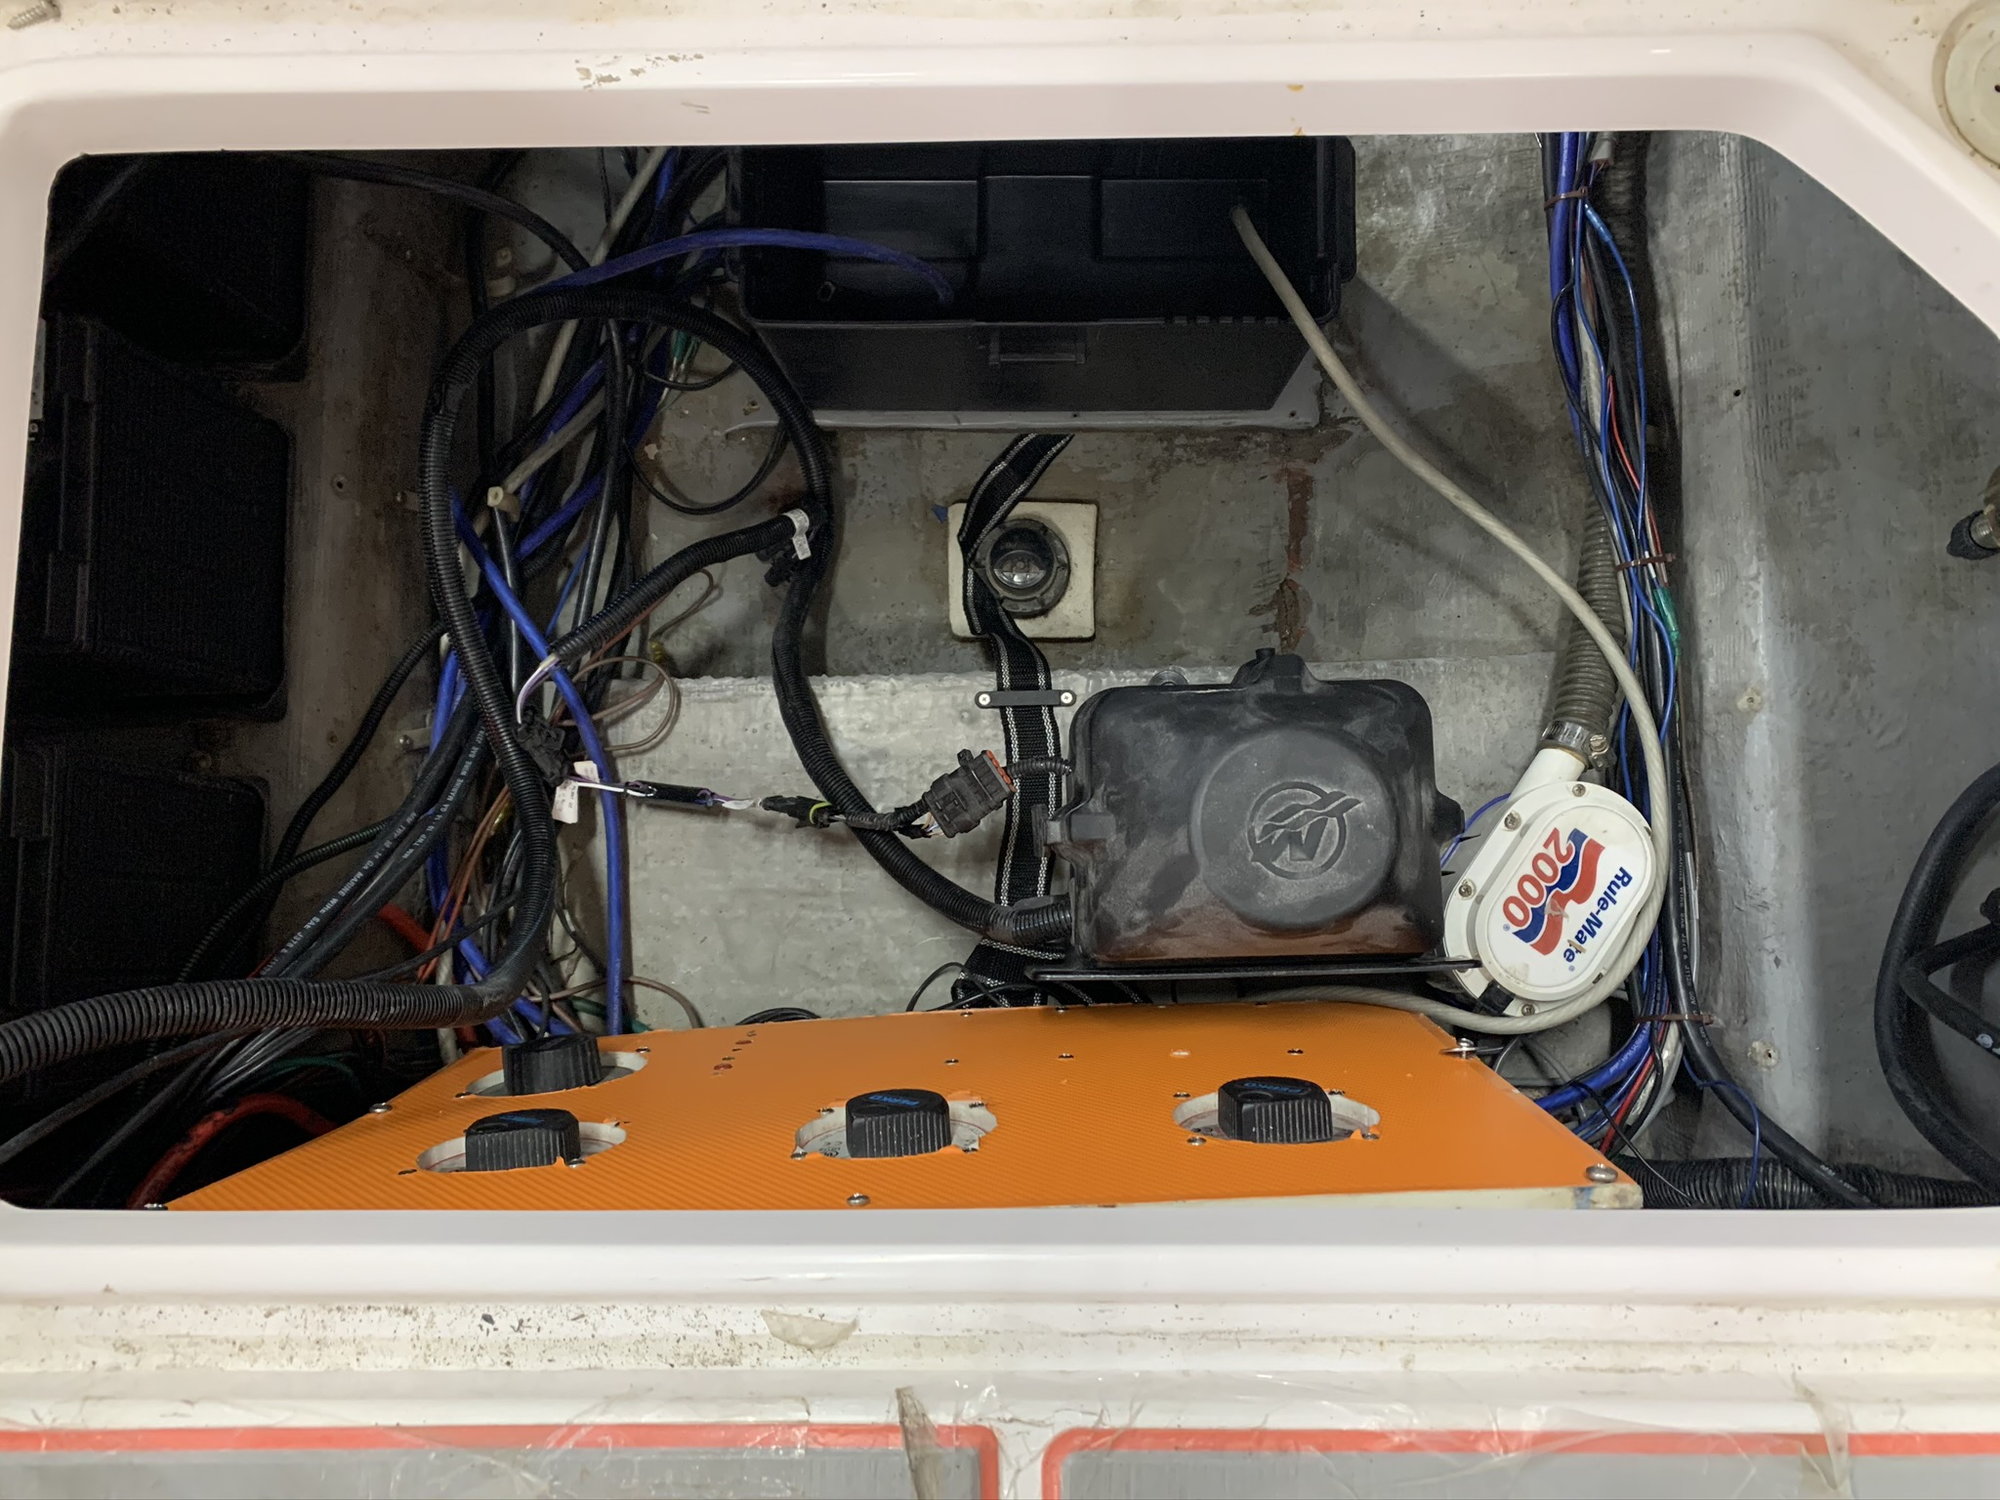
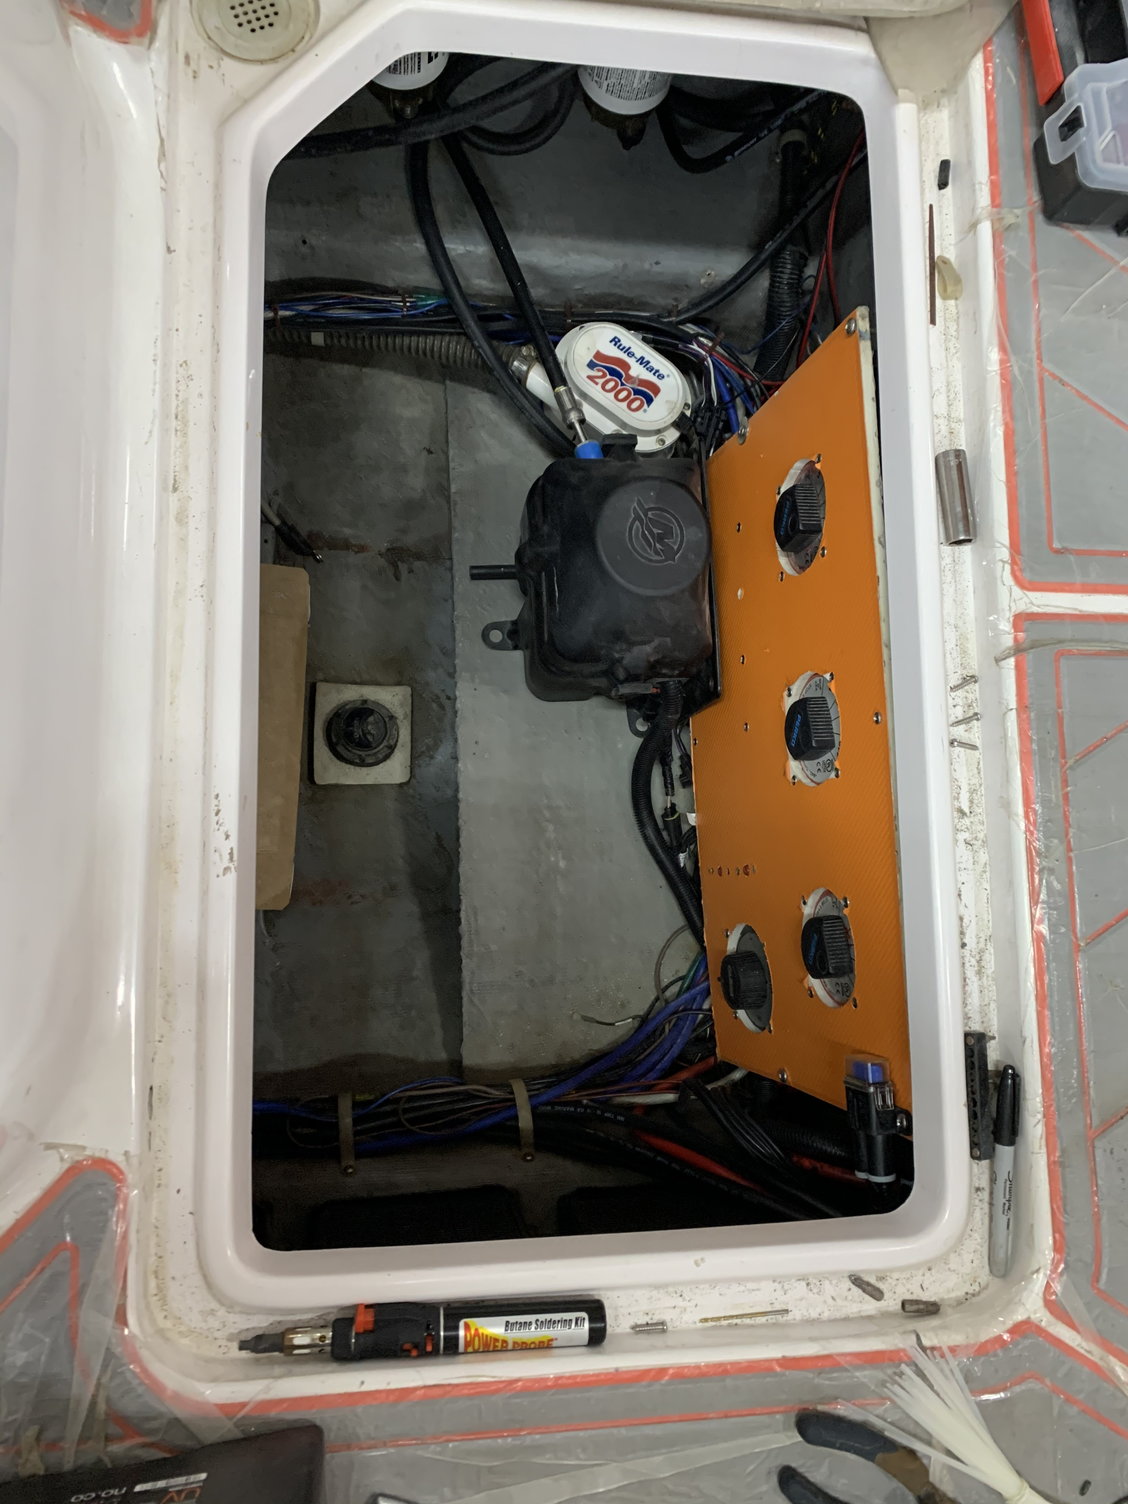
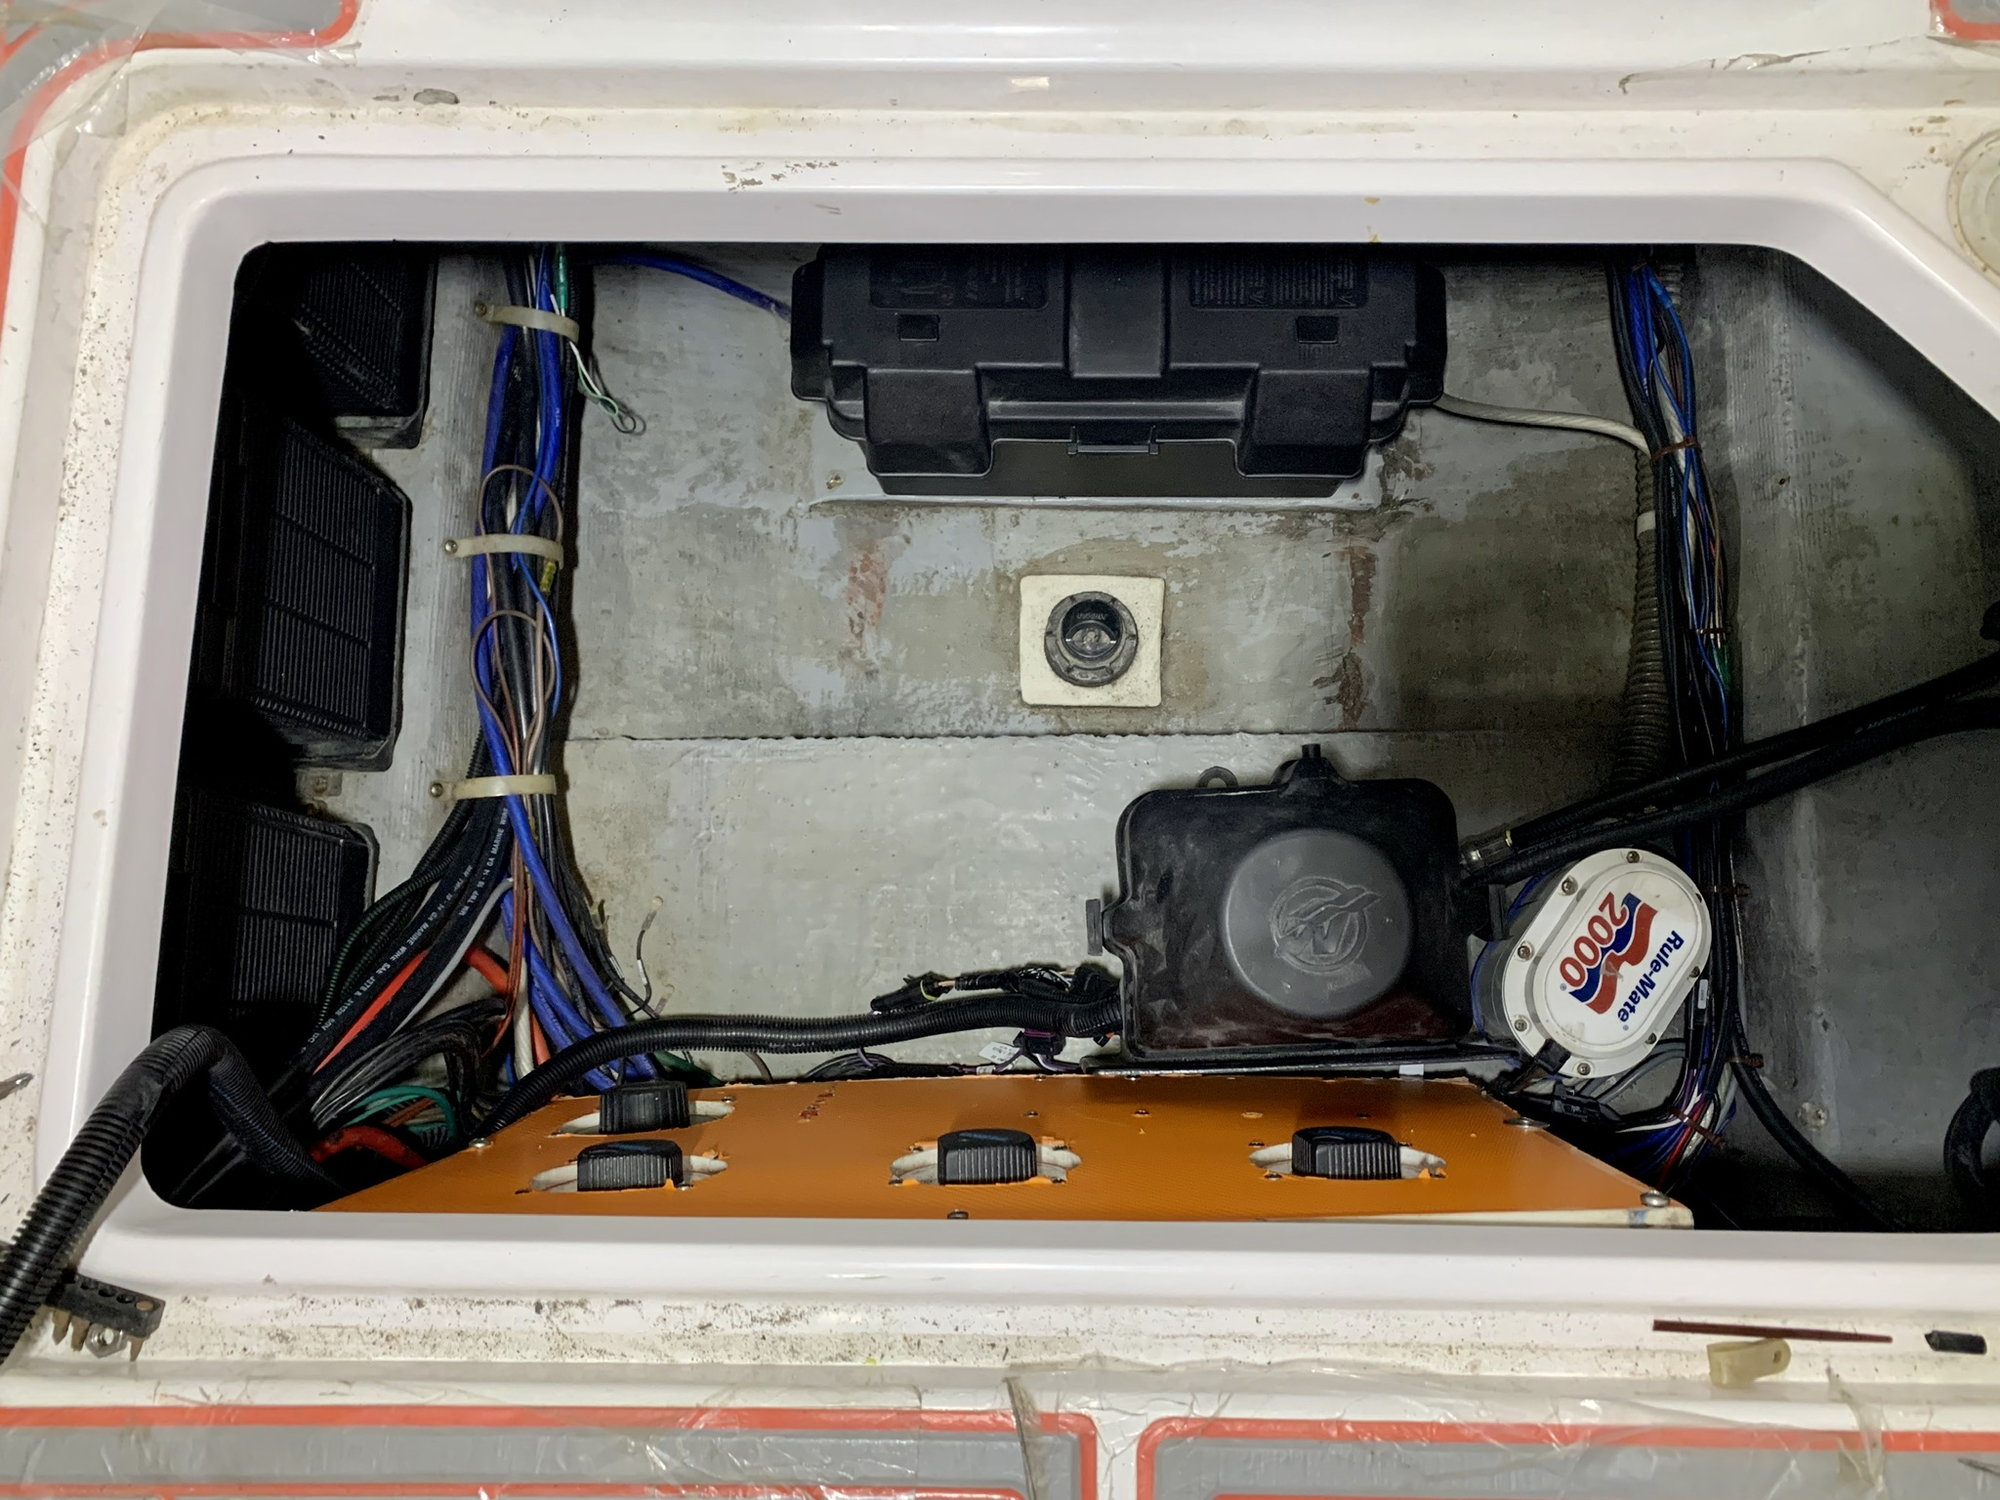
My workspace for the past week.. few things to tidy up but everything is hooked up and in place. Once you get down here there actually is quite a bit of room now that the oil tanks are in it. You can also see the support system that transfers the load from the inner transom down to the hull. (There is a solid tube between the inner and outer transom walls as well as a steel plate on the outside of the transom that the motors bolt to.)
Only thing left is to hook up the hi pressure line from the pump to the helm.(waiting on a fitting to arrive)
Top view
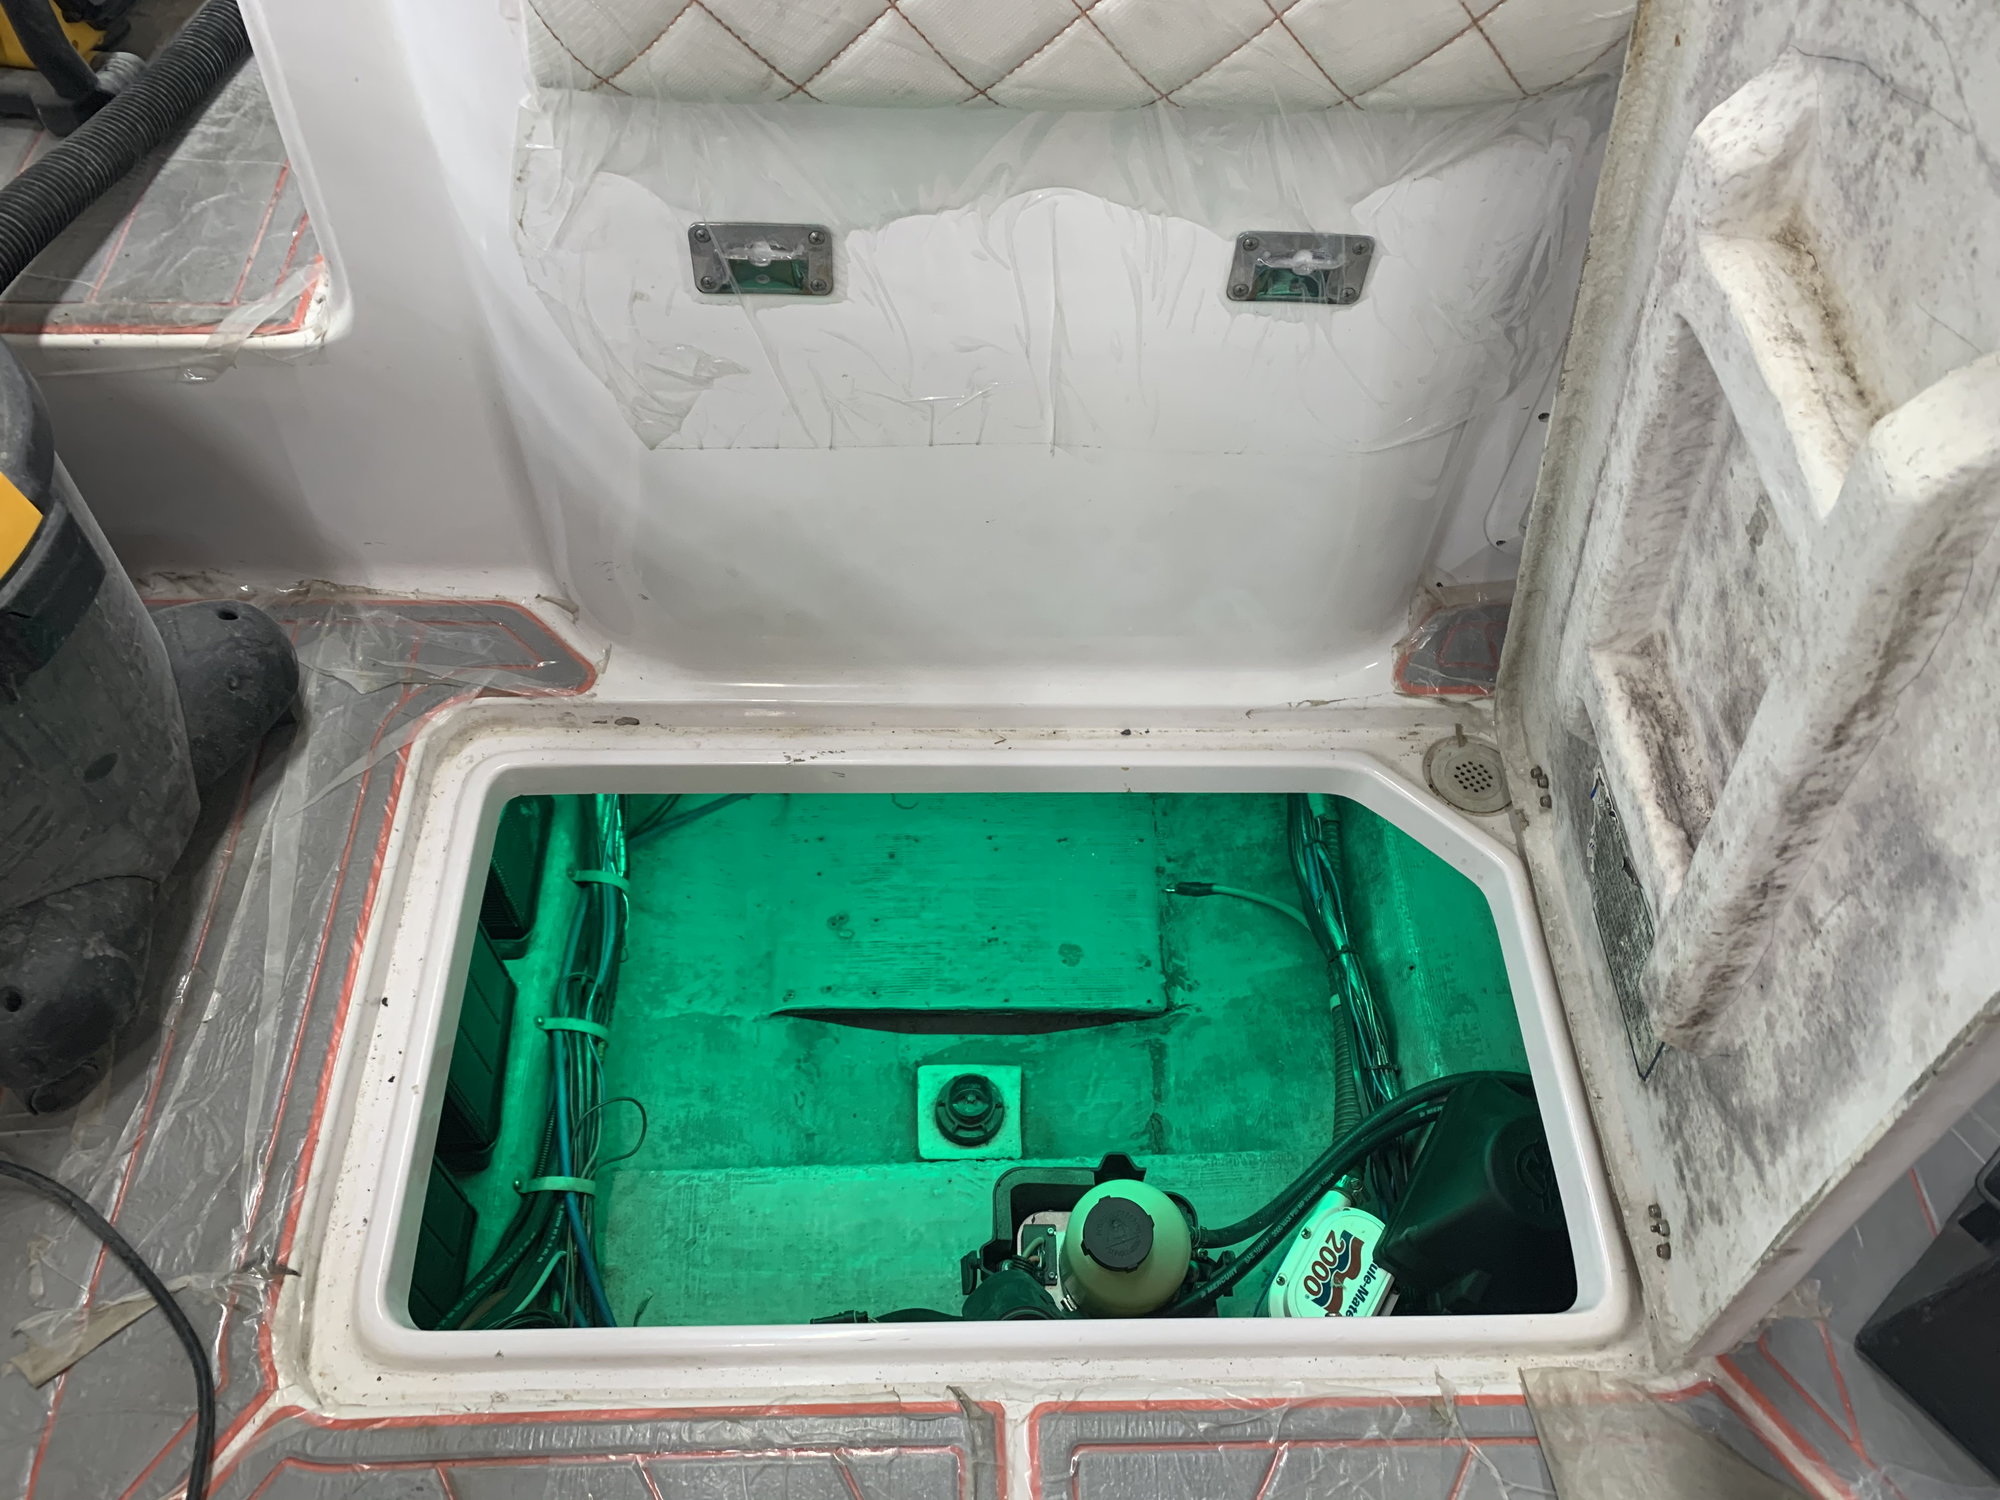
We had a left over strip of green LED�s from Phil�R Up so we hooked them up and put them on the bottom side of the floor in case we ever need to check something out down there we have some light.
Finally got the Steering wheel Off the old hub and put on the new one.
My workspace for the past week.. few things to tidy up but everything is hooked up and in place. Once you get down here there actually is quite a bit of room now that the oil tanks are in it. You can also see the support system that transfers the load from the inner transom down to the hull. (There is a solid tube between the inner and outer transom walls as well as a steel plate on the outside of the transom that the motors bolt to.)
Only thing left is to hook up the hi pressure line from the pump to the helm.(waiting on a fitting to arrive)
Top view
We had a left over strip of green LED�s from Phil�R Up so we hooked them up and put them on the bottom side of the floor in case we ever need to check something out down there we have some light.

