

please evaluate these pics for me
 08-20-2014, 10:06 AM
#11
Neno the mind boggler
Okoumes not overkill its actually what you should be using if cost dosnt scare ya 
Your on the right track. Its not a terribly difficult project in terms of technicality but does require sticking to some guidelines to stay out of trouble. I go through a couple of fives of corebond a month love the stuff and its the only way anymore for me, switched over years ago. The herringbone pattern is nice for channeling water to the back of the bilge but is a little more labor intensive, i prefer short stringers front to back. Good idea to sister fresh full length sections over your splice, three layers of half will be a bomber stringer. Yes you can use Durabond to set the stringer pieces make sure the area is well ground with 36, the piece is well fit and you prime them with a hot coat of resin prior to setting
Your on the right track. Its not a terribly difficult project in terms of technicality but does require sticking to some guidelines to stay out of trouble. I go through a couple of fives of corebond a month love the stuff and its the only way anymore for me, switched over years ago. The herringbone pattern is nice for channeling water to the back of the bilge but is a little more labor intensive, i prefer short stringers front to back. Good idea to sister fresh full length sections over your splice, three layers of half will be a bomber stringer. Yes you can use Durabond to set the stringer pieces make sure the area is well ground with 36, the piece is well fit and you prime them with a hot coat of resin prior to setting
__________________
Throttles- Cleveland Construction 377 Talon
08 OPA Class 1 National Champion
08 Class 1 Geico Triple Crown Champion
08 OPA High Points Champion
10 OPA Class 1 National Champion ( happy now Ed! )
Throttles- Cleveland Construction 377 Talon
08 OPA Class 1 National Champion
08 Class 1 Geico Triple Crown Champion
08 OPA High Points Champion
10 OPA Class 1 National Champion ( happy now Ed! )
Last edited by glassdave; 08-20-2014 at 10:11 AM.
 08-20-2014, 12:08 PM
#12
Registered
Thread Starter
When I hit the stringers with 36 grit do I just get it level and flat, or should I remove the existing fiberglass and bond directly to the wood? I was going to leave the glass as it is less grinding and cutting, but if I need to I'll remove it.
08-20-2014, 12:36 PM
#13
Neno the mind boggler
yep leave the glass but make sure you grind through any gel or paint that may have been applied. Try and get it as smooth as ya can but its not necessary to get out a ruler or anything like that. Nice snug fit on everything goes a long way toward the final results durability.
post up picks as ya go.
post up picks as ya go.
__________________
Throttles- Cleveland Construction 377 Talon
08 OPA Class 1 National Champion
08 Class 1 Geico Triple Crown Champion
08 OPA High Points Champion
10 OPA Class 1 National Champion ( happy now Ed! )
Throttles- Cleveland Construction 377 Talon
08 OPA Class 1 National Champion
08 Class 1 Geico Triple Crown Champion
08 OPA High Points Champion
10 OPA Class 1 National Champion ( happy now Ed! )
Last edited by glassdave; 08-20-2014 at 12:42 PM.
08-20-2014, 03:52 PM
#14
Registered
Thread Starter
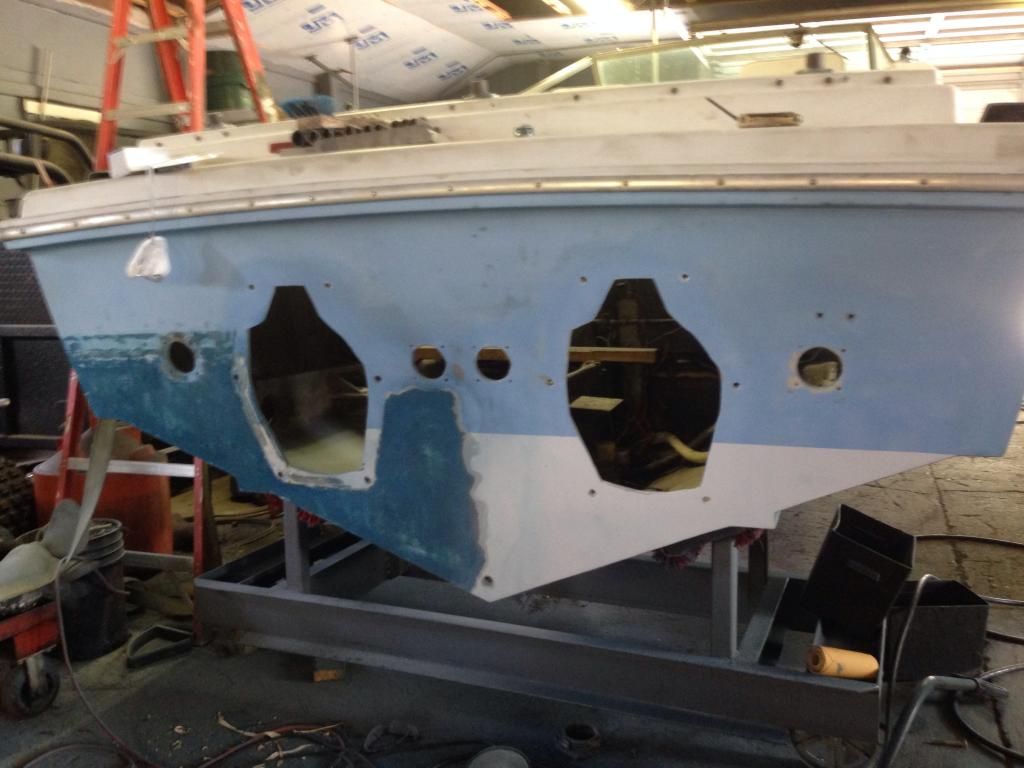
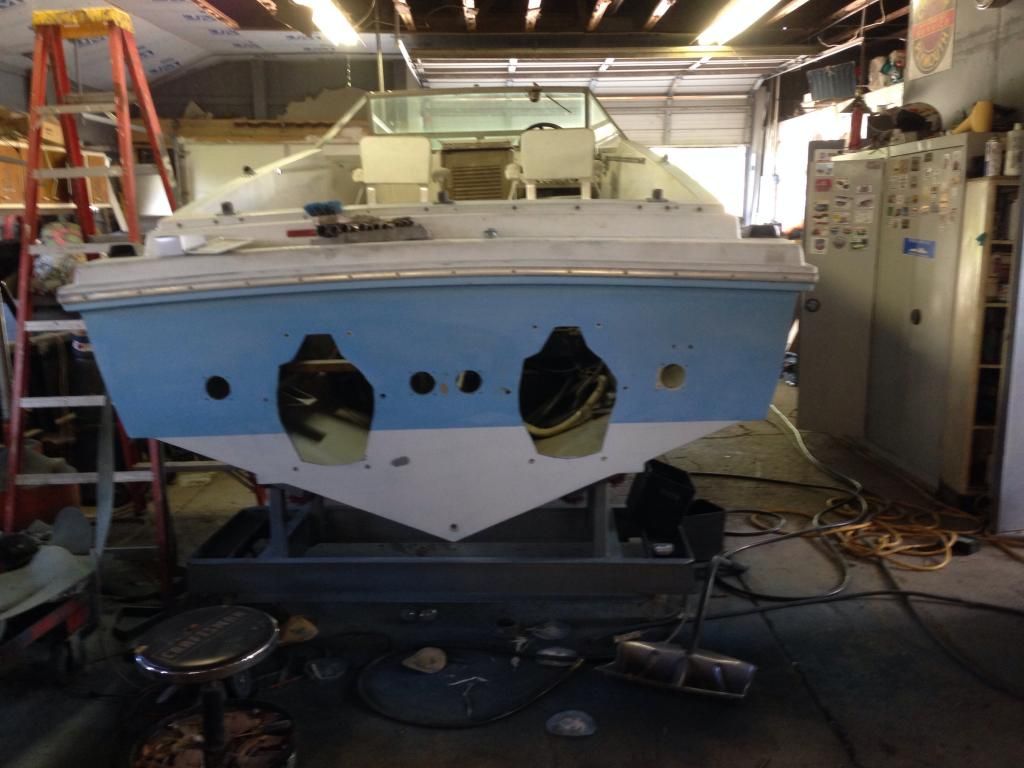
Hit the outside of the transom today, got all the bottom paint off, compared to some of the projects I've seen online I have it easy, not many holes to fill.

Compared to:


Compared to:
 08-20-2014, 03:58 PM
#15
Registered
Thread Starter
I am going to cut the transom off the boat one of my SP-A drives came off of this weekend to use as a template for my new drive cutouts. I'm jumping the gun a little but what is the best method for the new drive holes? Should I completely glass in the old cutouts and start from scratch, or just fill the gaps created by raising the drives? I will be filling the exhaust cutout holes as they will be raised with the new exhaust manifolds.
08-20-2014, 07:06 PM
#17
Registered
Thread Starter
Sounds like the plan then. Do I just build up layers of 1708 and VE in the cutout until it's flush? (After the the wood is bedded and glassed in from the inside)
08-20-2014, 08:53 PM
#18
Neno the mind boggler
yes you need to build up the area after the new transom is in. Grind back the old cutout hole about a half a foot or so and glass it in 1708 an VE. Same with the exhaust, im a big fan of going back to scratch it allows you to true up the cut outs and make sure they are square with each other ive seen factory drives off by as much as an inch.
27 foot Magnum . . . . foot for foot quite possibly the greatest hull ever

__________________
Throttles- Cleveland Construction 377 Talon
08 OPA Class 1 National Champion
08 Class 1 Geico Triple Crown Champion
08 OPA High Points Champion
10 OPA Class 1 National Champion ( happy now Ed! )
Throttles- Cleveland Construction 377 Talon
08 OPA Class 1 National Champion
08 Class 1 Geico Triple Crown Champion
08 OPA High Points Champion
10 OPA Class 1 National Champion ( happy now Ed! )
08-21-2014, 07:13 PM
#19
Registered
Thread Starter
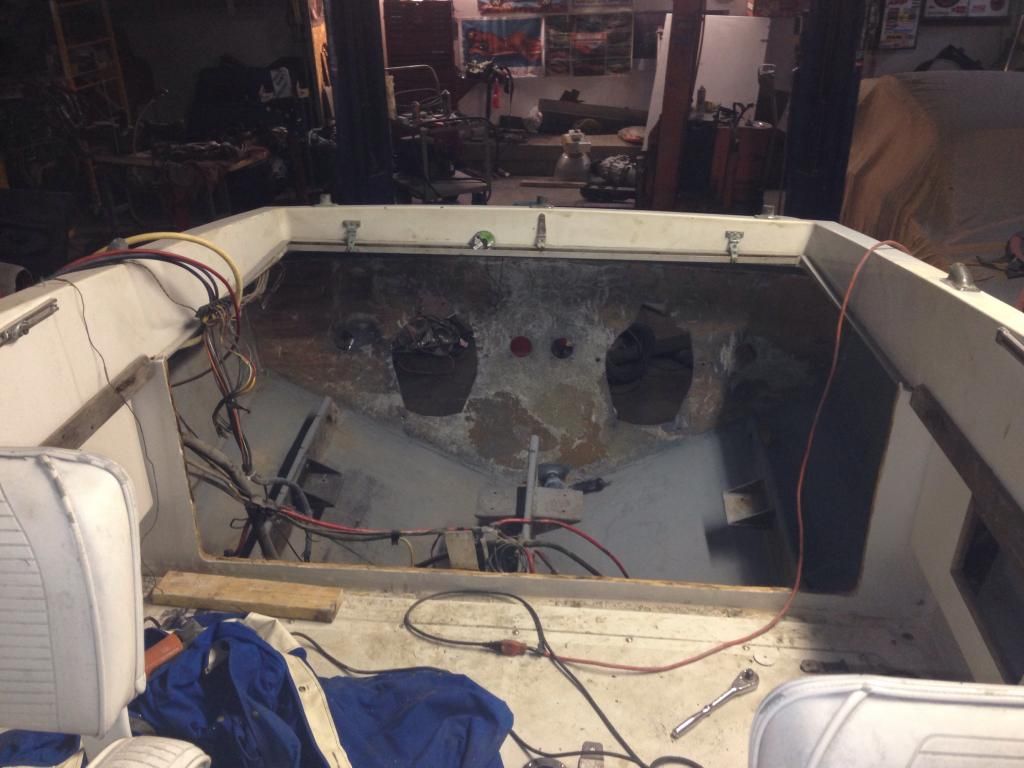
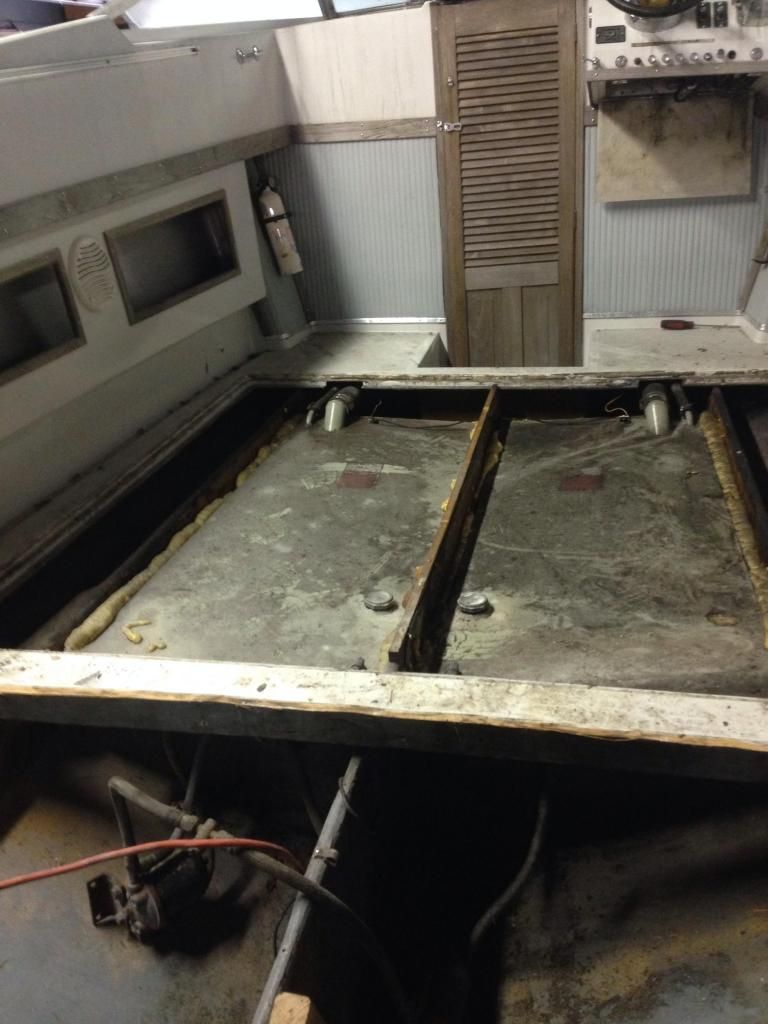
Ever since I pulled the engines I've been contemplating cutting out the back bulkhead and making it removable, today I did it. I am losing some real estate to mount wiring and filters, but access to the engine compartment is going to be soo much easier its worth the tradeoff IMO. What sealed the deal for me was how sloppily it was tabbed in, in cant be offering that much support if its barely connected to the hull sides anyway. I cut it 2" above the floor so the corner is still in tack to support the floor, and will add a piece of 3/4" ply to the back side of whats left, going down 2 inches below whats there so I can tie it into the stringers, and put a 1" lip on the top side for the removable panel to sit against. I also removed the cockpit floor, what is the best way to get the tanks out? I want to check them for corrosion / leaks and at least clean them out.

 08-21-2014, 09:43 PM
#20
Neno the mind boggler
I am doing something similar with my Magnum. Because bilge access is so minimal a am making a custom hatch and rear seat assembly that all hinges up.
lookin good, never hurts to re think some of this old school stuff.
lookin good, never hurts to re think some of this old school stuff.
__________________
Throttles- Cleveland Construction 377 Talon
08 OPA Class 1 National Champion
08 Class 1 Geico Triple Crown Champion
08 OPA High Points Champion
10 OPA Class 1 National Champion ( happy now Ed! )
Throttles- Cleveland Construction 377 Talon
08 OPA Class 1 National Champion
08 Class 1 Geico Triple Crown Champion
08 OPA High Points Champion
10 OPA Class 1 National Champion ( happy now Ed! )

