


My new project - 86 - 272 LS
 01-10-2013, 01:01 AM
#211
Registered
Brian don't worry about the bulkhead adding or diminishing structural integrity. I have run mine with out it in 3~5' seas in the open ocean for miles at 45~50 mph on test runs and never miss it except for engine noise.
 01-10-2013, 10:53 AM
#212
Registered
Thread Starter
Well that is good to know about the rigidity of the boat. I feel really good about the reinforcement I did on the stringers and bulkheads, so knowing that is solid is reassuring. I remember the first one I looked at was an flat glass 272, maybe an 85? The rear bulkhead was rotting out and the glass was delaminating off of the wood on the side stringers and where the batteries sit. Guy was still out using it jumping waves in lake Michigan! Must be some pretty good strength built into these hulls.
I am getting excited again, bottom redo might end up waiting until next winter with how late it is, but this thing is GOING TO RUN THIS SUMMER!
Brian
I am getting excited again, bottom redo might end up waiting until next winter with how late it is, but this thing is GOING TO RUN THIS SUMMER!
Brian
01-10-2013, 11:44 AM
#213
Registered
Thread Starter
You know, I was a bit discouraged by the fact that it has been about 6 weeks and not much has happened on the boat. But then again, it was the holidays and I have 9 kids at home and 3 of the foster kids are pretty much in full revolt right now, so things are a bit hectic. But I looked back through the thread to see where I was last year at this time and now I feel better. I had taken the seats and trim out of the boat to start making new ones. About this time we had just pulled the motors out to start looking at them, let alone start on the new ones.
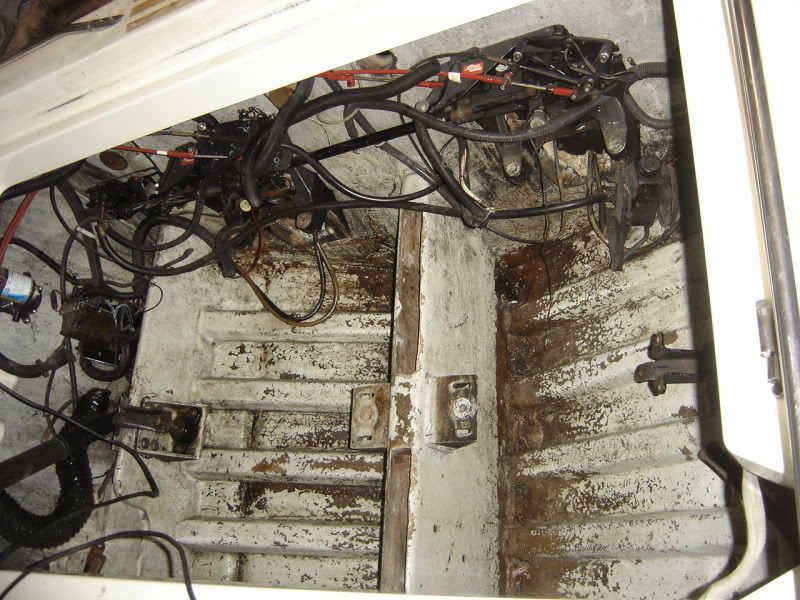
First real pictures of the inside were from the beginning of March which showed the motors out but the transom assemblies still in. Mid March I had started to paint the inside, but had not started on the new transom assemblies yet. So I have two more months to go untill I am at the point that I was still tearing crap apart a year ago.
I believe this picture was taken in early march! Now I feel better.
02-15-2013, 03:08 PM
#214
Registered
Thread Starter
OK, finally getting the itch and the time together to get some progress done. I did it, I cut out the rear seat back. I was really surprised how easy it cut out, but gotta tell you I was nervous starting it! This definately is a game changer on motor access. Now you can lay chest down on the rear seat with your arms hanging down to the work on things or sit there with your legs hanging in front of you. So after I cut out the seat back, I sanded the edges down smooth and radiused them some. Now I have to go in with a paint brush and touch up the raw edges of the glass just to seal the fibers in, but I will do that after the 3m 5200 adhesive finishes drying from the plywood reinforcement I added.
The piece I added under the bench seat is 1.5" thick plywood, bonded to the bottom of the seat and to the fiberglass lower seat panel with 3m 5200 slow set. It was then screwed in from the top and through bolted from the backside, should be pretty secure. This also gave me a nice surface to attach my fuel system to which I modified.
I added a second fuel pump to the other side mounted on the bulk head behind the fuel tank, so fuel pressure is now redundant. Each fuel pump will push fuel through a check valve and then into the fuel filter. Now when the pump shuts off due to the pressure switch mounted to the fuel filter mounting manifold, the pump should not chatter on and off as pressure bleeds off. From there it is standard as it just goes to each carb.
The real change is I added a crossover between the two spare outputs on the filter mount. Each side has it's own pressure gauge so it is easy to see if carbs are getting pressure, but they are seperated by a ball valve in the middle. If one side does die for a reason, I can open the valve in the middle and one pump will supply both motors. Check valves will prevent any backflow through the dead pump to the fuel tank. Might not be able to run full throttle on one pump from my previous experience, but the boat will be able to plane and maintain 40 mph to get back to the dock. After the fuel system problems I had last year, I decided to go a bit further than I had origianlly planned.
After all that I vacuumed out the engine compartment again. I really want to hose it down, but I do not have running water out there right now, so it will have to wait untill I take it home in the spring. Now that the fuel stuff is in, I need to add some new fuel line to finish it up and then redo the wiring mess I caused by the removal of the rear seat. Where the bulk head went is where the stereo amp and LED wires were bundled, so they need to be redone with the fuel pump wiring.
Still finishing up the other motor, just haven't had time to finish it. Need to swap out the head bolts one at a time, clean up the manifolds for new risers and gaskets, install new ignitions and a new dipstick tube. Little stuff, but hopefully a couple of weeks the motor will go back in.
02-24-2013, 10:28 PM
#216
Registered
Thread Starter
OK, in the next couple of weeks, I am hoping to redo the trailer and convert it to bunks. I have always wondered how people get the boats on and off the trailers without using water.
so, what my question is, can I lift my 272 straight up by using three come-alongs? I have three - 4,000 lb come alongs and ceiling beams that are nicely spaced out. Large beams! Can I simply attach one to each of the tie down u-bolts that go through the transom and the third to a strap that passes through or under the bow hold down mount? I figure the front will be pretty light, maybe 1500 to 2000 pounds. the back will be split between the two sides at 2000 to 2500 each. Are these U bolts designed for this or do I have to strap the boat?
Anyone do this before?
Brian
02-24-2013, 11:23 PM
#217
Registered
The stern Eyes will do the job...that why they are there. Do you not have a lift ring in the front that is bolted/rodded thru to the keel? My '86 272 did...I would be surprised to know that yours doesn't.
02-25-2013, 08:11 AM
#218
Charter Member #232
As long as your transom is in good shape it should not be an issue. When I did it on mine I used 2 boat stands under my K planes. Then had a guy come over with a tow truck. He lifted the bow with the arm and I drove out. Then I put some foam blocks under the keel.
__________________
Put your best foot forward!
Put your best foot forward!
02-25-2013, 12:04 PM
#219
Registered
Thread Starter
Transom is nice and dry, no issues there so the back is good. On the bow I have the anchor line cleat that is bolted throught the deck and then the bow eye which is underneath and through bolted. See pictures. I figure I will have to put a nylon strap under the bow eye to protect the hull and lift by that, is that what others do?
Also attached is a picture of the fuel system. Friday I was able to touch up the yellow paint to cover the 3m5200 adhesive. I then ran most of the wires into wire looms and secured them. Worked well except for the two power wires that run down to the fuel pumps and the connecting ground wires. Just looks a bit unfinished with the loose wires there. actually, after looking at the picture, I think I can bury that connecting ground most of the way in the conduit that runs to the bilge pump. That will clean it up some more. When I laid it out in my mind, it seemed a lot nicer looking than what I ended up with.....
Brian

