


My new project - 86 - 272 LS
 04-11-2012, 03:16 PM
#61
Registered
Thread Starter
Mounted the holley fuel pump today. Kind of interesting in the instructions it said to mount below the lowest point of the fuel tank. Hmm, won't that slow the boat down some? Well, I am going to try it just above the fuel tank and see if that works, can't imagine a vane type pump once primed won't pull gas up that far.
Trimmed up the glass a bit where I added the front bulk head so my bilge pump will fit in there. Have to make a sketch up for the mount. Want it secure but capable of being removed with two wing nuts for maintenance.
Also got some of the transom sanded today and a second coat of surface coat put on to fill in the few remaining dips.
Also made up a mount for the one engine so we can completely assemble it on the skid before dropping it in. Second motor is on the engine stand now for assembly tomorrow.
Oh, got the stereo installed today and mostly wired up, sounds pretty decent.
It was a good day. Now it is time to take the camper home so we can de-winterize it.
Brian
 04-14-2012, 01:15 PM
#62
Registered
Thread Starter
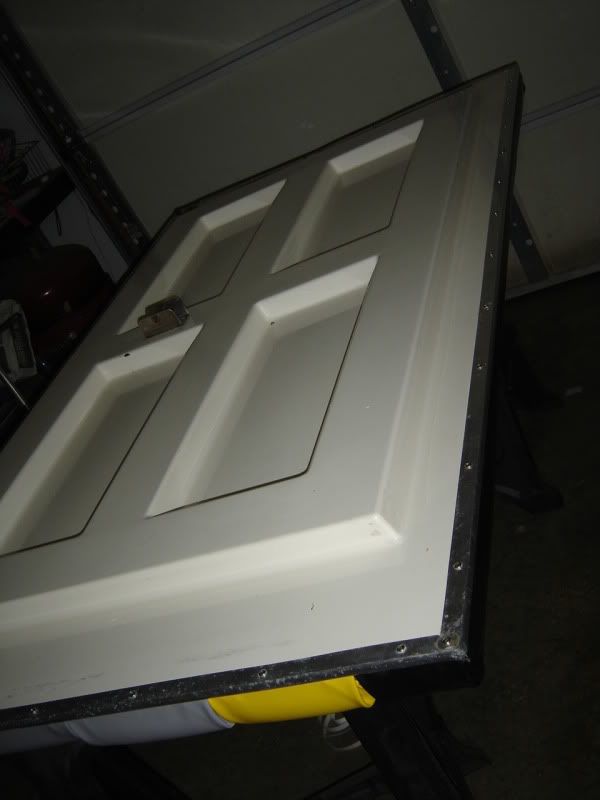
Finished up the vinyl on the engine hatch. Now, keep in mind I have been going about this as a budget build. I know some will scoff at my methods or results, some would be downright embarrassed, but I am going for a quality utility on the water build, not the current bling status.
The old hatch was shot. The vinyl was dirty, faded and dry rotted to the point that the vinyl was cracking when you put any weight on it. Some had already split and torn in spots. When I went to remove it, the plywood underneath was saturated and came off more like mulch than plywood. The only thing I saved was the foam, fiberglass panel for the bottom and the aluminum trim pieces.
First thing I did was cut a piece of 3/4" plywood and put several coats of urethane on it to seal it up well. I then got the vinyl and started fitting it over the old foam. I decided early on I was not going to spend good money having someone else do the sewn ends with piping and what not, I would just staple everything together and fold the ends. The hatch sits down inside the hull, so the ends really won't be seen anyways. I also decided to replace the white panel with another piece of grey. Two things: first I didn't have to buy another color of vinyl and second the white will get dirty too fast. yeah, I know, keep it clean. I have too many kids for that and this whole project is meant as a cheap way to get us on the water for our camping trips up in Michigan (32' travel trailer, very nice!).
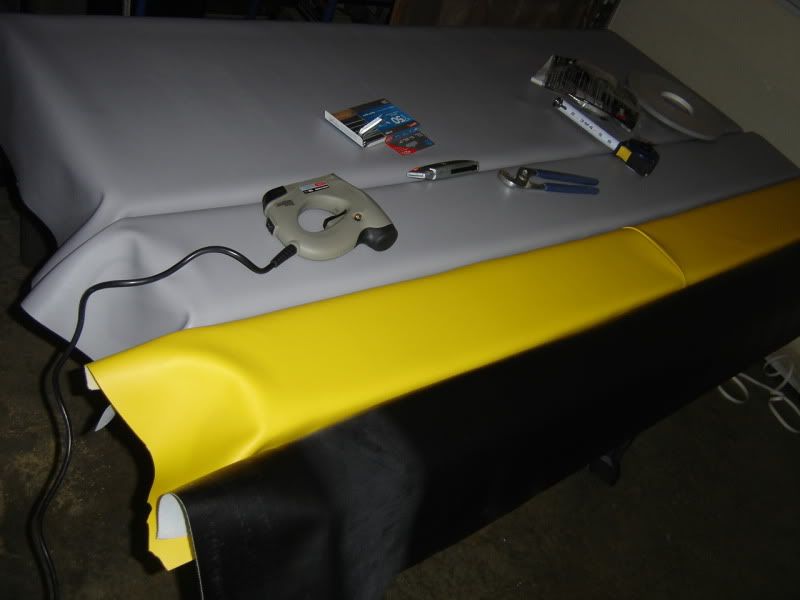
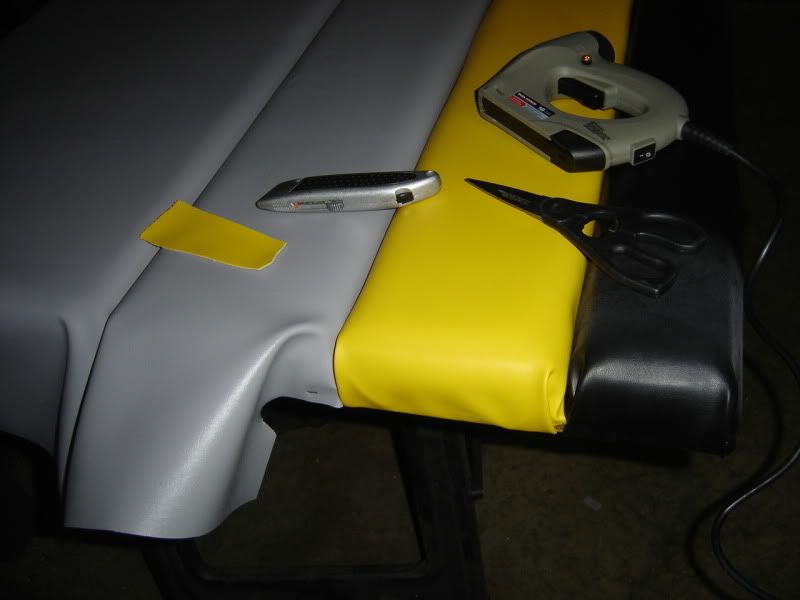
The pics below show the vinyl being stapled down to the plywood. I started in the middle at the seam between the two grey pieces and stapled it all the way across. I then put in the piece of foam, pulled the vinyl over the foam and tacked the vinyl down in severa spots on the other side. Then I layed the next color vinyl into the seam and ran a row of staples down the seam and kept repeating the process until I got to the end. Is it perfect? Nope. But it is alot better than the old rotted and cracking hatch and the best thing is I spent less than $80 on grey, yellow and black vinyl. That is enough to redo the cockpit trim, a couple of rear seat cushions and the entire engine hatch with some left over.
I did try my hand and hand sewing the yellow vinyl. I did not buy enough to do the strip as one piece, so I sewed them together. It is very strong and turned out alright.
Next post will show the completed project.
The old hatch was shot. The vinyl was dirty, faded and dry rotted to the point that the vinyl was cracking when you put any weight on it. Some had already split and torn in spots. When I went to remove it, the plywood underneath was saturated and came off more like mulch than plywood. The only thing I saved was the foam, fiberglass panel for the bottom and the aluminum trim pieces.
First thing I did was cut a piece of 3/4" plywood and put several coats of urethane on it to seal it up well. I then got the vinyl and started fitting it over the old foam. I decided early on I was not going to spend good money having someone else do the sewn ends with piping and what not, I would just staple everything together and fold the ends. The hatch sits down inside the hull, so the ends really won't be seen anyways. I also decided to replace the white panel with another piece of grey. Two things: first I didn't have to buy another color of vinyl and second the white will get dirty too fast. yeah, I know, keep it clean. I have too many kids for that and this whole project is meant as a cheap way to get us on the water for our camping trips up in Michigan (32' travel trailer, very nice!).
The pics below show the vinyl being stapled down to the plywood. I started in the middle at the seam between the two grey pieces and stapled it all the way across. I then put in the piece of foam, pulled the vinyl over the foam and tacked the vinyl down in severa spots on the other side. Then I layed the next color vinyl into the seam and ran a row of staples down the seam and kept repeating the process until I got to the end. Is it perfect? Nope. But it is alot better than the old rotted and cracking hatch and the best thing is I spent less than $80 on grey, yellow and black vinyl. That is enough to redo the cockpit trim, a couple of rear seat cushions and the entire engine hatch with some left over.
I did try my hand and hand sewing the yellow vinyl. I did not buy enough to do the strip as one piece, so I sewed them together. It is very strong and turned out alright.
Next post will show the completed project.
04-14-2012, 01:26 PM
#63
Registered
Thread Starter
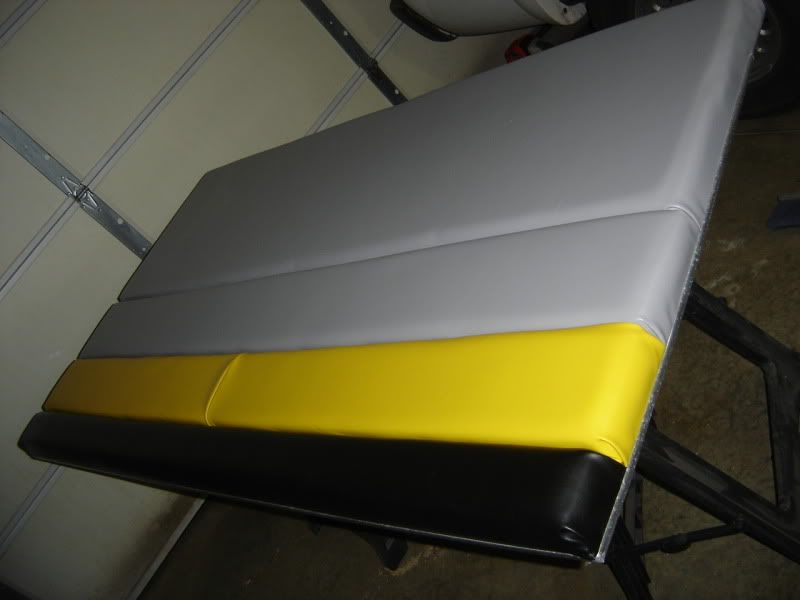
Now for the ends. I basically did it like wrapping a present. took the sides and pulled them in toward the middle of each foam strip. A staple in each side holds it in place while the excess vinyl is trimmed off. The center piece is then folded and pulled under the plywood where it is stapled. Once all of them are done, the whole hatch cover is flipped over and finished being stapled and trimmed.
Once that was done, the fiberglass back panel was set in place and the aluminum trim secured down with #8 stainless screws. Blind nuts where installed in the plywood to give the hindges a solid place to anchor to. It is not exactly formula quality, but it turned out pretty nice.
Looking forward to setting it in place and getting a picture of the boat as it sits now. Still no motors or drives in the hull, but the new wood parts are in for the rear bench. It is starting to come together! maybe by the holiday for summer!
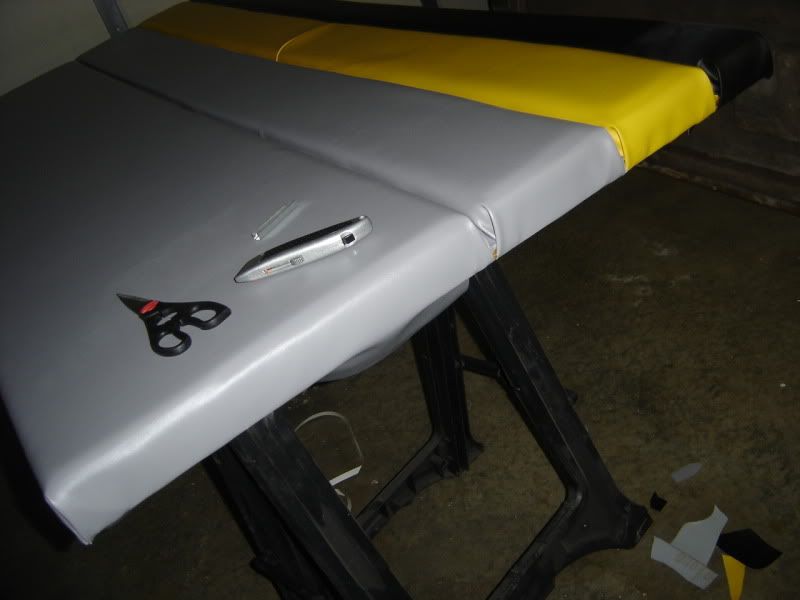
04-15-2012, 04:12 PM
#66
Registered
Thread Starter
Did the yellow pad for the back of the seat today. Took some pictures of how I cut and folded the ends in case anyone is interested.
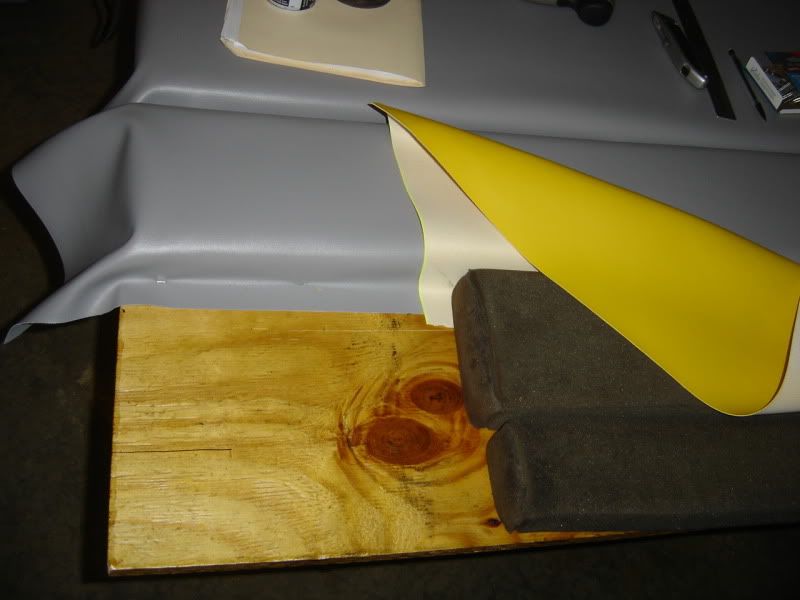
Started by measuring the old piece of wood and cut a new piece of plywood, then several coats of urethane. (I have inside storage and do not leave the boat out, so should have some pretty limited weather exposure.) The piece of plywood is also the same size as the piece of foam. I use some spray adhesive to help hold the foam in place while doing the coverning, but it does not seem to last long term, just makes it tacky to limit slipping around.
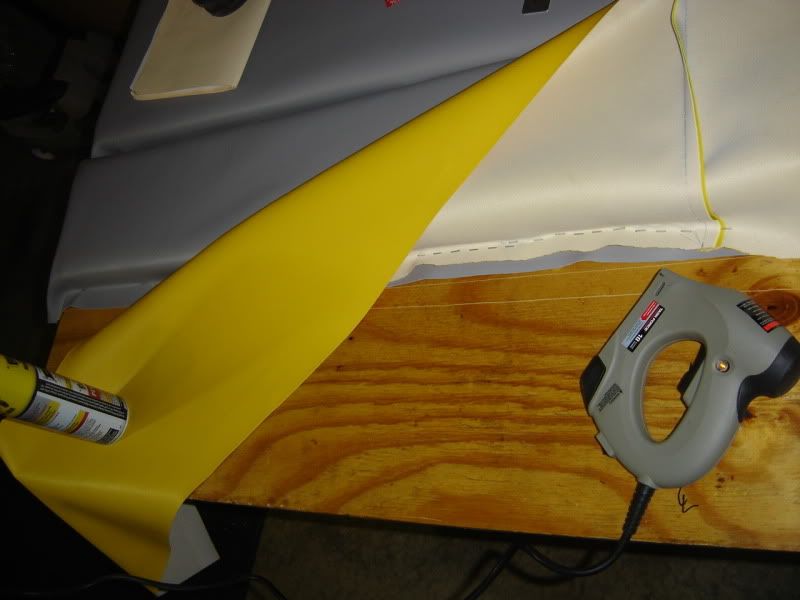
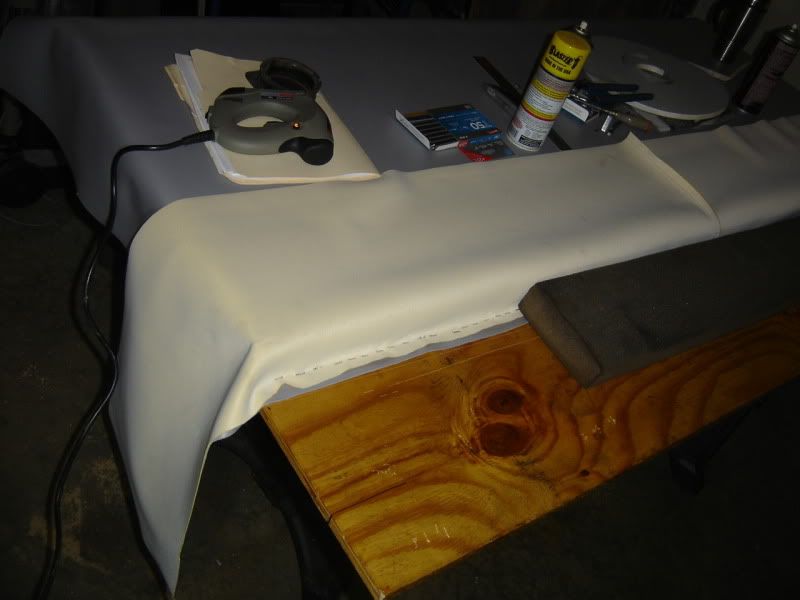
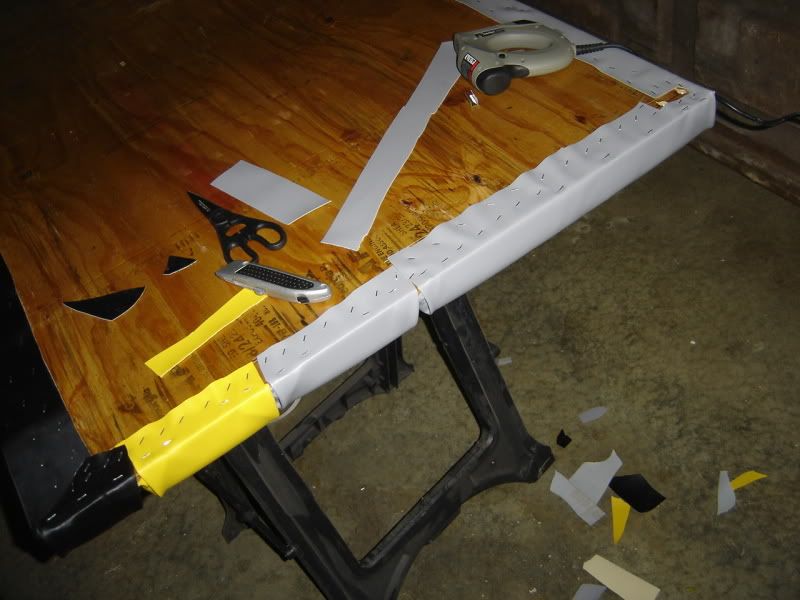
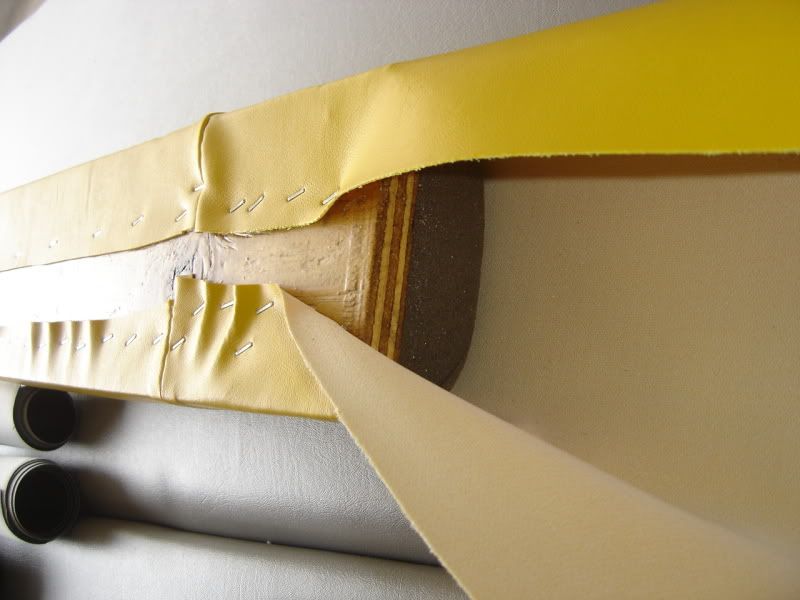
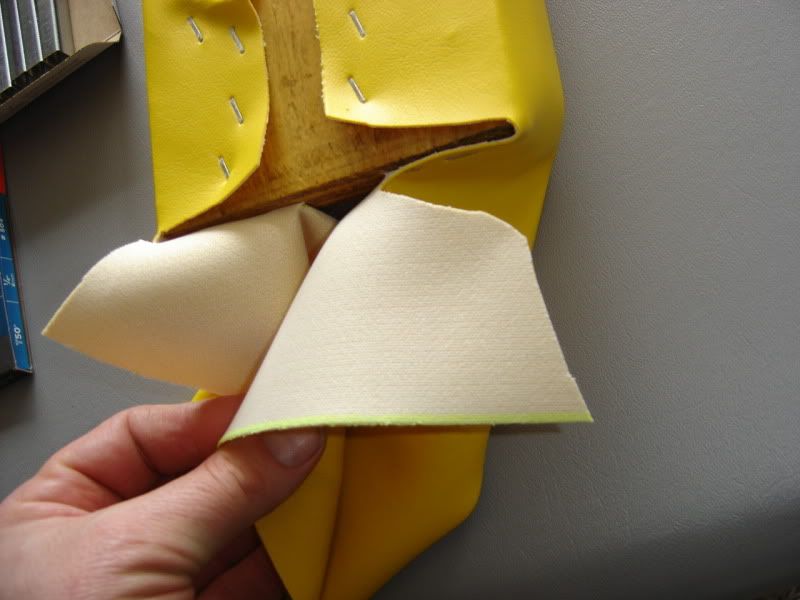
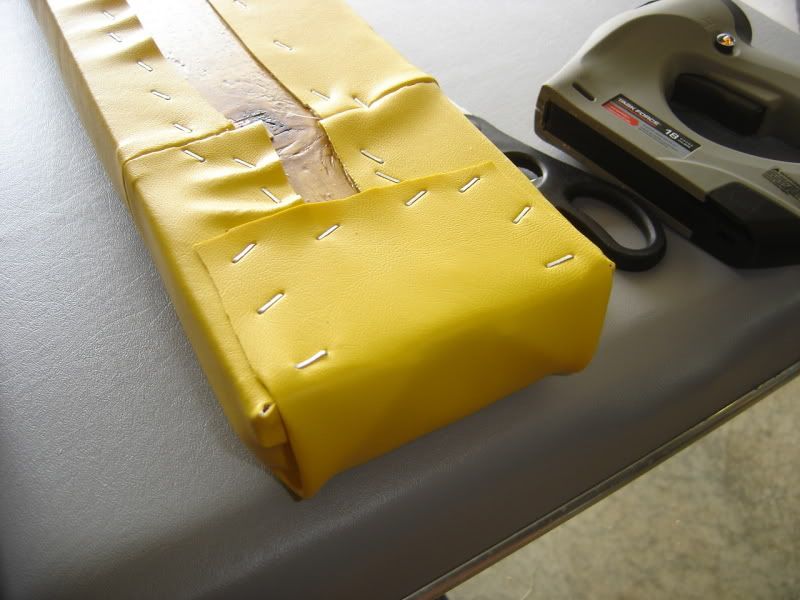
I cut the vinyl big enough to wrap almost all the way around with plenty on the ends also, trimmed to length later. I started in the middle and stapled down one side trying to keep it as straight as possible. I then went to the other side and started in the middle also. I grabbed the edge and stretched it around the plywood and foam to make it firm and then shot a few staples into it. Moved down about 9" and did it again, then filled inbetween them with more staples. This worked well and gave the pad a nice firm feel to it. this is where the first picture starts, with the ends not done.
For the ends, I leave it upside down and pull the sides over the end. I try to position it so the top corners are pulled in a bit and not loose. Once I "guess" where this is, I shoot one or two staples into each side to hold it in place. Try to keep them towards the outside, other wise it will limit you on how wide your end "fold over flap" will be. get the staples too far towards the middle and your flap will not be the full width of the plywood.
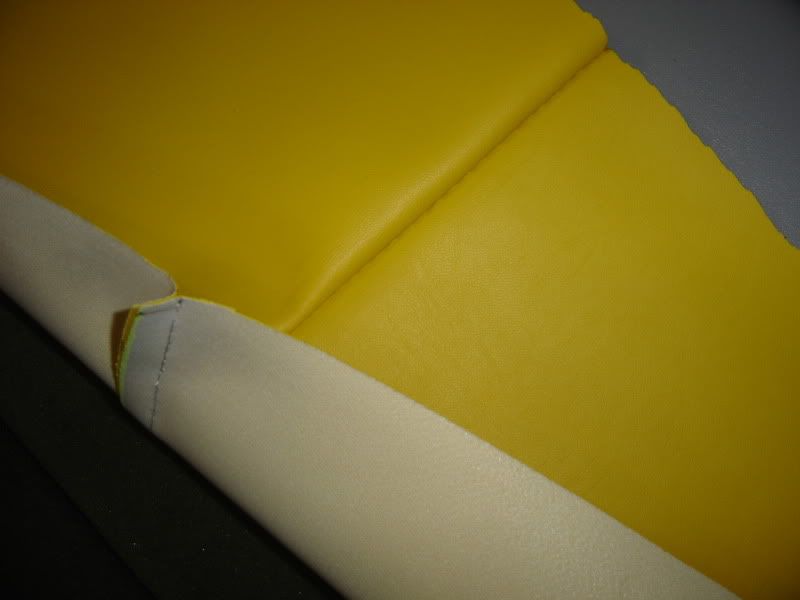
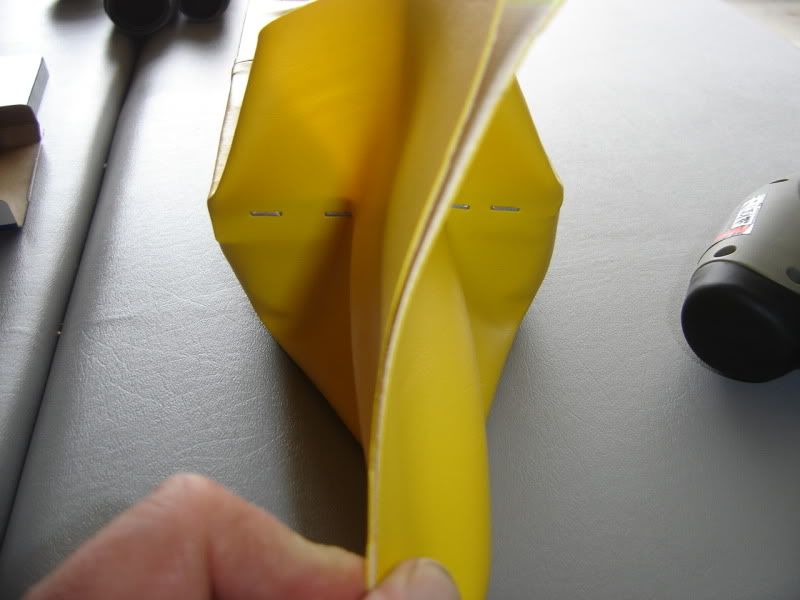
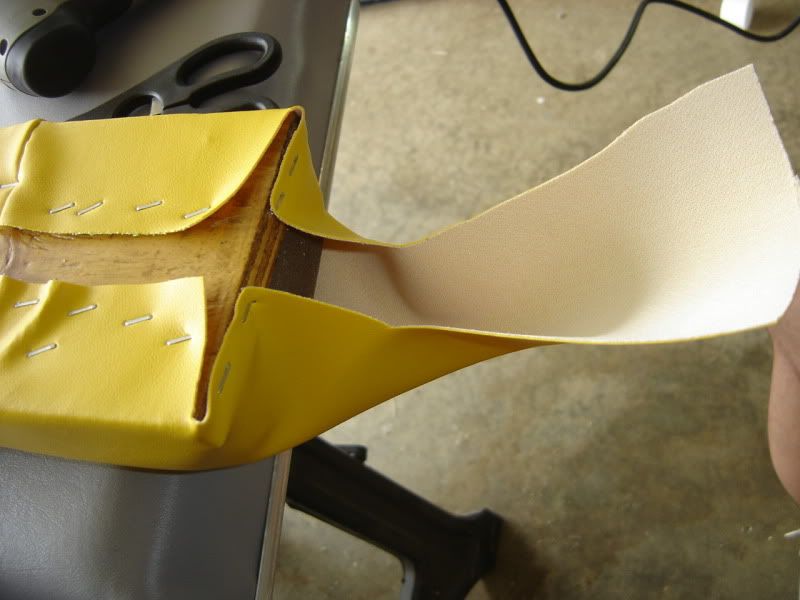
then starts the trimming. I cut the vinyl along the bottom edge of the plywood, both for the vinyl on the bottom of the ply and the vinyl stapled to the end of the ply.
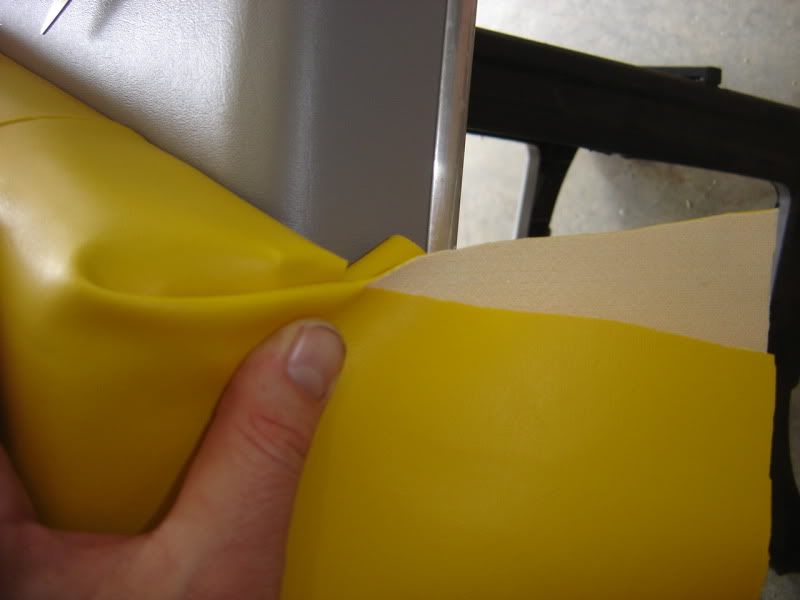
I then roll the pad upright and fold the vinyl end flap over and postion it so the vinyl crease is close to the corner of the plywood. I hold this in place with my thumb and cut up to it from the end of the flap (2nd to last pic)
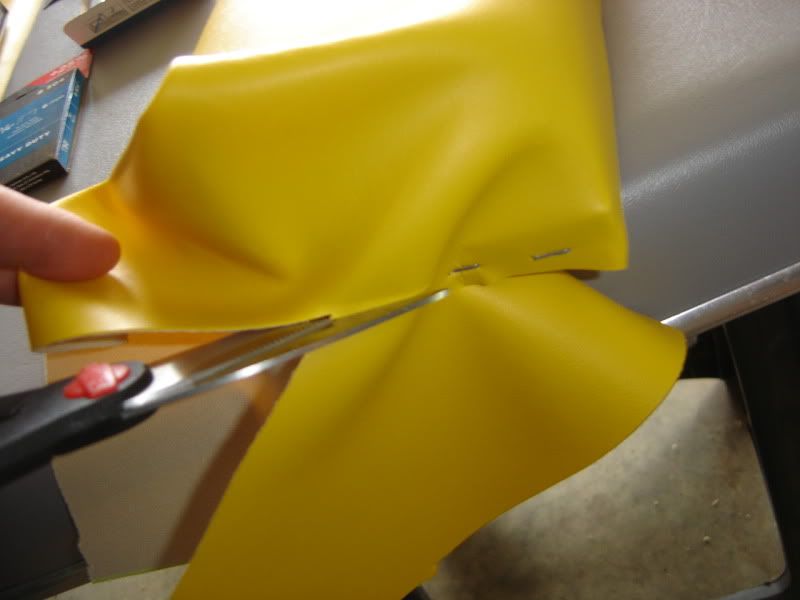
I then cut from the end of that cut to the end of the cut along the bottom edge of the plywood, and it is ready to be stapled to the bottom. (Note: The last picture shows the scissors ready to start making this last cut.)
In the next post I will show the resulting end vinyl ready to be folded and stapled.
Started by measuring the old piece of wood and cut a new piece of plywood, then several coats of urethane. (I have inside storage and do not leave the boat out, so should have some pretty limited weather exposure.) The piece of plywood is also the same size as the piece of foam. I use some spray adhesive to help hold the foam in place while doing the coverning, but it does not seem to last long term, just makes it tacky to limit slipping around.
I cut the vinyl big enough to wrap almost all the way around with plenty on the ends also, trimmed to length later. I started in the middle and stapled down one side trying to keep it as straight as possible. I then went to the other side and started in the middle also. I grabbed the edge and stretched it around the plywood and foam to make it firm and then shot a few staples into it. Moved down about 9" and did it again, then filled inbetween them with more staples. This worked well and gave the pad a nice firm feel to it. this is where the first picture starts, with the ends not done.
For the ends, I leave it upside down and pull the sides over the end. I try to position it so the top corners are pulled in a bit and not loose. Once I "guess" where this is, I shoot one or two staples into each side to hold it in place. Try to keep them towards the outside, other wise it will limit you on how wide your end "fold over flap" will be. get the staples too far towards the middle and your flap will not be the full width of the plywood.
then starts the trimming. I cut the vinyl along the bottom edge of the plywood, both for the vinyl on the bottom of the ply and the vinyl stapled to the end of the ply.
I then roll the pad upright and fold the vinyl end flap over and postion it so the vinyl crease is close to the corner of the plywood. I hold this in place with my thumb and cut up to it from the end of the flap (2nd to last pic)
I then cut from the end of that cut to the end of the cut along the bottom edge of the plywood, and it is ready to be stapled to the bottom. (Note: The last picture shows the scissors ready to start making this last cut.)
In the next post I will show the resulting end vinyl ready to be folded and stapled.
04-15-2012, 04:22 PM
#67
Registered
Thread Starter
So the first picture shows the results of the vinyl cutting from the previous post. At this point I fold the end and pull the flap over the bottom of the plywood. Move it around untill the corners are where you want them, the vinyl is taunt, and staple away! Trim the vinyl back to the finished length and you are done.
Now, it is not a nice square end with piping and what not, but I do not have the machinery to do that. I am also cheap. I will spend good money on glass supplies and hull hardware, but vinyl seats? Peoples butts go on them! Just the way I am. Keep in mind that other pads go on either side of this and the side arm rest goes against the end. I am looking forward to fitting this to the boat as I doubt you will be able to see anything except the top inch or less of it.
If others have a different or better way of recovering these seat pads themselves, i would love to see it. The more this information is shared, the better. Compared to what the interior of this looked like when I got it, this is a dramatic improvement. No where near close to a new Formula, but the price is right. I figure for under $150, I redid the four side trim pieces in the cockpit, rebuilt and restained the two bucket seats and rear bench sides, recovered two of the six rear seat pads and built a new engine hatch cover. Not bad in my book. And I can say I did it!
Brian
04-27-2012, 01:42 PM
#68
Registered
Thread Starter
Well, still making progress, some forward, some backwards....
Got the white cushion redone for the seat, so 2 out of the six are new with all new on the hatch cover, side arms repainted! Interior is ready to go back in and I am itching to see it, but it is not going outside untill the motors are in and done, no grease!
Got the starboard transom assembly on this morning. Still need to hook up the hydraulic lines and attache the bottom section of blower hoses. Where do others run them? I figure try to get them both under the starboard motor? Seems like the port side would be lacking then. The transom is looking good. Mostly cleaned up, refinished exhaust tips in, looking cool.
Also learned something on my old motors. Was cleaning up and we were stripping the "cracked" one down. It is a Jasper marine motor, two piece rear main seal bored 0.040 over. Thought cyclinder #1 was cracked, but now it feels smooth. I think it was just a rust line from when we cracked the heads off and water dripped down there. Feels really nice and the motor looks pretty new. So, once the boat is done I am going to take the block in, have it tanked and fluxed. If OK, I will have it honed and put it back together. Either keep it as a spare short block with flywheel, or find a small boat project for it. Maybe a jet for the kids....
Also need new 3" exhaust elbows, that salt water ate the crap out of mine, wow! The manifolds look good, but the risers are major corrosion at the outlets. The other brand, GLM <sp> are available for around $100+ each, not sure if I want to dump the $450 or so into new risers, not overly impressed with them. May go another route.... we will see.
Kinda burned out right now. Think I will spend some time with family this weekend and go see a friend who just got his Shrike for the M16 and play with that. Hit it again on Monday.
Brian

