

Replacement Merc 496 Fuel Rail
 09-30-2024, 09:24 AM
#1
VIP Member
Thread Starter
Guys,
As mentioned in my recent “Hurt 496”, thread, I am developing an “80% drop-in” replacement for the 496 fuel rail. The end user will have to plumb them in and provide their own fuel pressure regulator. All the fixturing is machined and ready to go to black oxide (as a rust preventative), and all the components for the rails are ready to start the welding process.
Here is the teaser:
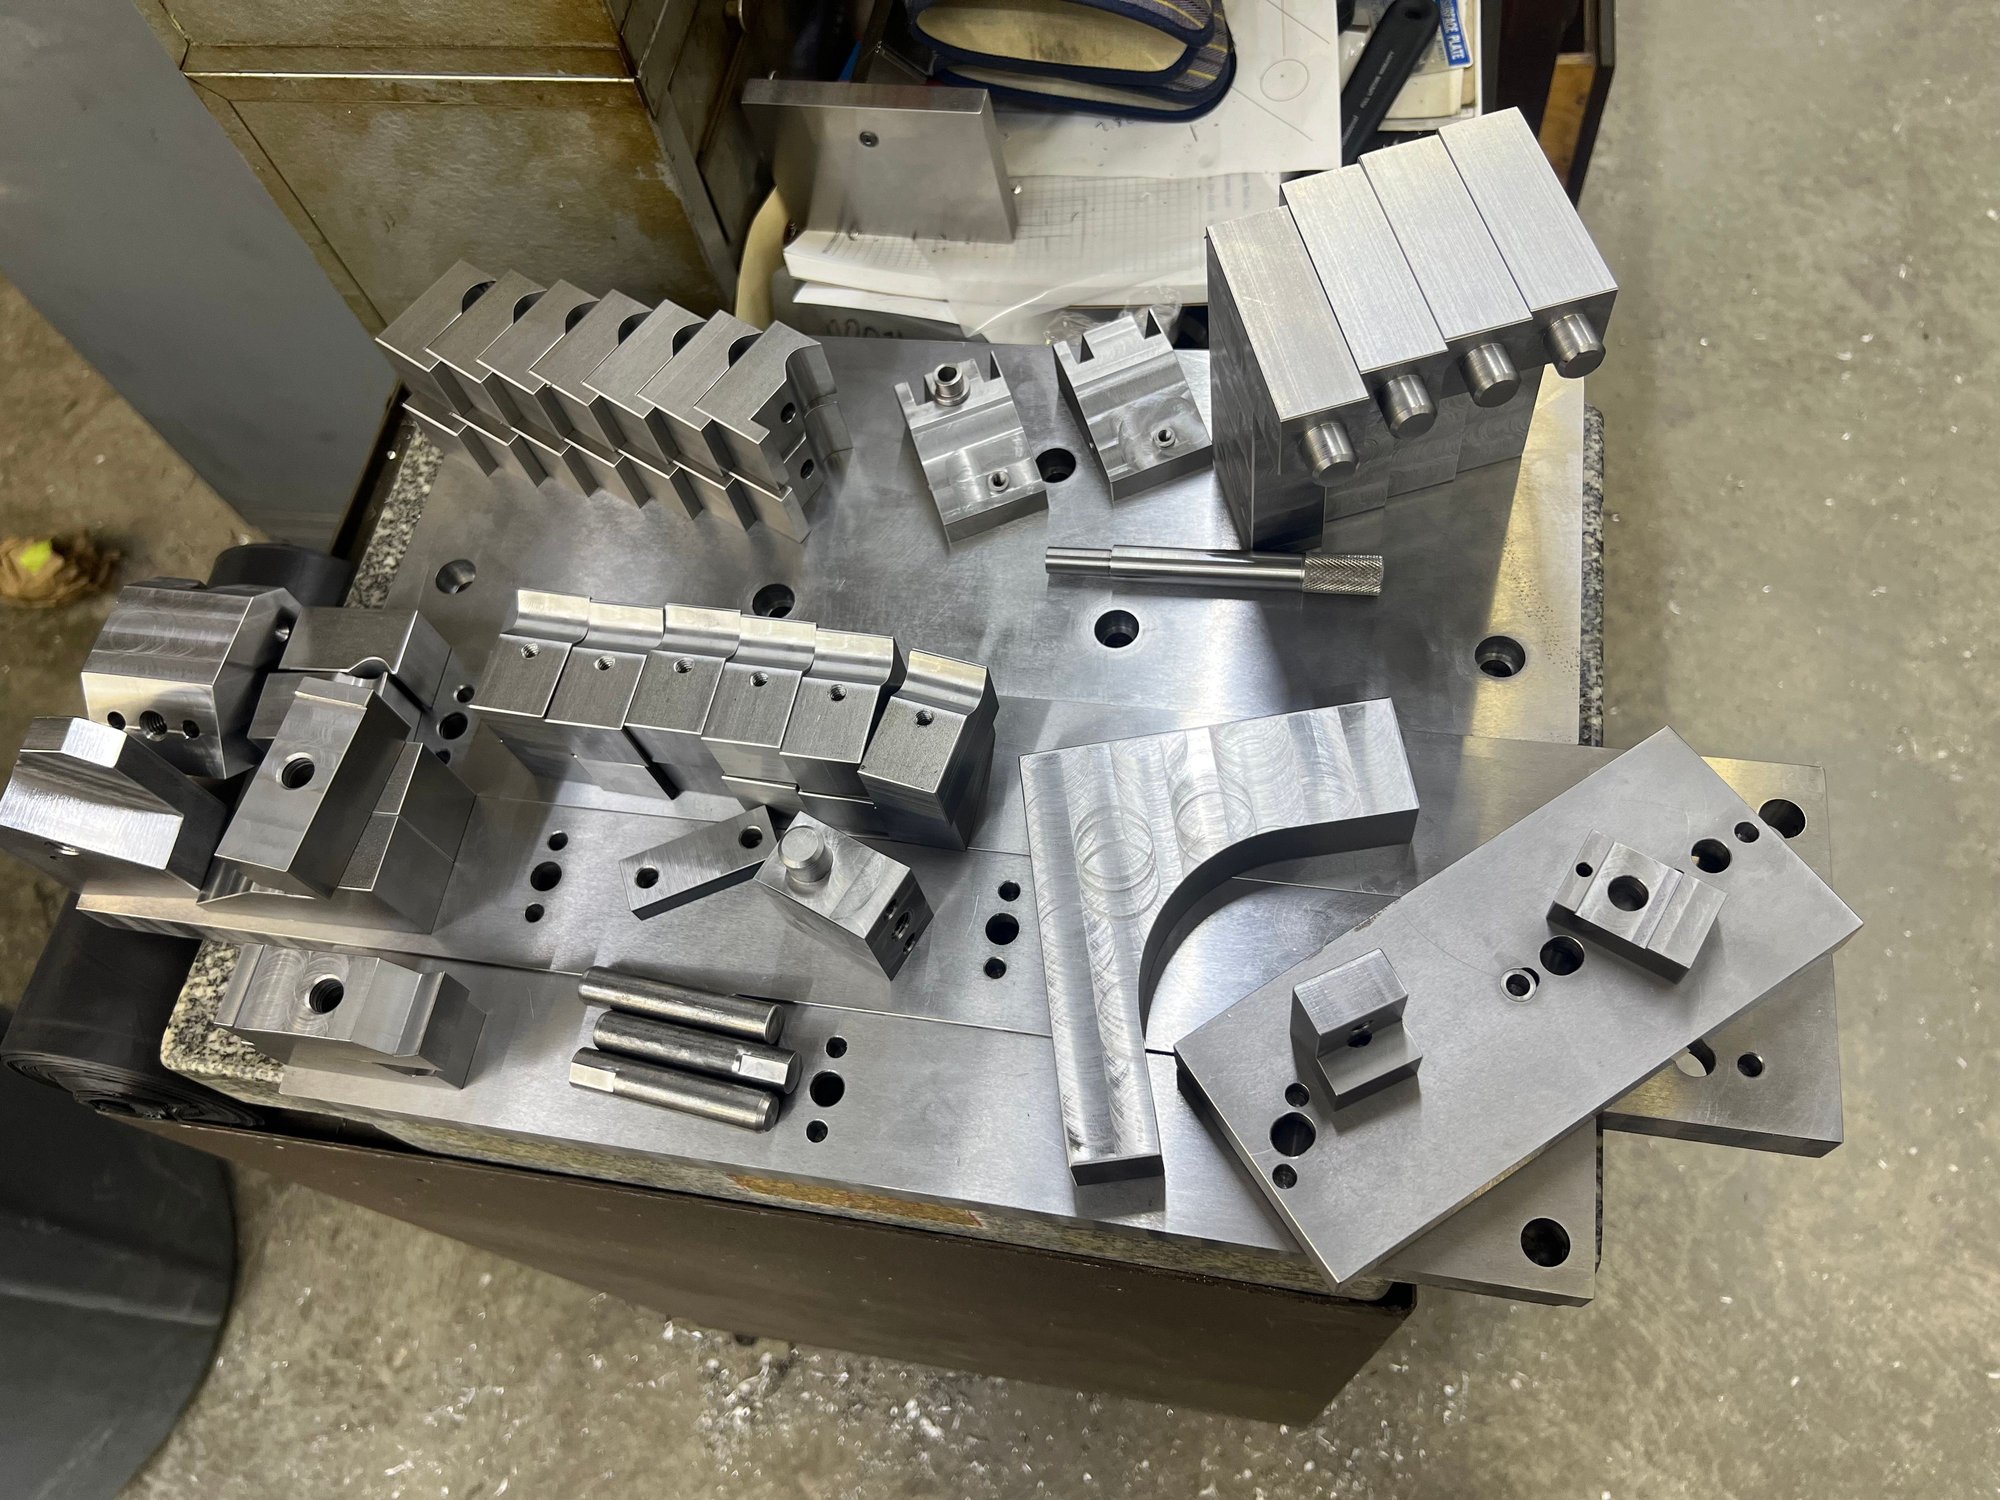
Fixturing components. There are four individual fixtures, each with their own place in the order of operations.
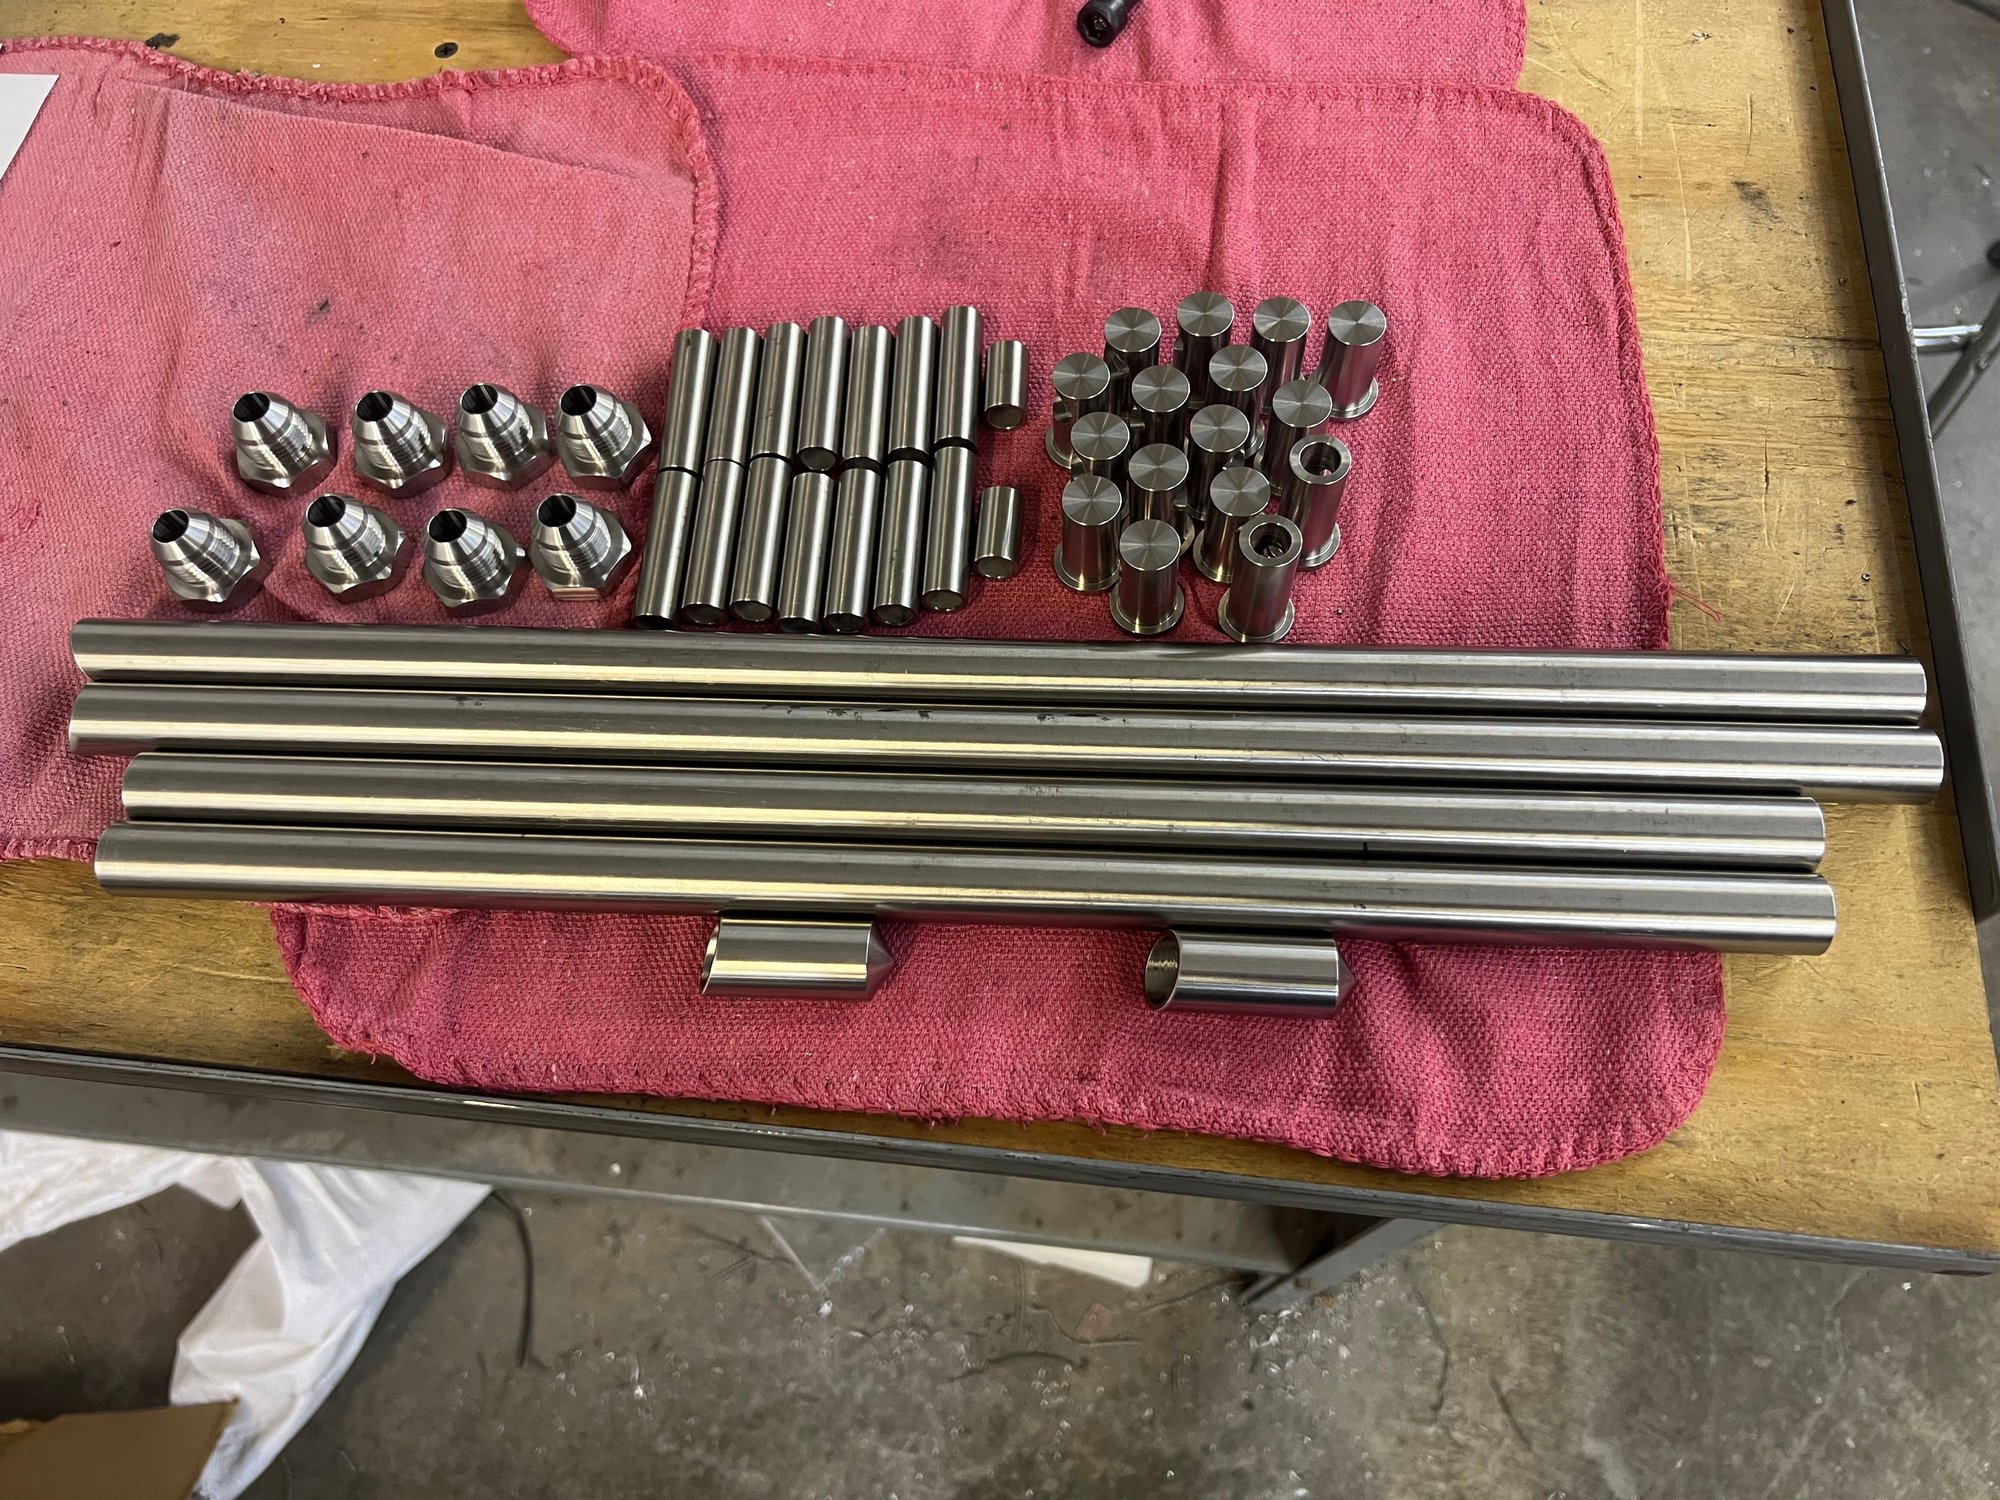
Rail components for two complete sets of rails. The injector cups and AN bungs are machined from bar stock. All 316ss. The mounting tabs, also 316ss, are not included in the pic, as I don't have them from the sheet metal shop yet, but will be included on the rails.
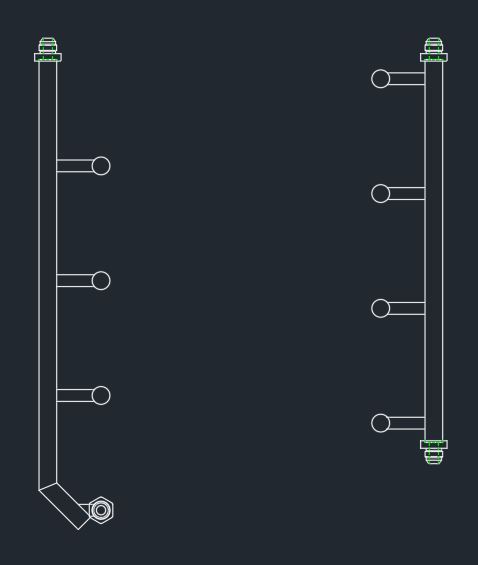
This is the layout, looking at the engine from the cockpit, toward the transom. My plan for mine is to supply the front port side, bridge across the rear and return from the starboard from, out the top of the injector cup. This should allow for the purging of air almost immediately.
More to come.
Thanks. Brad.
As mentioned in my recent “Hurt 496”, thread, I am developing an “80% drop-in” replacement for the 496 fuel rail. The end user will have to plumb them in and provide their own fuel pressure regulator. All the fixturing is machined and ready to go to black oxide (as a rust preventative), and all the components for the rails are ready to start the welding process.
Here is the teaser:
Fixturing components. There are four individual fixtures, each with their own place in the order of operations.
Rail components for two complete sets of rails. The injector cups and AN bungs are machined from bar stock. All 316ss. The mounting tabs, also 316ss, are not included in the pic, as I don't have them from the sheet metal shop yet, but will be included on the rails.
This is the layout, looking at the engine from the cockpit, toward the transom. My plan for mine is to supply the front port side, bridge across the rear and return from the starboard from, out the top of the injector cup. This should allow for the purging of air almost immediately.
More to come.
Thanks. Brad.
Last edited by Brad Christy; 09-30-2024 at 09:30 AM.

The following users liked this post:
87MirageIntruder (Today)
Today, 11:57 AM
#2
VIP Member
Thread Starter
Guys,
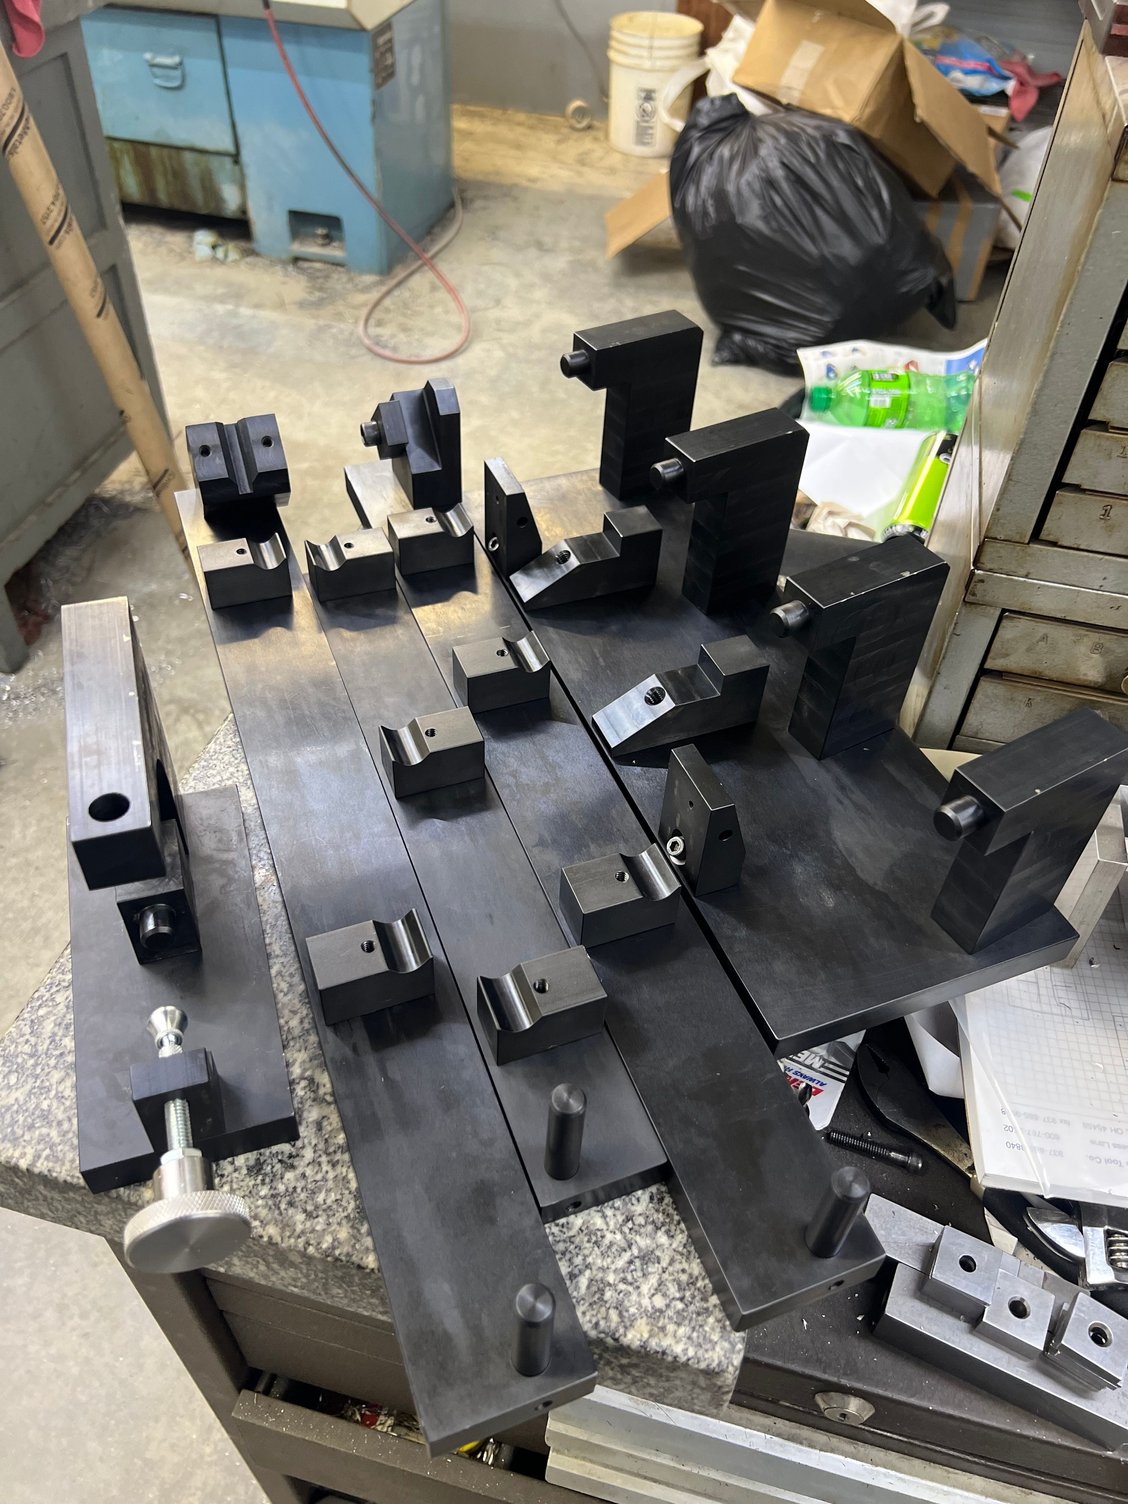
The gang of fixtures.
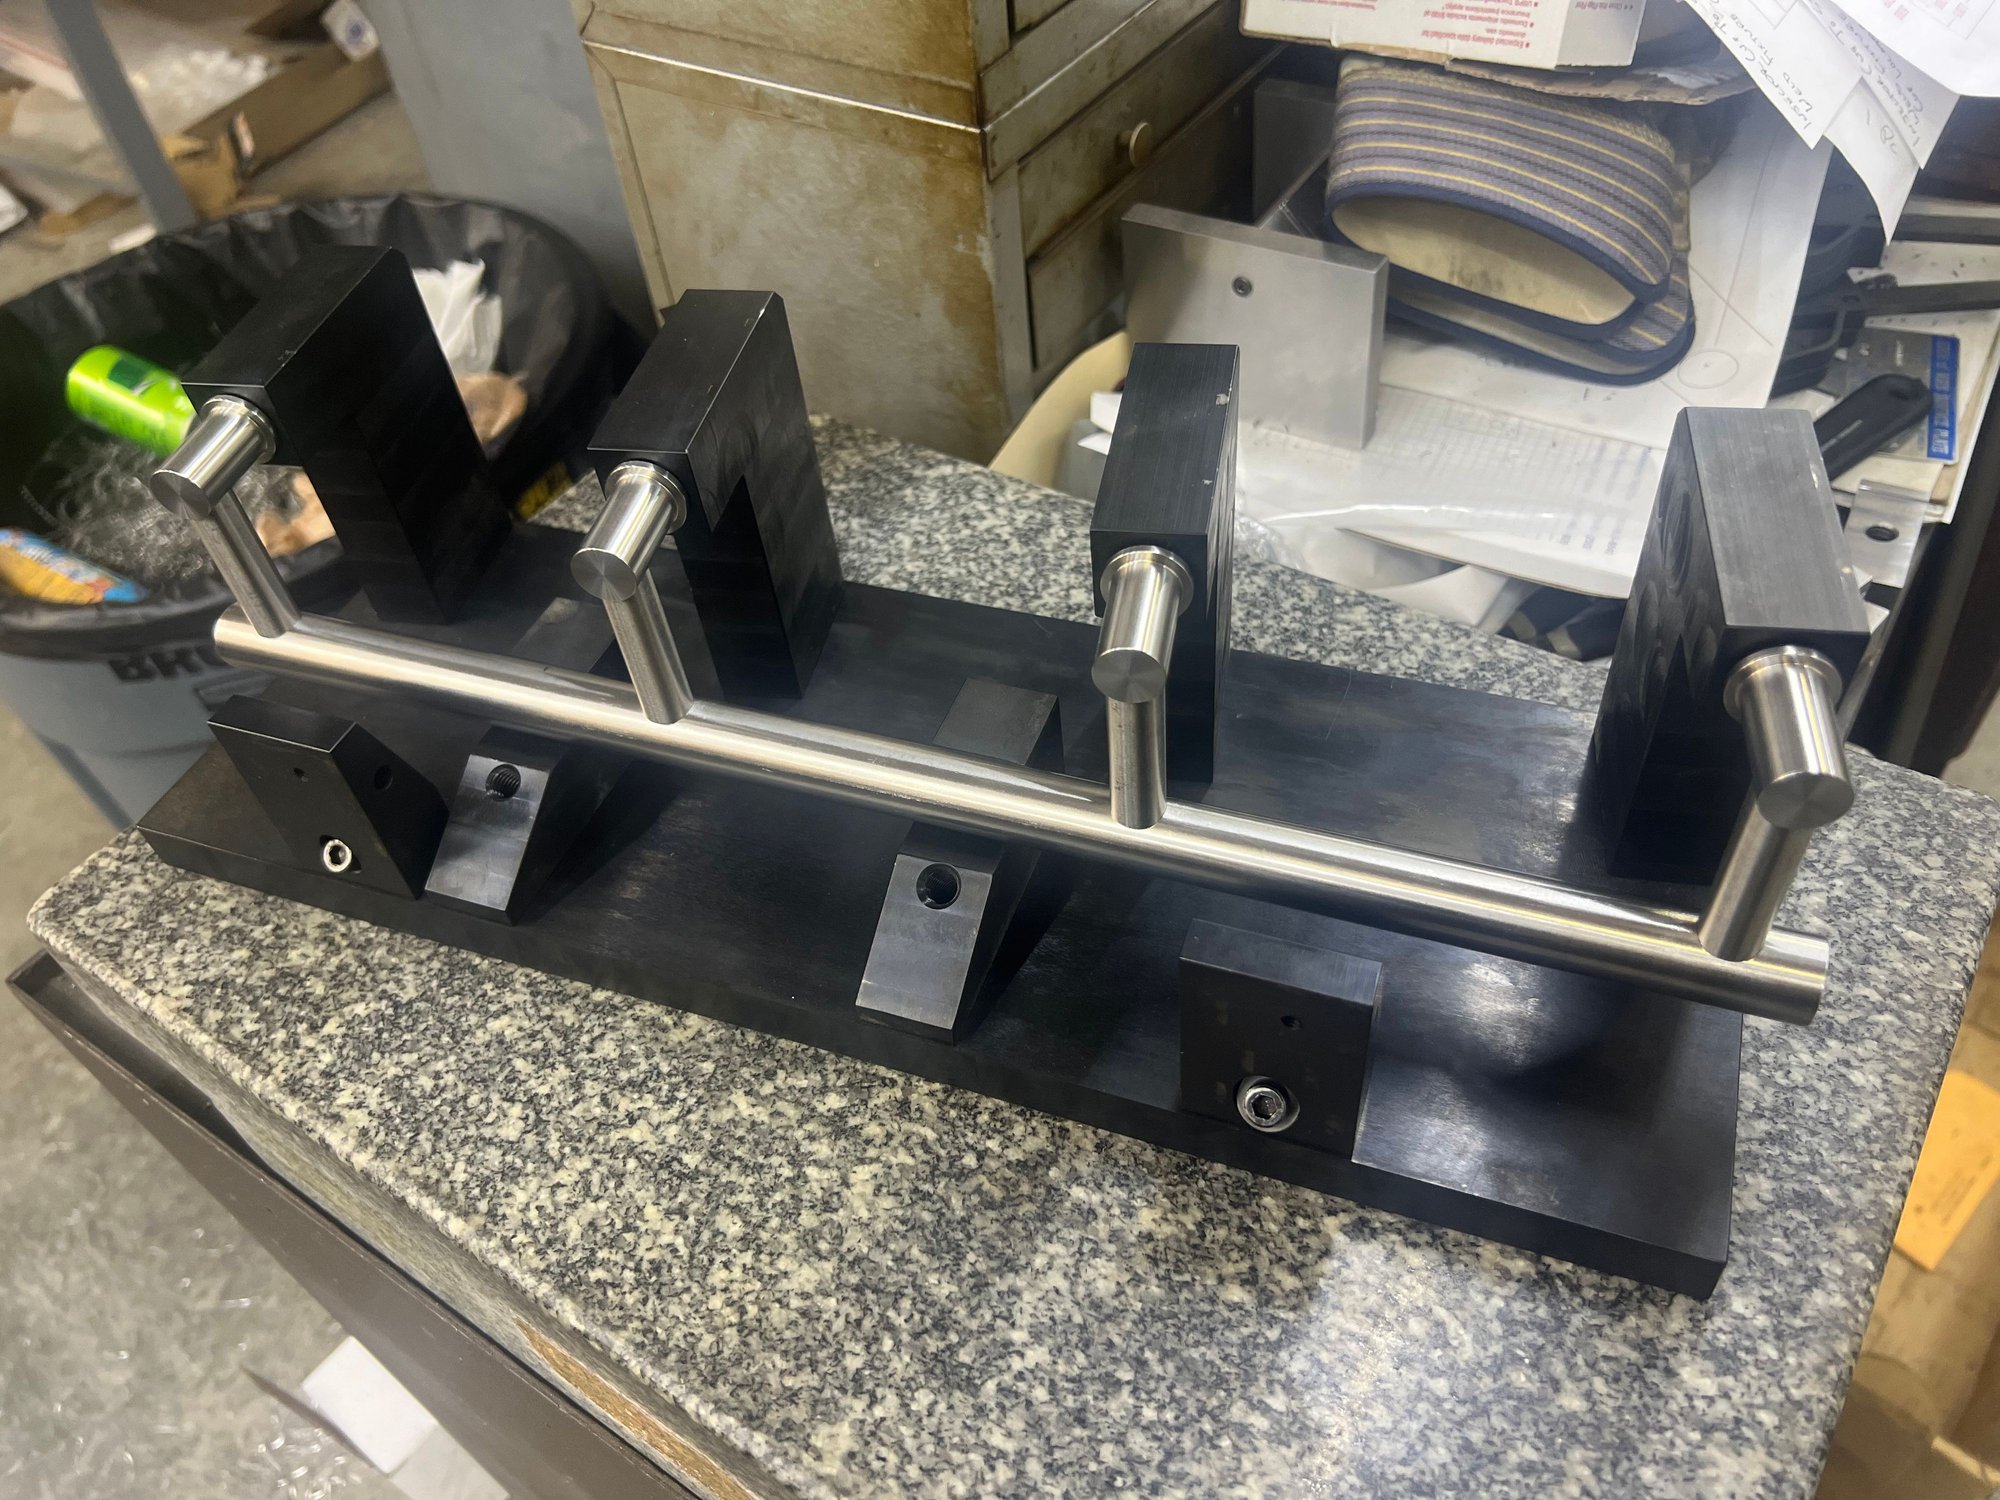
The final assembly welding fixture, with mock-up in place
This thing is coming together.
Thanks. Brad.
The gang of fixtures.
The final assembly welding fixture, with mock-up in place
This thing is coming together.
Thanks. Brad.
Last edited by Brad Christy; Today at 01:23 PM.
The following users liked this post:
87MirageIntruder (Today)


