

93 Mirage 232 Trovare build
 11-05-2013, 07:25 AM
#21
Gold Member
Join Date: Sep 2010
Location: LSC, MI
Posts: 1,087
Likes: 0
Received 0 Likes
on
0 Posts
My gimble ring is also worn and I will be sending it to JR Marine and then using their upgraded parts as well. You sure are getting a lot of work done quickly! I use a propane torpedo heater in the garage during the winter works good.
 11-14-2013, 04:58 PM
#22
Banned
Thread Starter
Join Date: Jun 2013
Location: AZ
Posts: 1,014
Likes: 0
Received 0 Likes
on
0 Posts
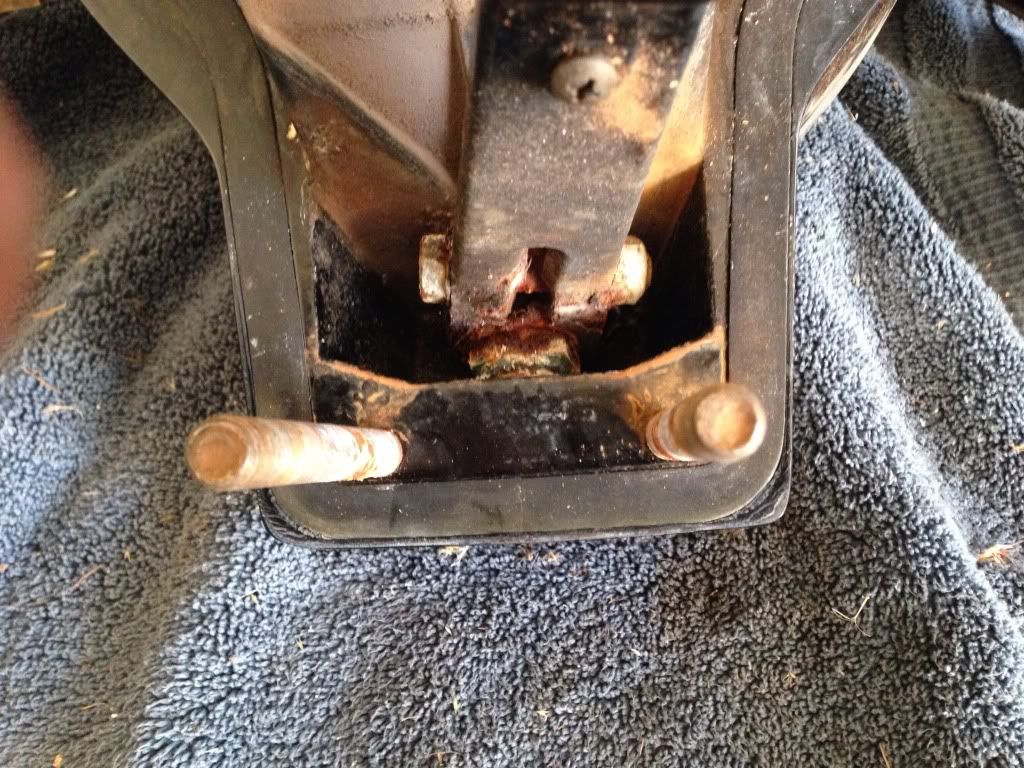
So I got some time during my sons nap to remove the complete transom plate today. It was pretty difficult and after a while beating the crap out of the studs(used a rubberized sledge), I found out why it would not just pop off....
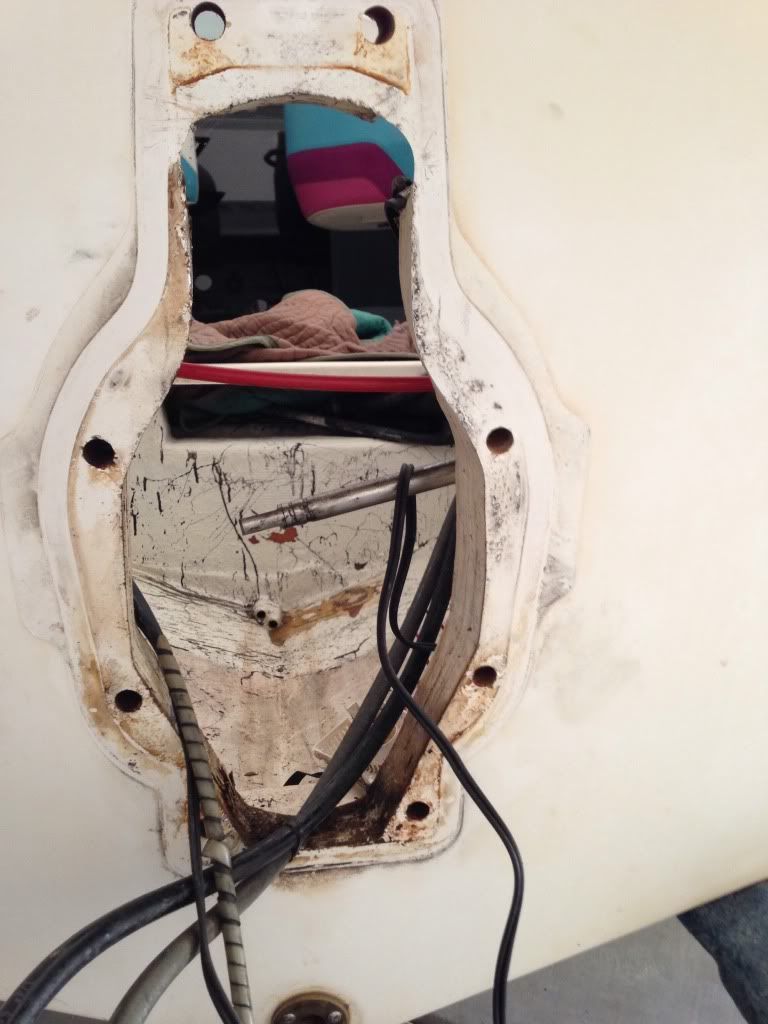
Guessing there might have been a leak... Maybe some salt water?
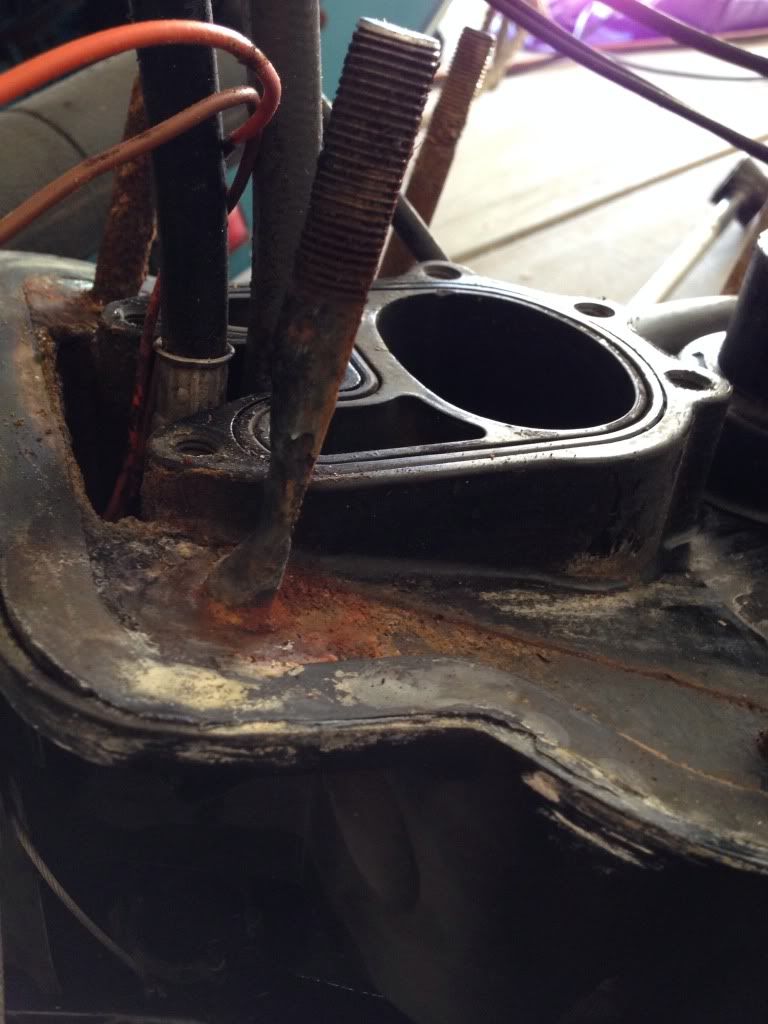
Other stud
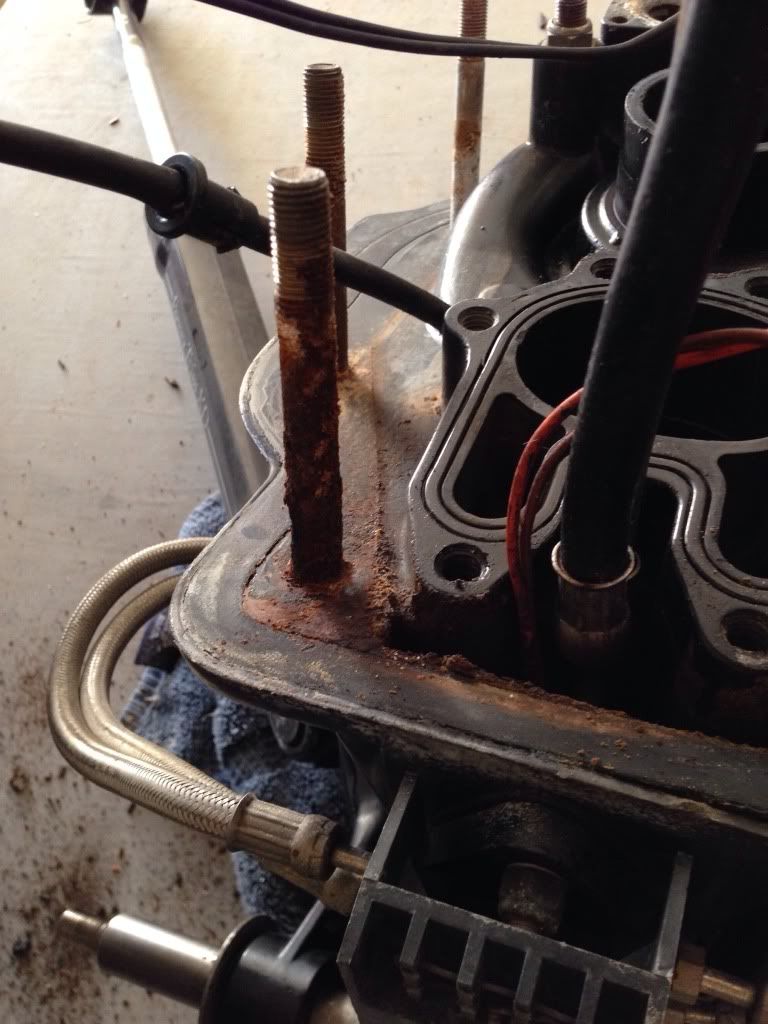
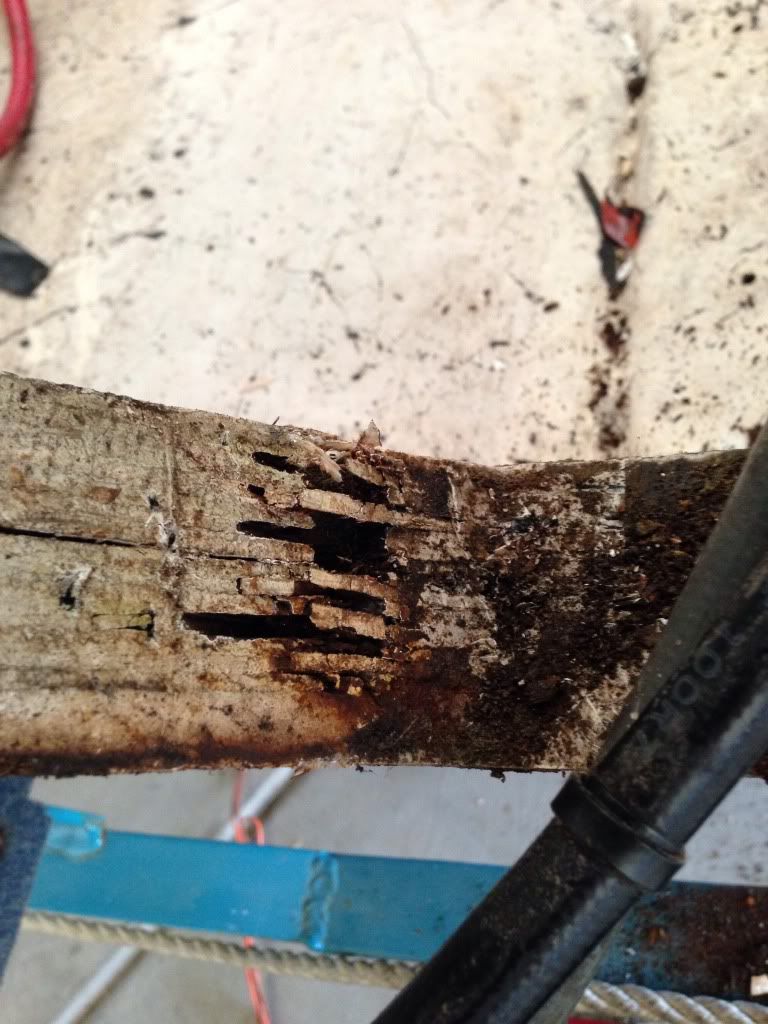
Tiller arm looks like its toast as well
The mounting hole in the transom is trashed, so I plan to just grind out the damaged area and maybe glass in some new wood, and re bore the hole. The rest of the transom is solid.
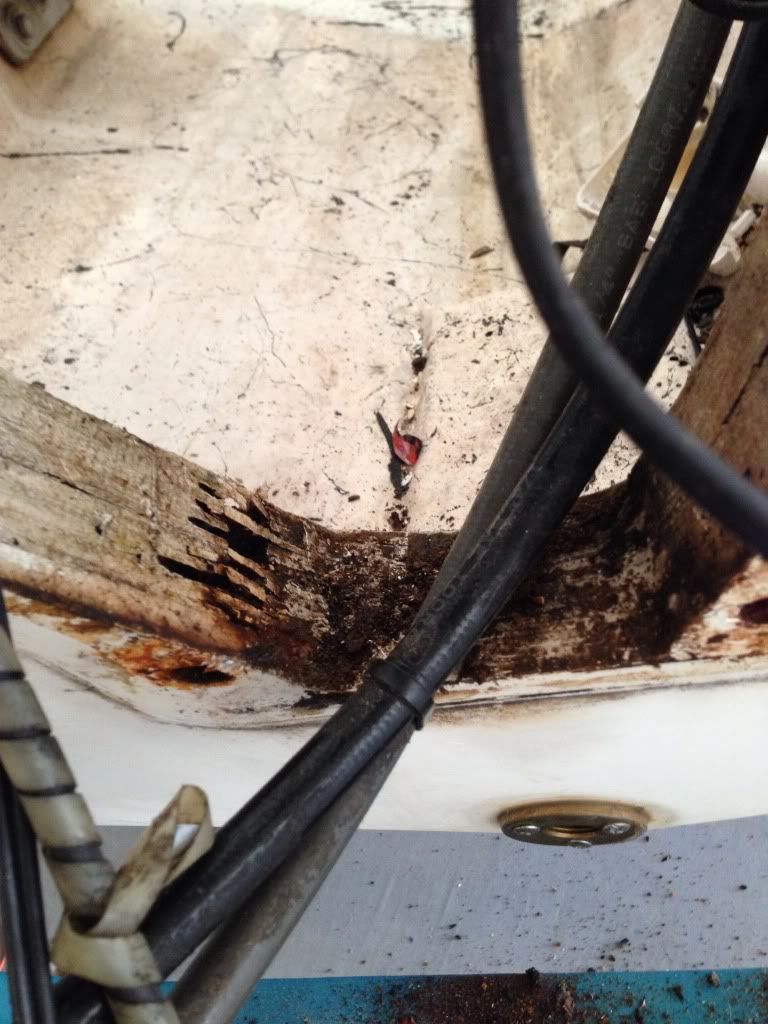
Hoping I can salvage the transome plate by a good soak with penetrating oil, some heat and my trusty pair of vice grips.
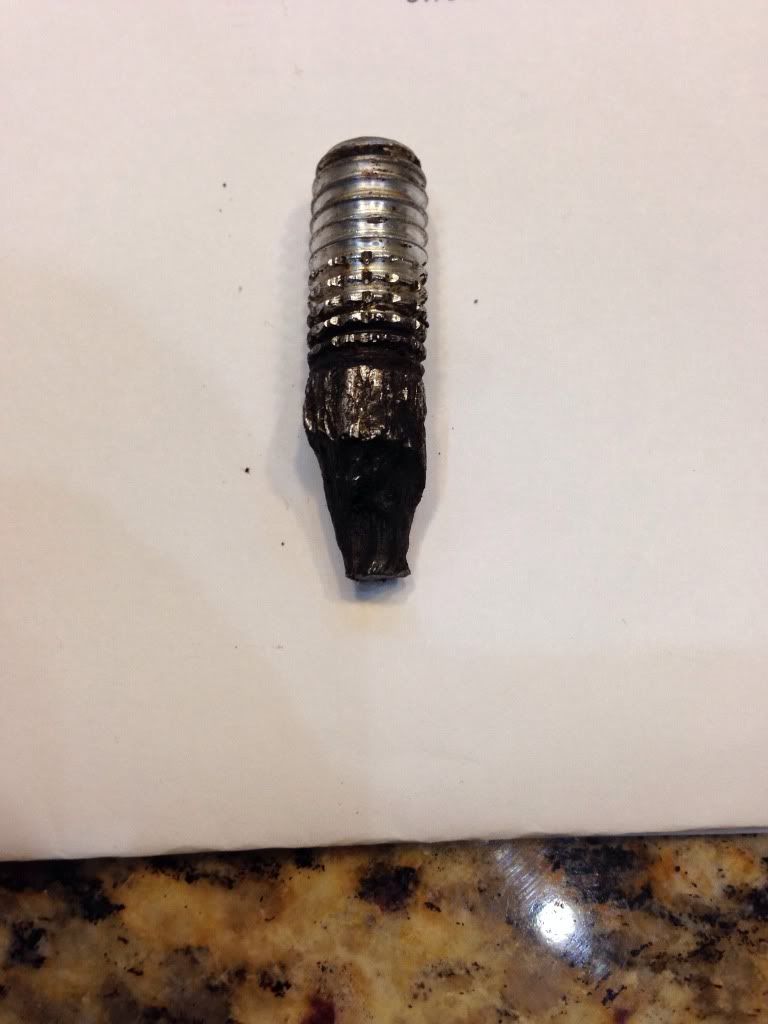
UPDATE: Soaked the badly corroded stud for about 30 mins, and lightly heated the back of the transom plate to get some expansion. And this happened which I kind of expected....
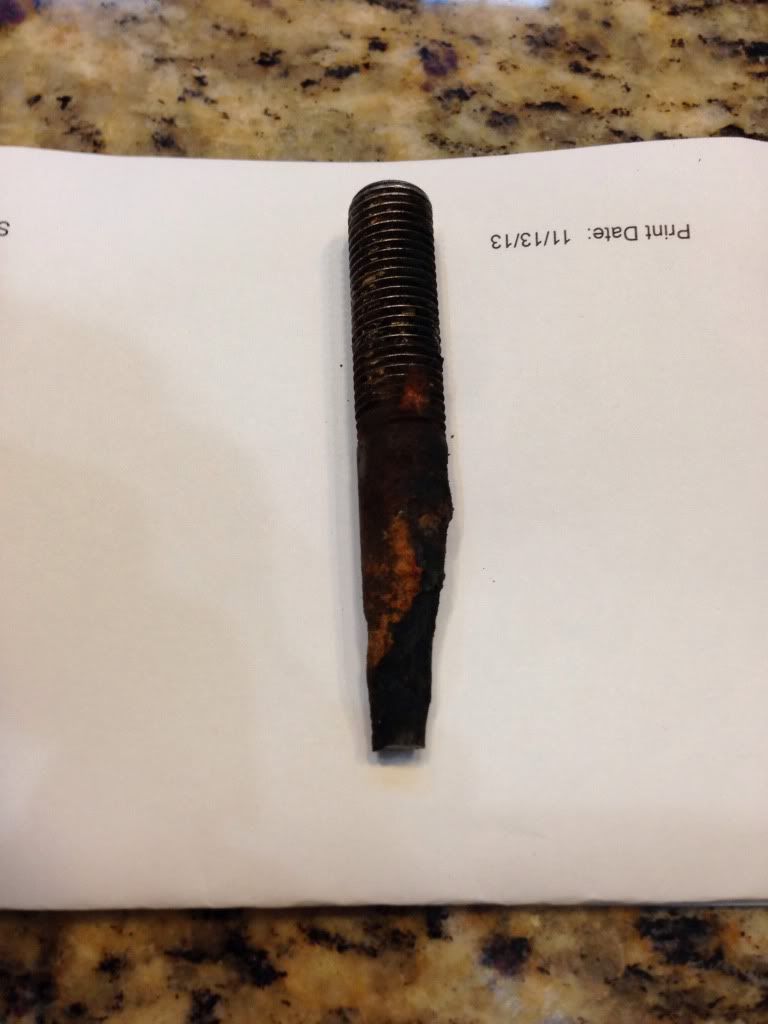
Fortunately, there was just enough material to get it out. To be honest, I figured this would need to be sent out to JR as well. All in all I'm happy, as I had planned to replace all of the studs anyways.
Guessing there might have been a leak... Maybe some salt water?
Other stud
Tiller arm looks like its toast as well
The mounting hole in the transom is trashed, so I plan to just grind out the damaged area and maybe glass in some new wood, and re bore the hole. The rest of the transom is solid.
Hoping I can salvage the transome plate by a good soak with penetrating oil, some heat and my trusty pair of vice grips.
UPDATE: Soaked the badly corroded stud for about 30 mins, and lightly heated the back of the transom plate to get some expansion. And this happened which I kind of expected....
Fortunately, there was just enough material to get it out. To be honest, I figured this would need to be sent out to JR as well. All in all I'm happy, as I had planned to replace all of the studs anyways.
Last edited by Borgie; 11-14-2013 at 09:49 PM. Reason: Spelling
11-14-2013, 06:00 PM
#24
Banned
Thread Starter
Join Date: Jun 2013
Location: AZ
Posts: 1,014
Likes: 0
Received 0 Likes
on
0 Posts
11-21-2013, 10:47 AM
#25
Banned
Thread Starter
Join Date: Jun 2013
Location: AZ
Posts: 1,014
Likes: 0
Received 0 Likes
on
0 Posts
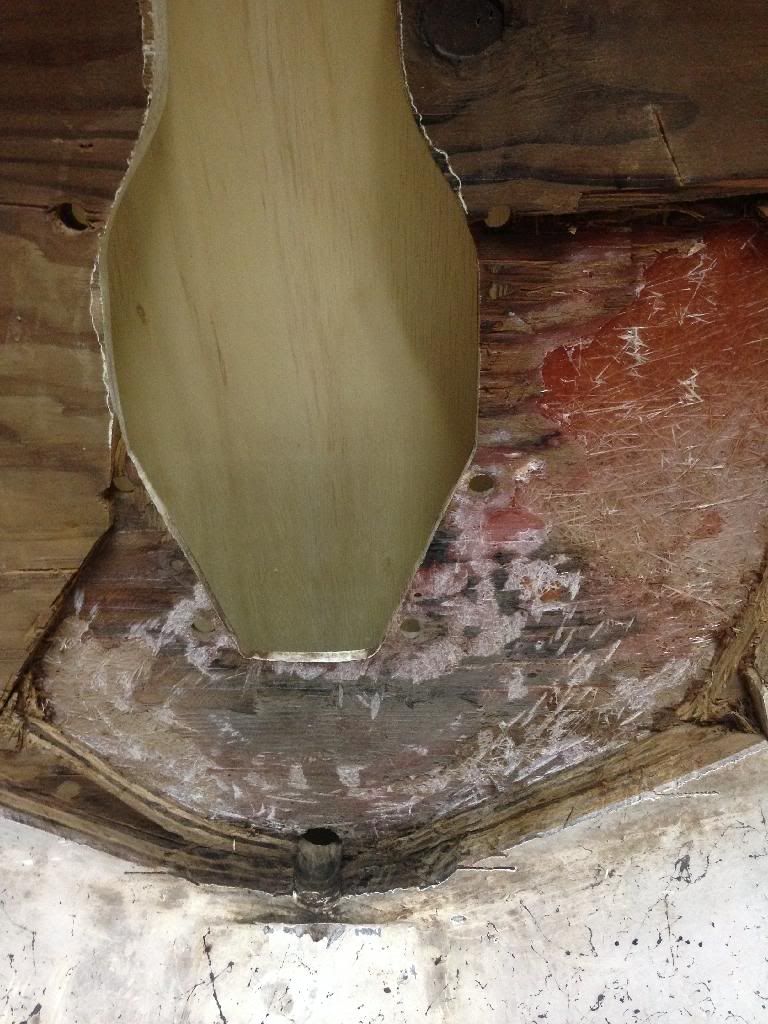
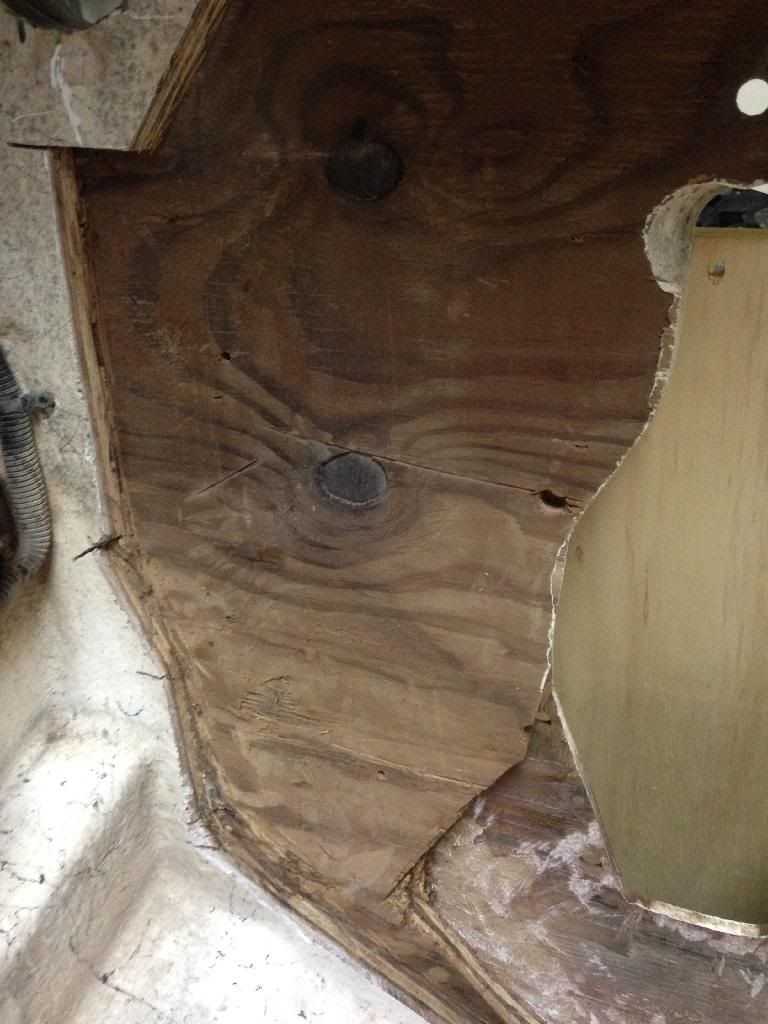
Now that everything has been removed from the transom I was able to take a closer look at the transom opening. Looks like the bottom half is rotten.... Drilled some pilot holes to confirm and it is soft on the bottom half. Going to see if I can get away with a partial replacement. Might just be better to do the entire transom. Oh and to top it off my iphone took a ride in the washing machine..... Maybe I should go buy on lottery ticket, on second thought.... Should have more pics in a few days
11-23-2013, 06:02 PM
#26
Registered
For the bilge paint the stuff I'm using is just a white rustoleum with a epoxy hardener. Dries fast and hard and don't stain at all...the hardener you can get at tractor supply
11-25-2013, 11:31 AM
#27
Banned
Thread Starter
Join Date: Jun 2013
Location: AZ
Posts: 1,014
Likes: 0
Received 0 Likes
on
0 Posts
I will be sure to update this thread with pictures and progress after my cell phone is replaced or functional. Not having one is a real PITA. Dont realize how much we rely upon technology for daily communication until its gone.
11-26-2013, 04:44 PM
#28
Banned
Thread Starter
Join Date: Jun 2013
Location: AZ
Posts: 1,014
Likes: 0
Received 0 Likes
on
0 Posts
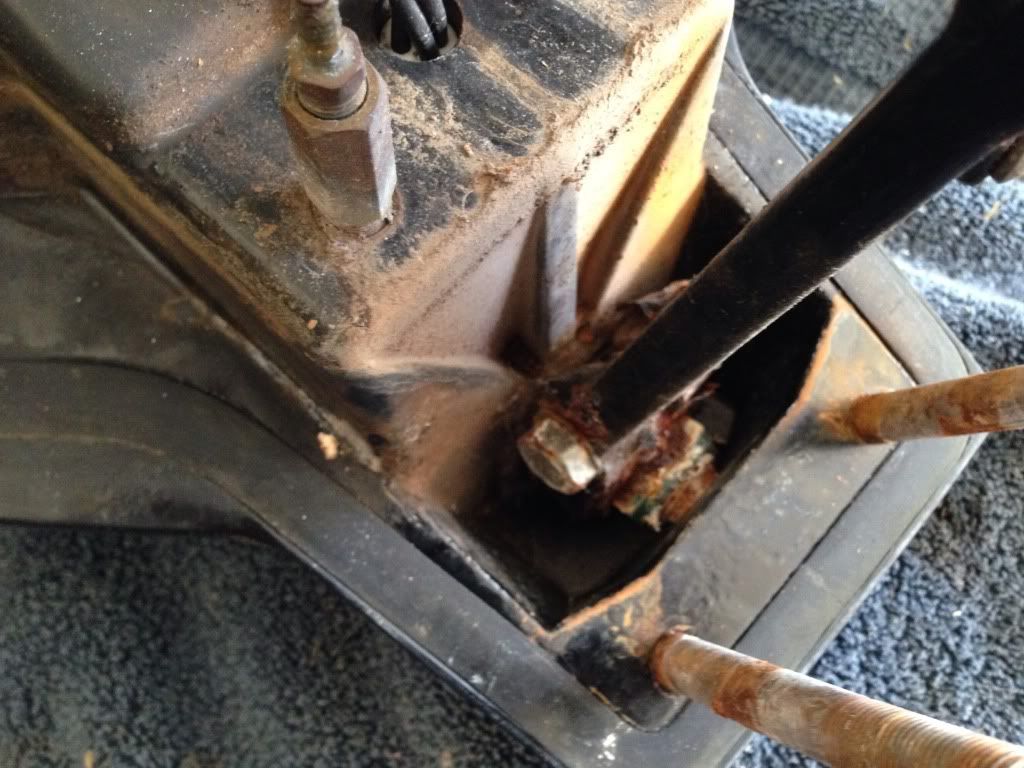
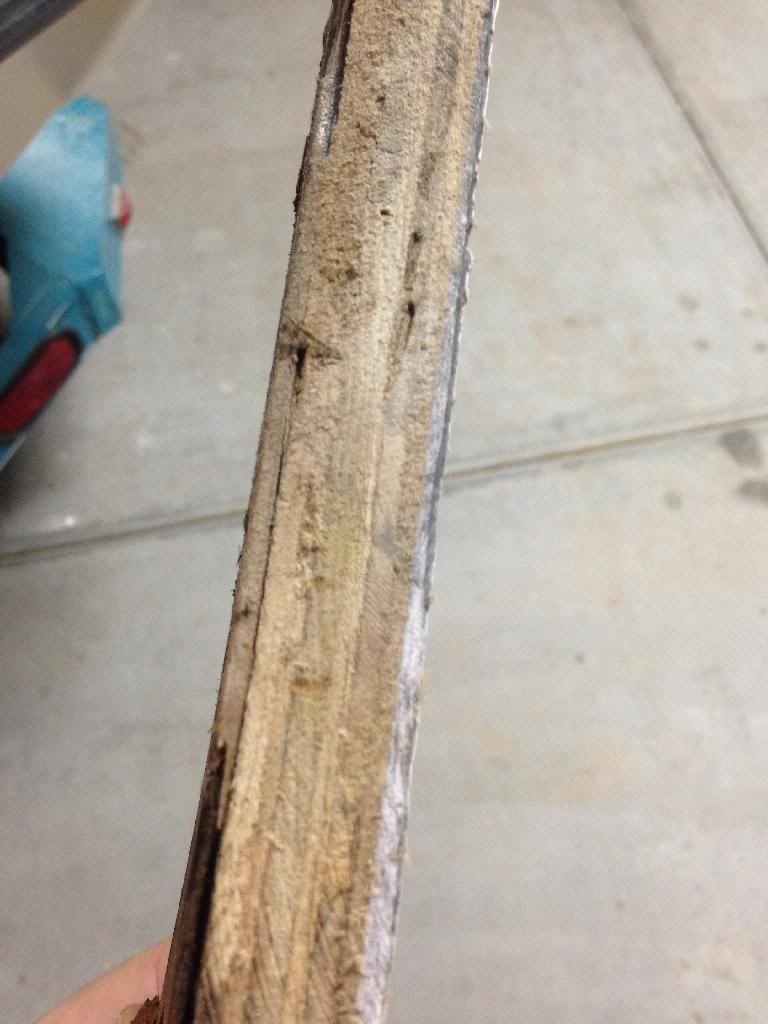
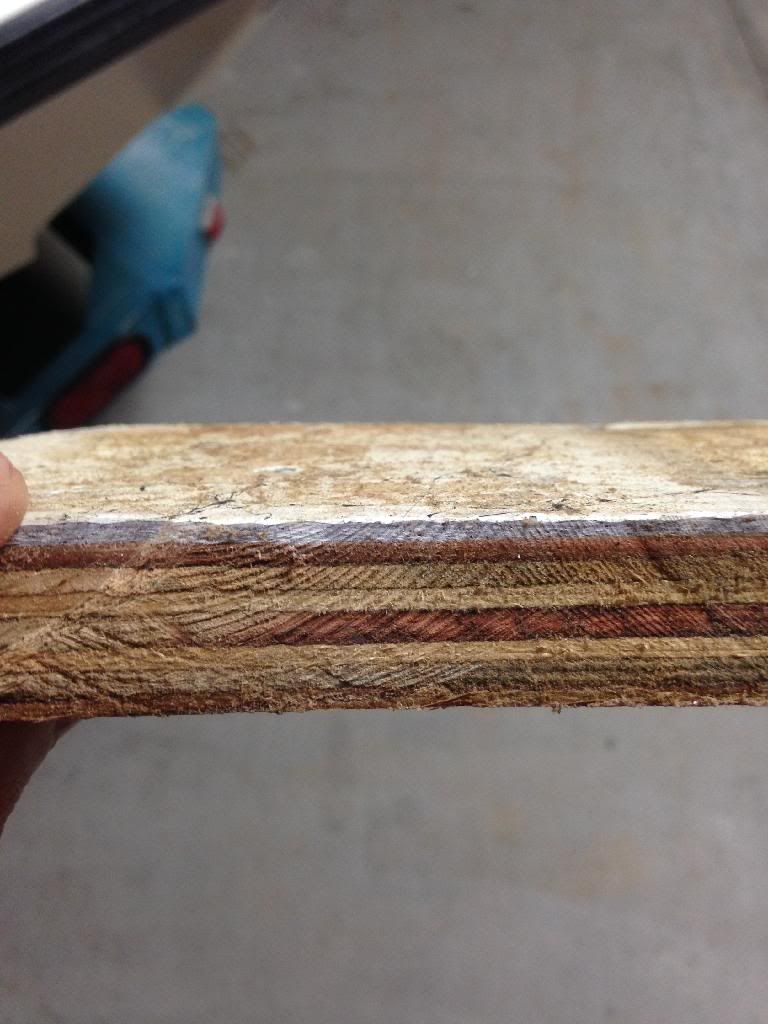
Over the weekend I bought a RotoZip saw and decided to do some exporitory cutting. The resulting damaged area( lower half) is exactly what I anticipated.
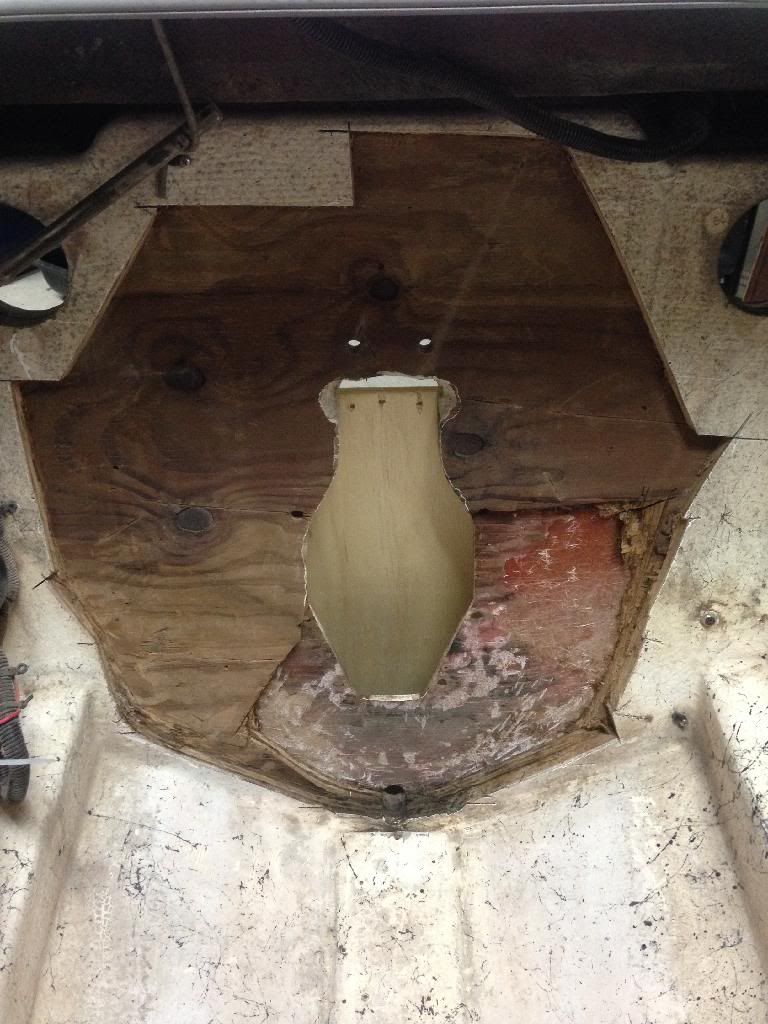
The bottom half was slightly damp in the middle with very little "Rot"
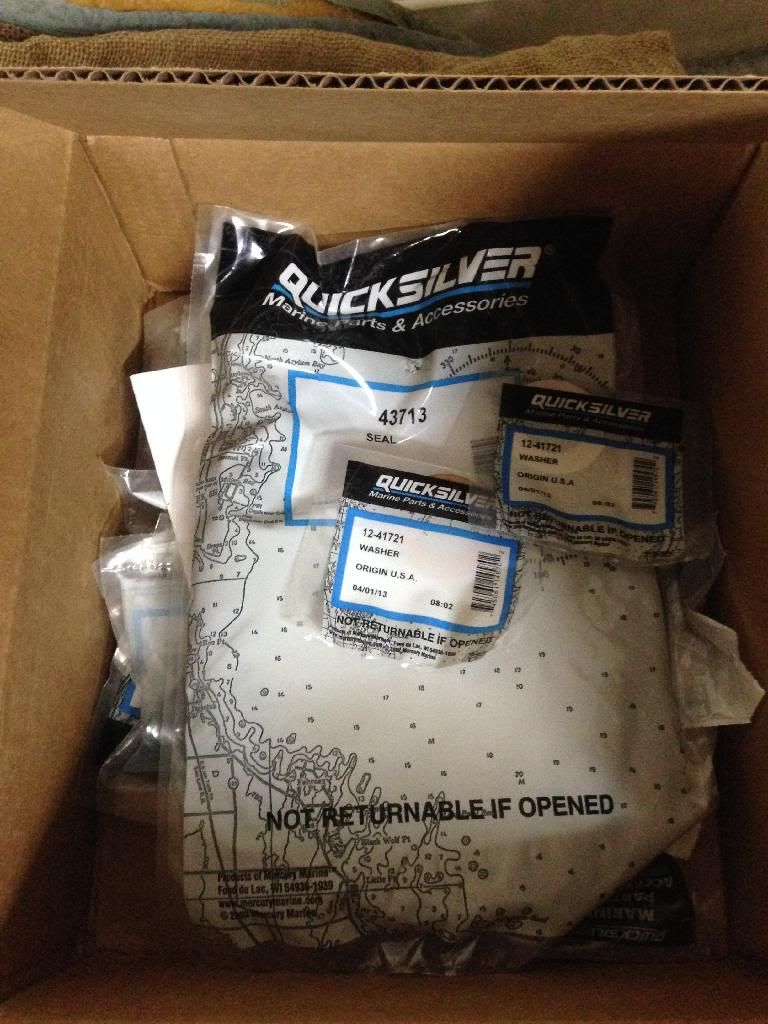
Box of goodies for the gimble and transom rebuild. Studs, washers, seals, gaskets, bolts and whatnot. Mercruiser "whatnots" are pretty damn expensive! Lol
Now it's time to decide if I'm going to remove the rest of the transom, or do a partial replacement, overlaying 3/4 plywood. Going with US Composites vinyl ester resin, 1708 biax and some assorted other things. Need to locate some fairly void free 3/4 outdoor plywood. If I opt to replace the entire transom, I plan on relocating the drive cutout to gain some speed while I'm at it. Decisions....decisions!

The bottom half was slightly damp in the middle with very little "Rot"


Box of goodies for the gimble and transom rebuild. Studs, washers, seals, gaskets, bolts and whatnot. Mercruiser "whatnots" are pretty damn expensive! Lol

Now it's time to decide if I'm going to remove the rest of the transom, or do a partial replacement, overlaying 3/4 plywood. Going with US Composites vinyl ester resin, 1708 biax and some assorted other things. Need to locate some fairly void free 3/4 outdoor plywood. If I opt to replace the entire transom, I plan on relocating the drive cutout to gain some speed while I'm at it. Decisions....decisions!
Last edited by Borgie; 11-26-2013 at 05:02 PM.
11-27-2013, 01:38 PM
#29
Banned
Thread Starter
Join Date: Jun 2013
Location: AZ
Posts: 1,014
Likes: 0
Received 0 Likes
on
0 Posts
Ok after contemplating this and speaking with several pros, I've decided to do the complete transom with laminated 3/4 plywood (same as original but better wood). Now I need to calculate materials and order all of my glass supplies. Going to finish scarfing out the entire transom this week if time allows. Pics to follow!
12-13-2013, 01:04 PM
#30
Banned
Thread Starter
Join Date: Jun 2013
Location: AZ
Posts: 1,014
Likes: 0
Received 0 Likes
on
0 Posts
UPDATE: getting ready to remove the rest of the transom. Once this is complete, I will order the vinyl ester and rest of supplies. Block was just finished, machinist is balancing the rotating assembly as we speak. Went with Akerly&Childs moly top, Napier 2nd and low tension oil rings. Great company to deal with when you need custom rings!
Just purchased some KE thunder & lightning cast headers with 18 inch dry tails, so the cam is no longer restricted. Thinking its gonna be loud . Should be posting progress pics soon!
Just purchased some KE thunder & lightning cast headers with 18 inch dry tails, so the cam is no longer restricted. Thinking its gonna be loud
. Should be posting progress pics soon!

