

32 Skater Rebuild
 07-29-2019, 09:49 PM
#71
Registered
Thread Starter
In town for the week working at the shop then slaving away on the boat at night! Stopped off at Skater this past Thursday to pick up some more resin and so far so good. Friend Joe came over tonight and we played around with a couple different mixing methods as this is somewhat new to me. Bought a handheld food mixer and made a batch of epoxy / hardener with the mixer and then made one up just mixing by hand with a paint stir stick. I was worried that the blender was going to introduce too much air into the mix but after letting the pot sit for a few minutes all of the bubbles floated to the surface and disappeared. The result appear to be the same between the two test panels so I think that the blender would be a better choice as it ensures a more thorough and homogenized mix. Will see what tomorrow brings for the test coupons as they are still curing tonight.
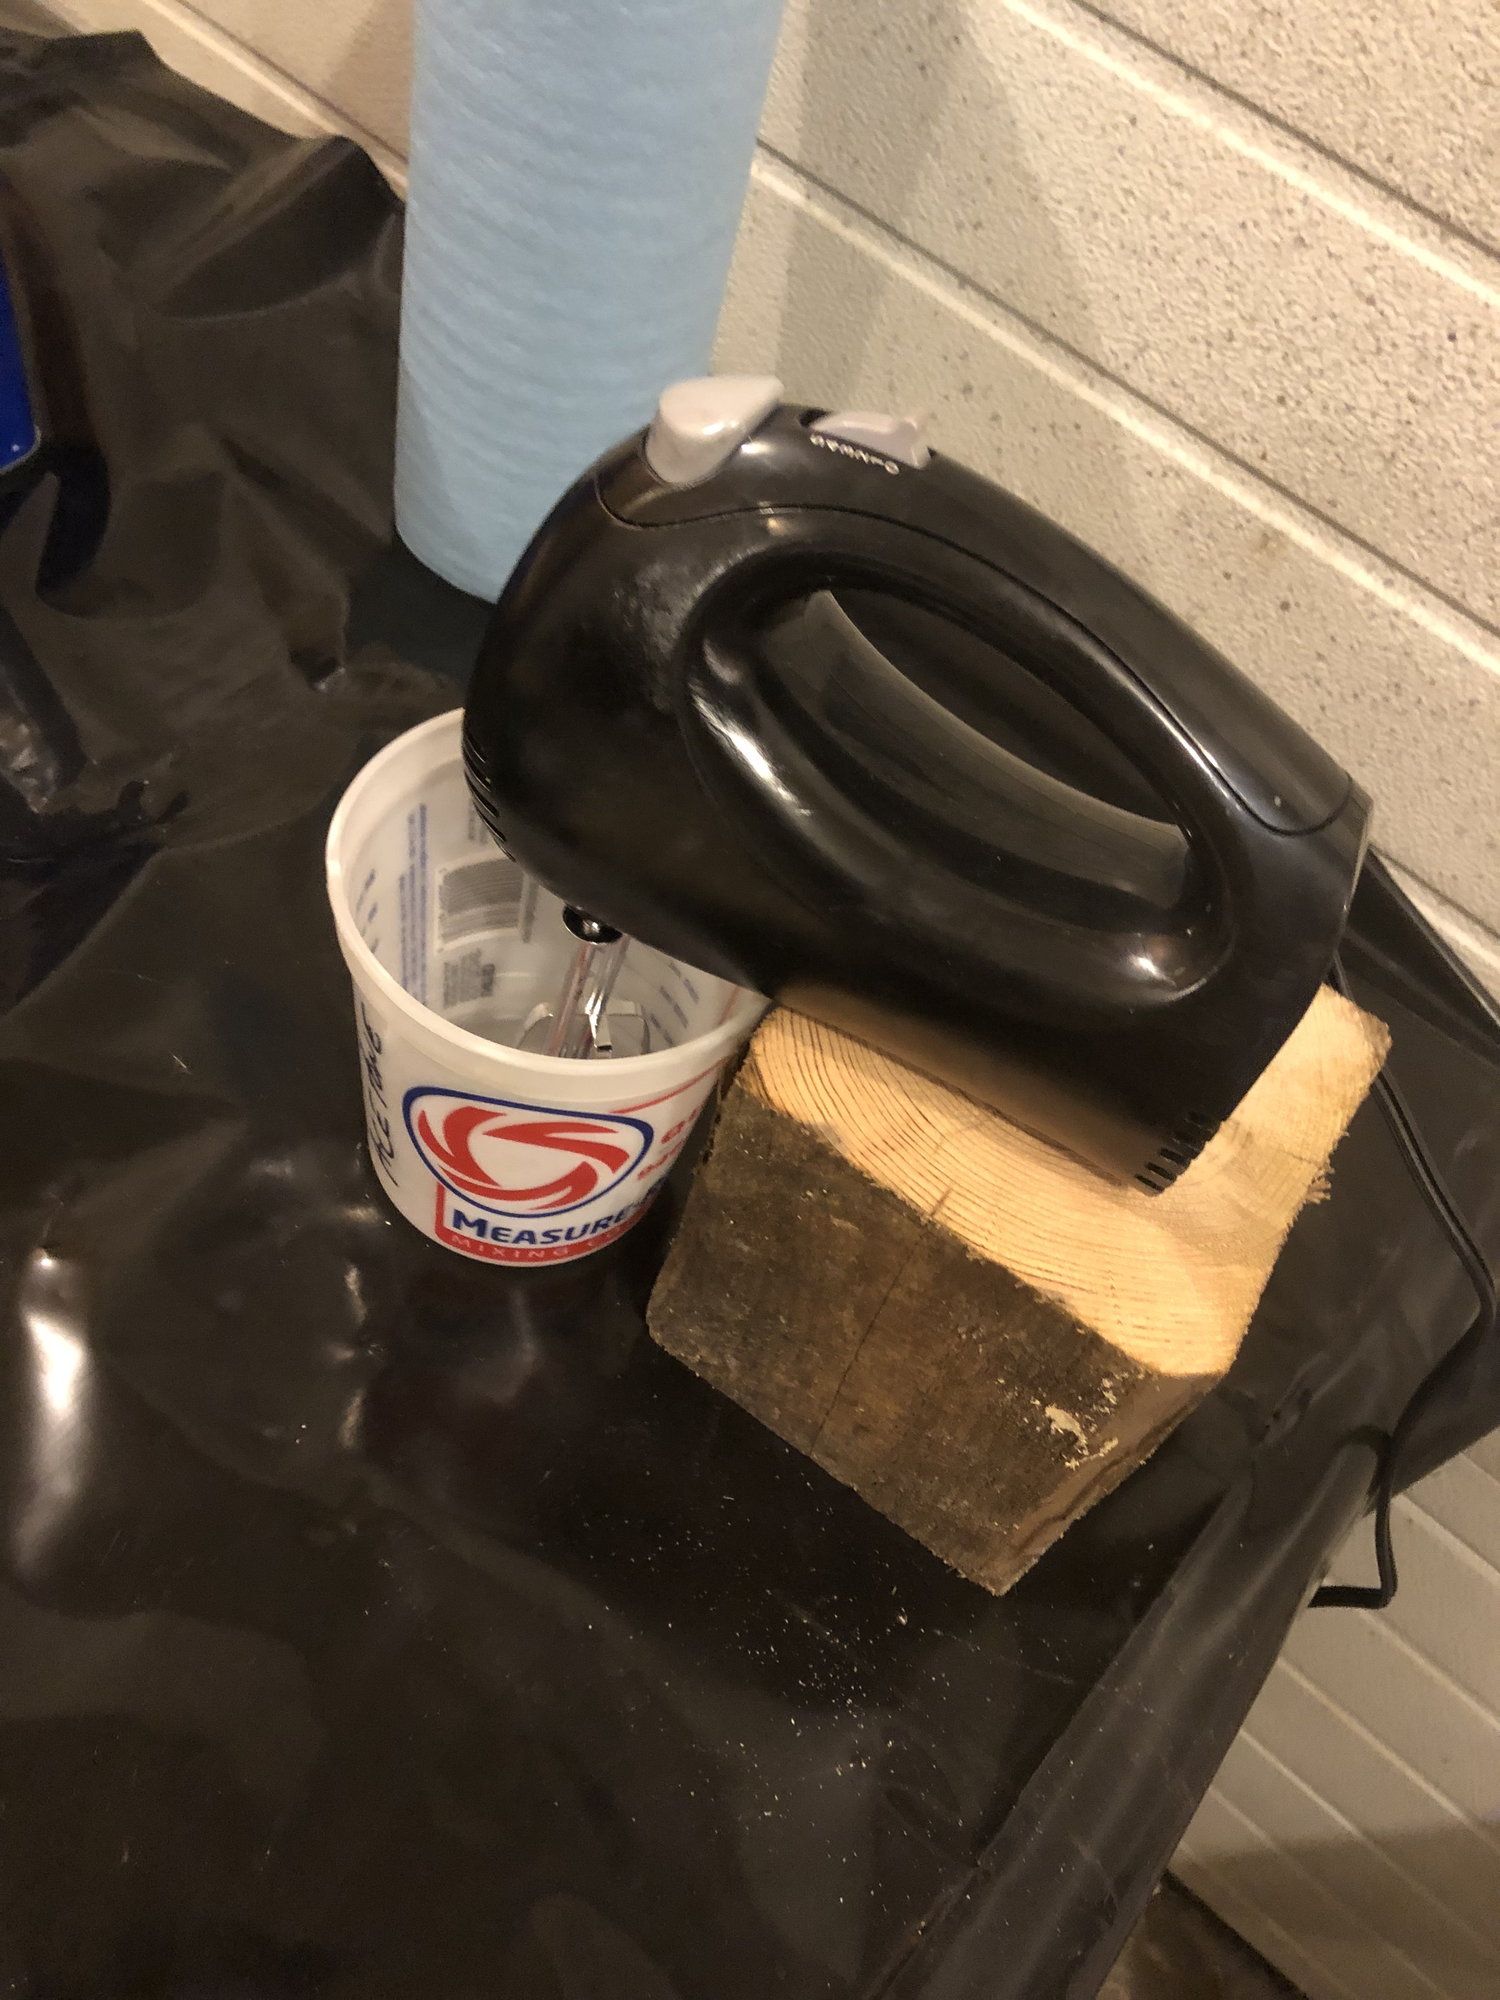
The mighty dollar general 10$ special toastmaster 5 speed hand mixer
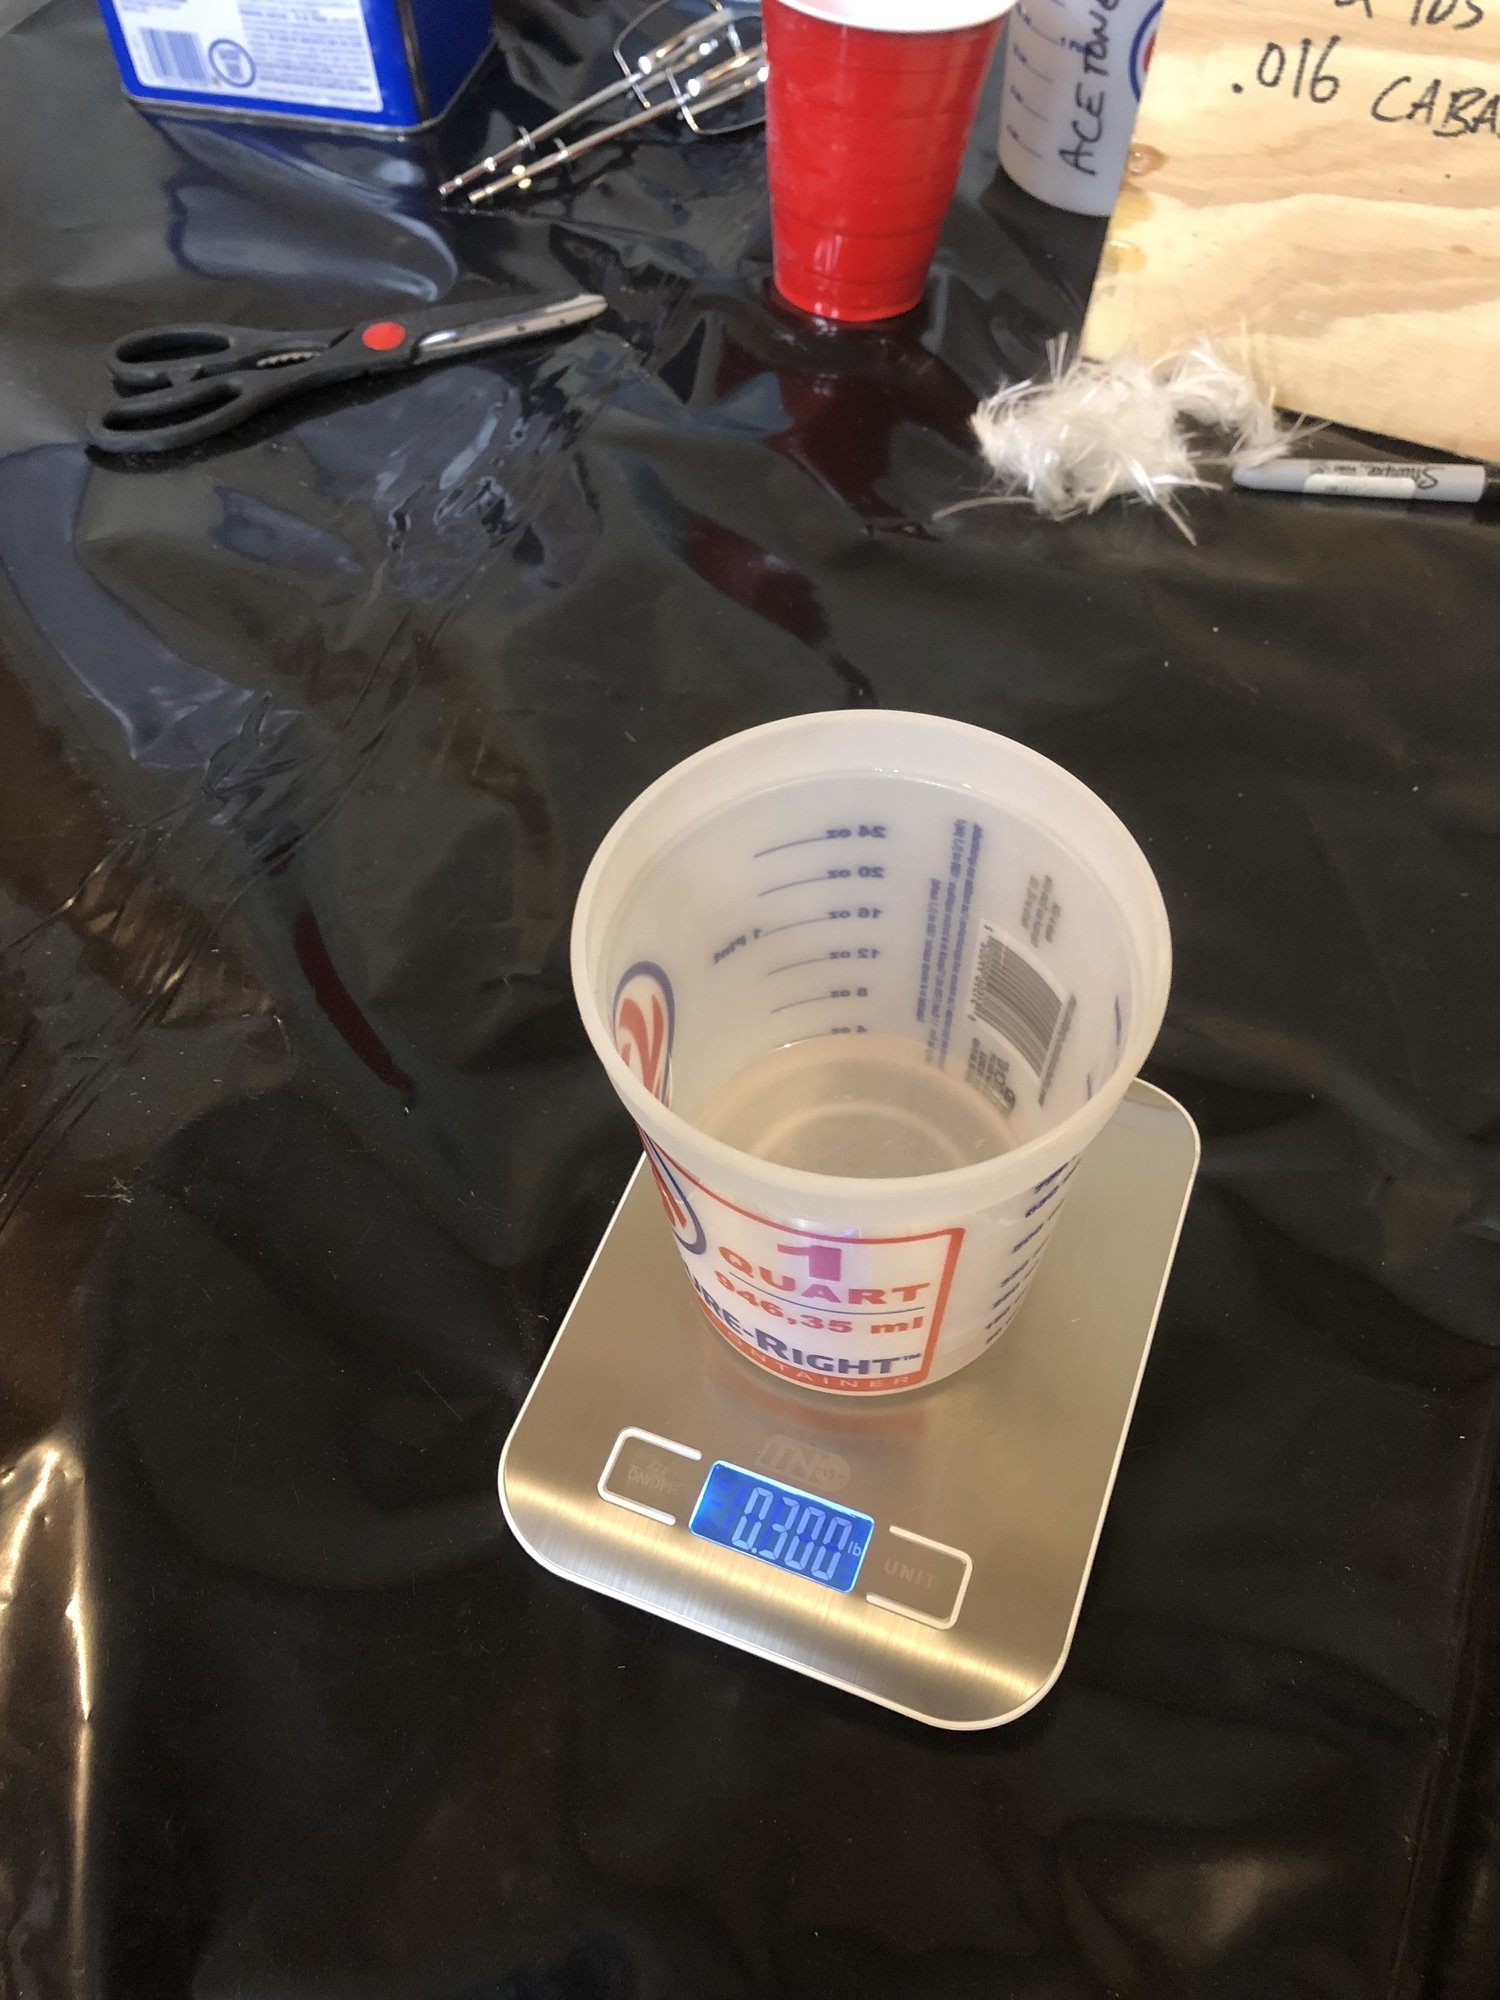
Got a smaller scale that is much more accurate and reads to the thousandth of a pound
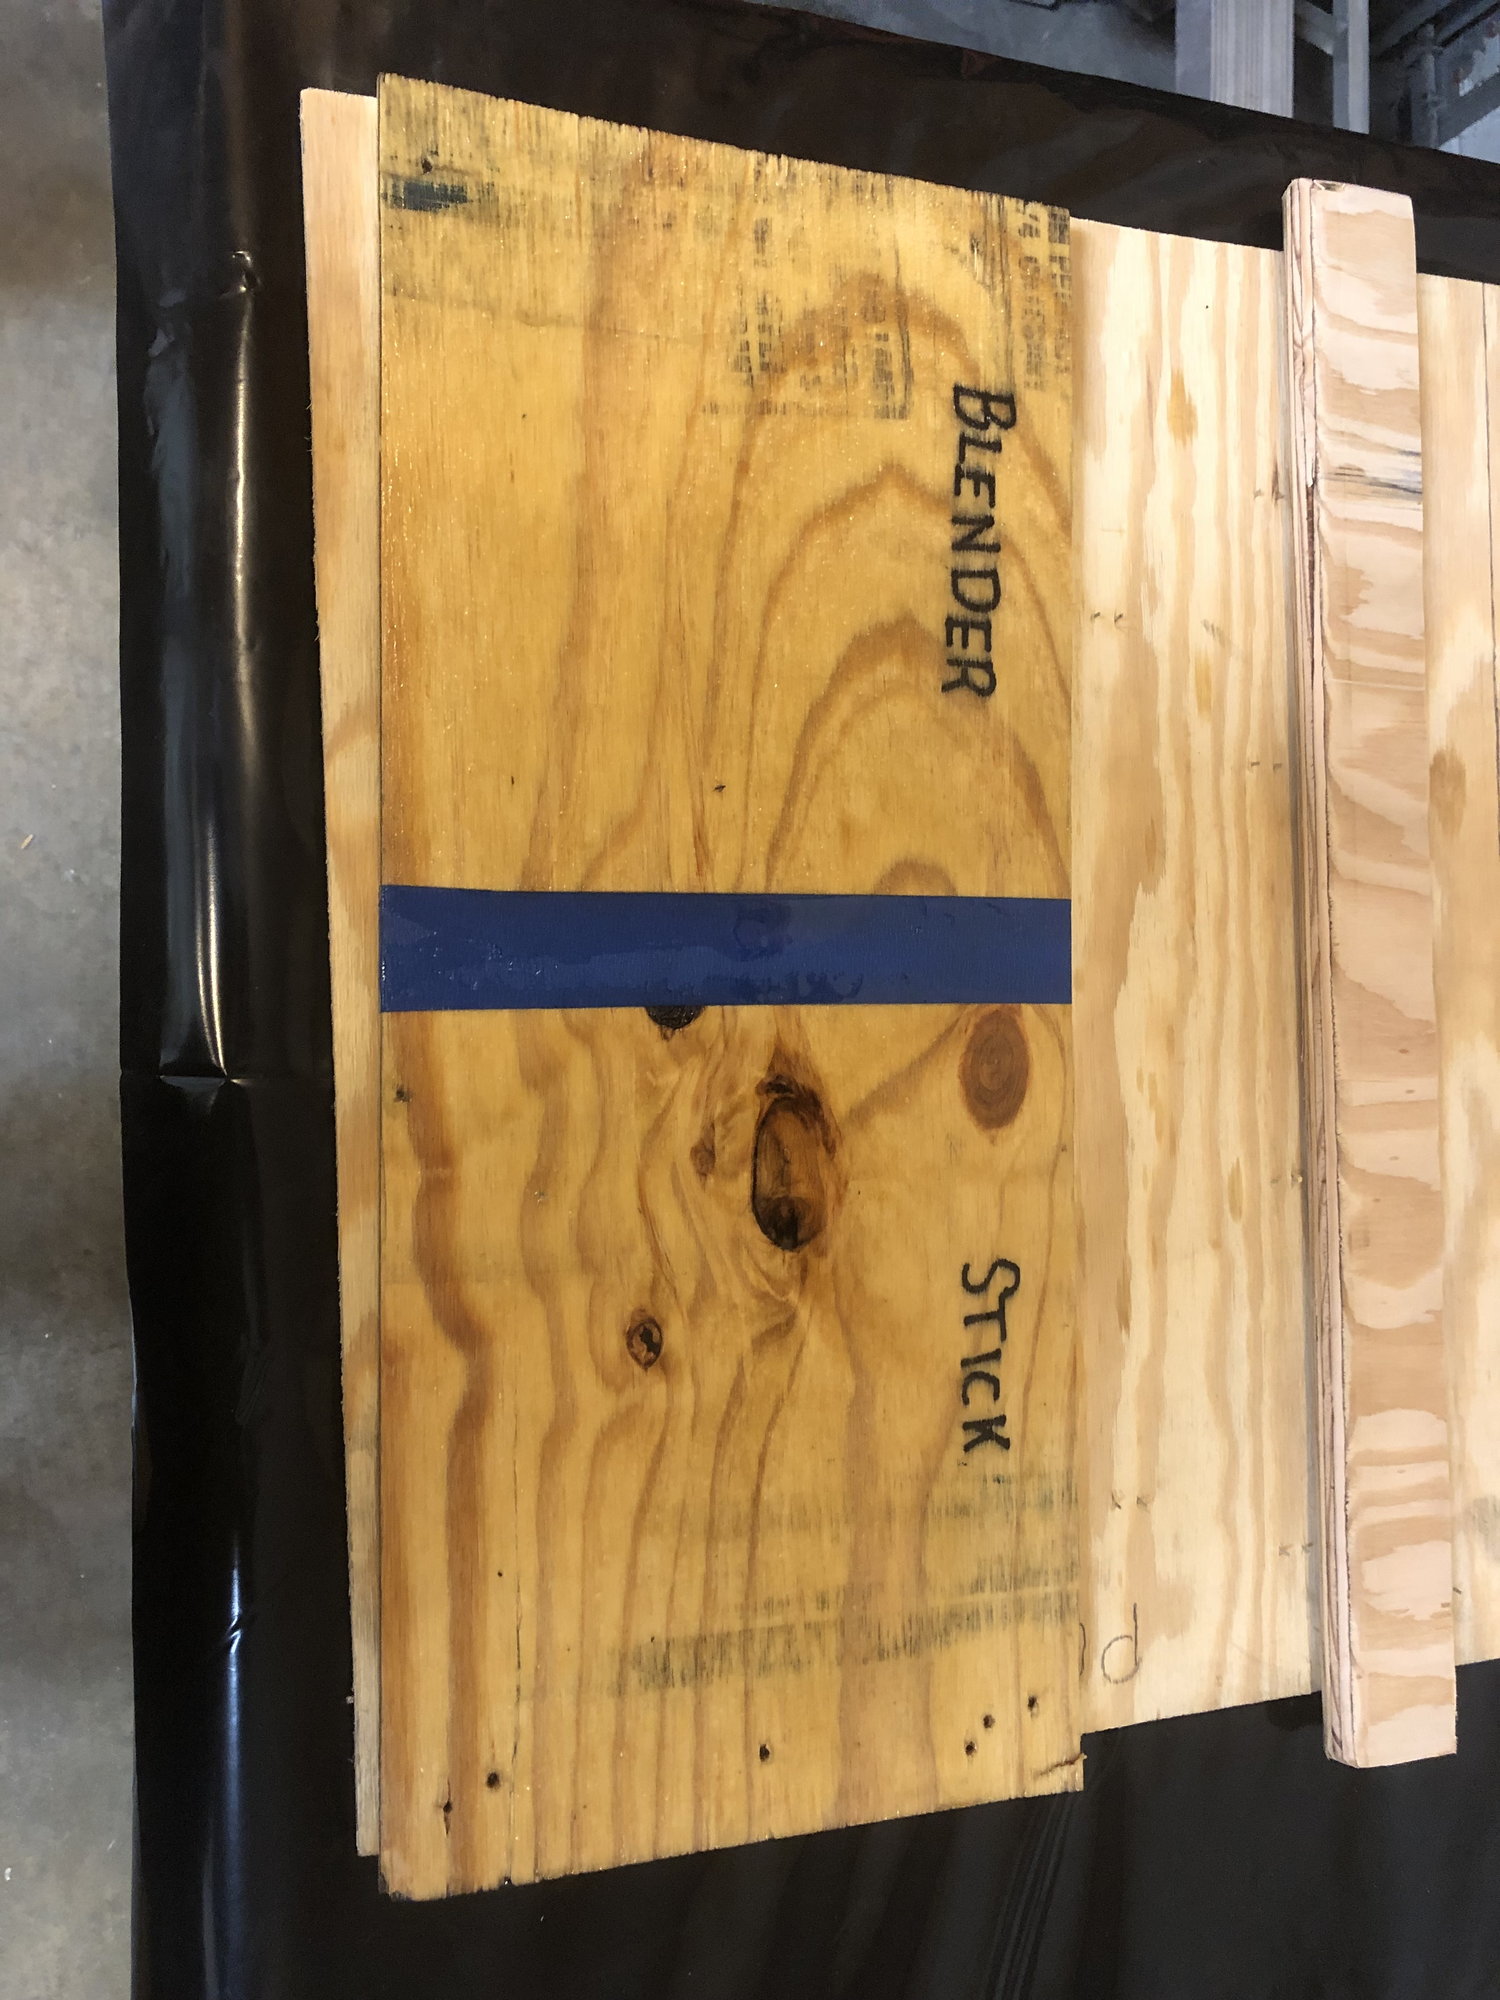
Test coupon
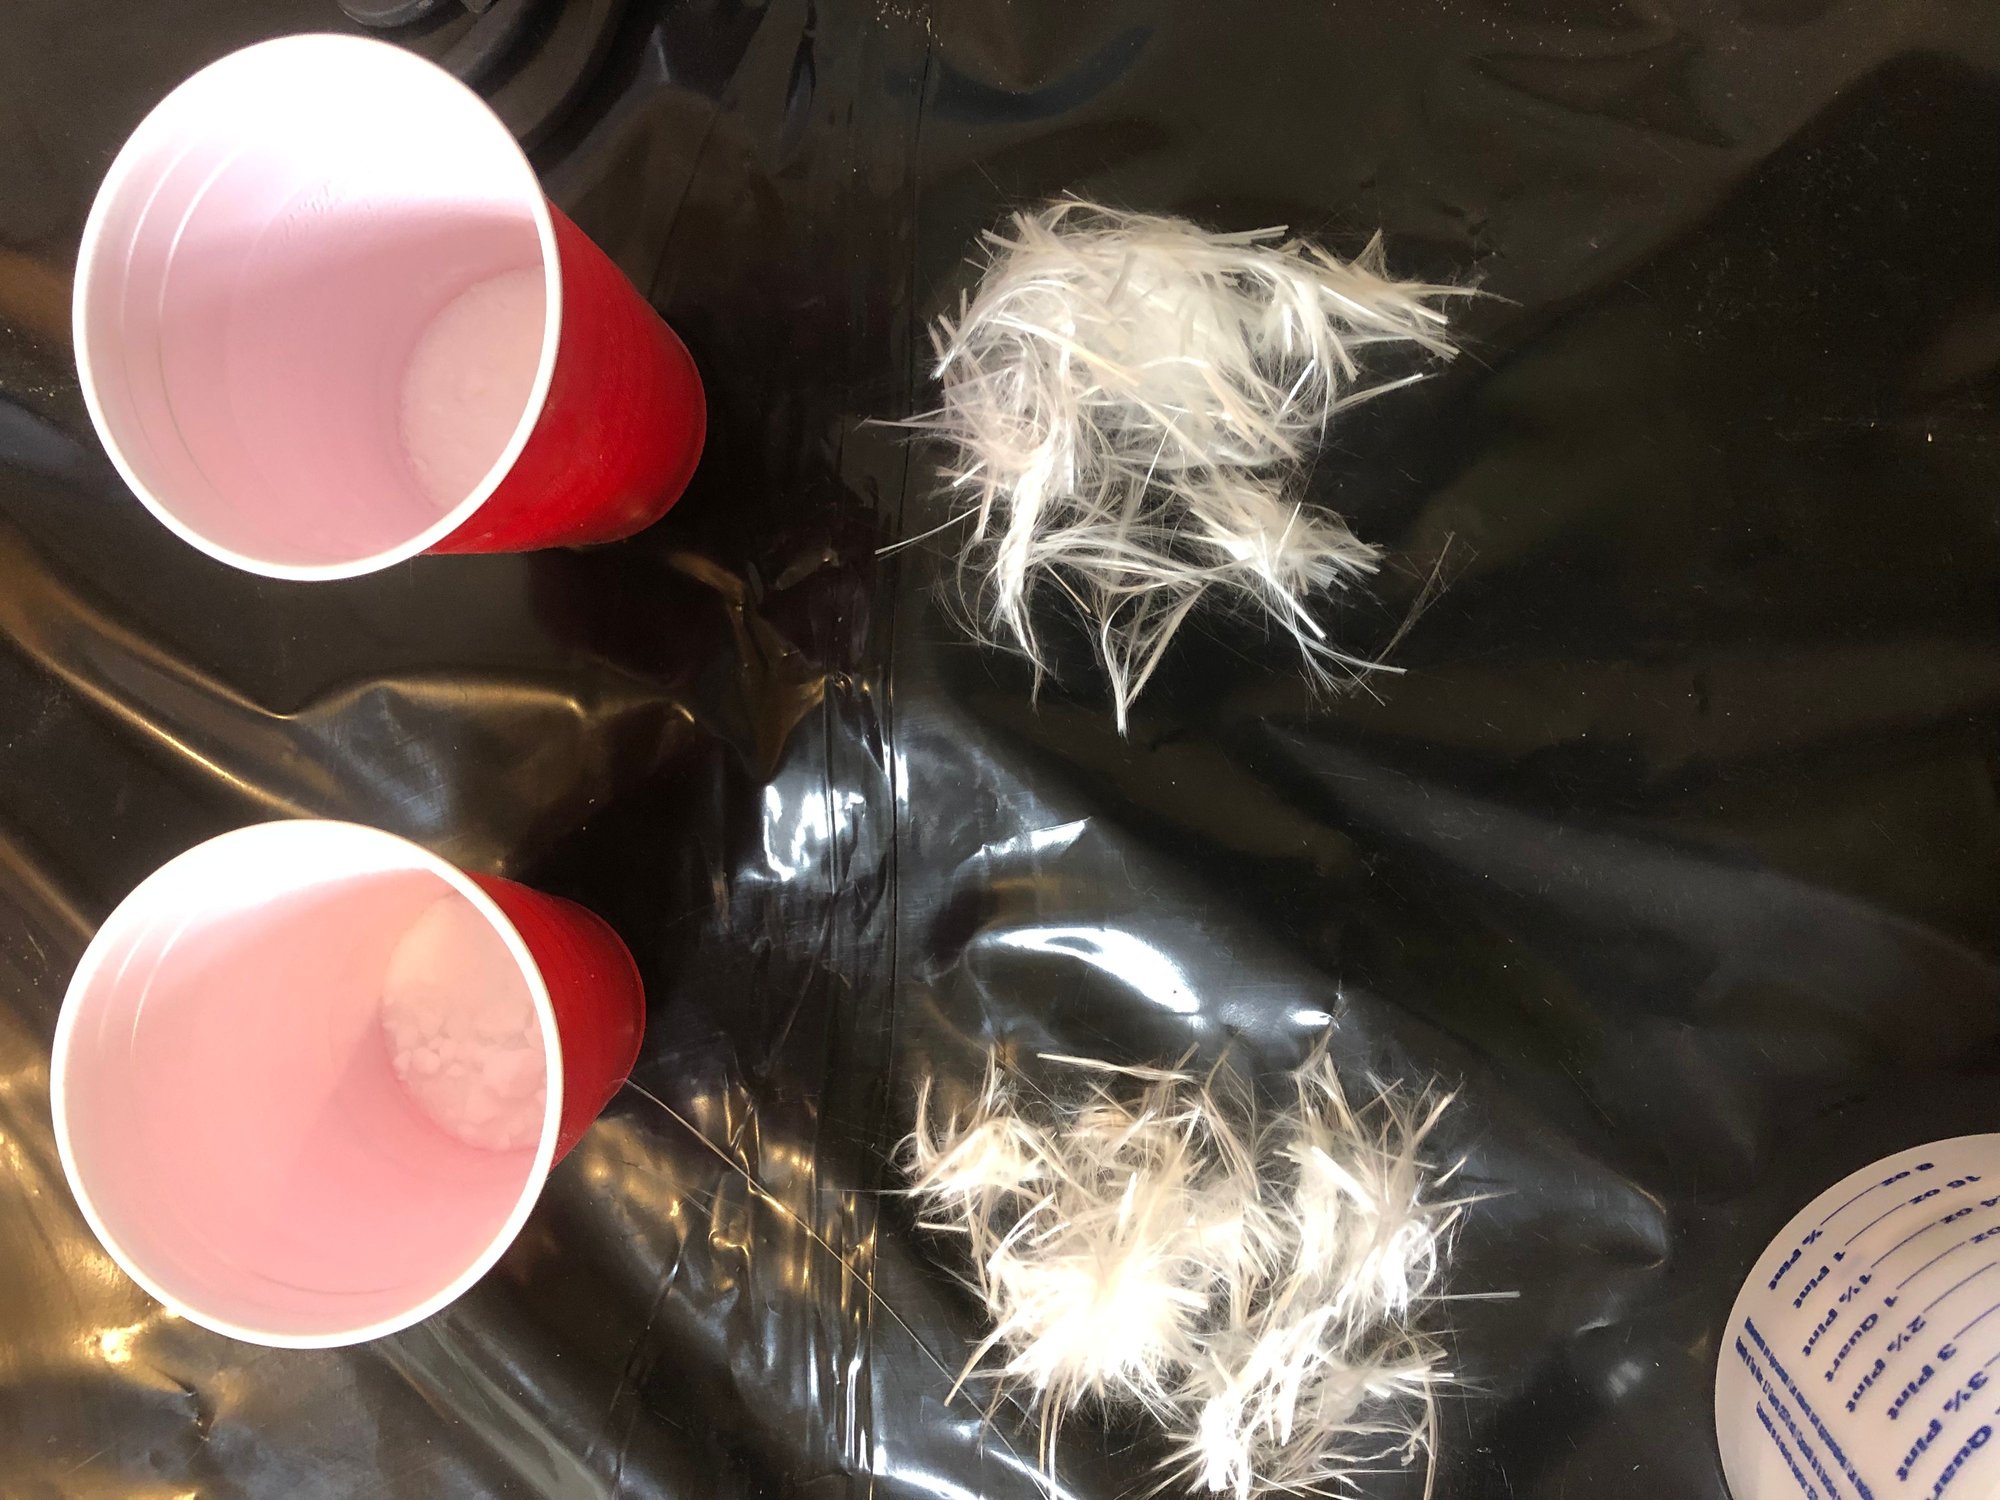
Also mixed up a batch of putty to see how much cabosil and glass fibers is needed so when it comes time to set stringer pieces in place I�ve got a reference to go off of

Test coupon for the putty. I think I added too much glass to the mix. Was difficult to get it to lay flat and smooth without pulling strands of glass along with the stick. I also used S glass and think some biaxial mat will work much better
The mighty dollar general 10$ special toastmaster 5 speed hand mixer
Got a smaller scale that is much more accurate and reads to the thousandth of a pound
Test coupon
Also mixed up a batch of putty to see how much cabosil and glass fibers is needed so when it comes time to set stringer pieces in place I�ve got a reference to go off of
Test coupon for the putty. I think I added too much glass to the mix. Was difficult to get it to lay flat and smooth without pulling strands of glass along with the stick. I also used S glass and think some biaxial mat will work much better
Last edited by Rossman; 07-29-2019 at 09:53 PM.
 07-30-2019, 08:39 PM
#72
Registered
Thread Starter
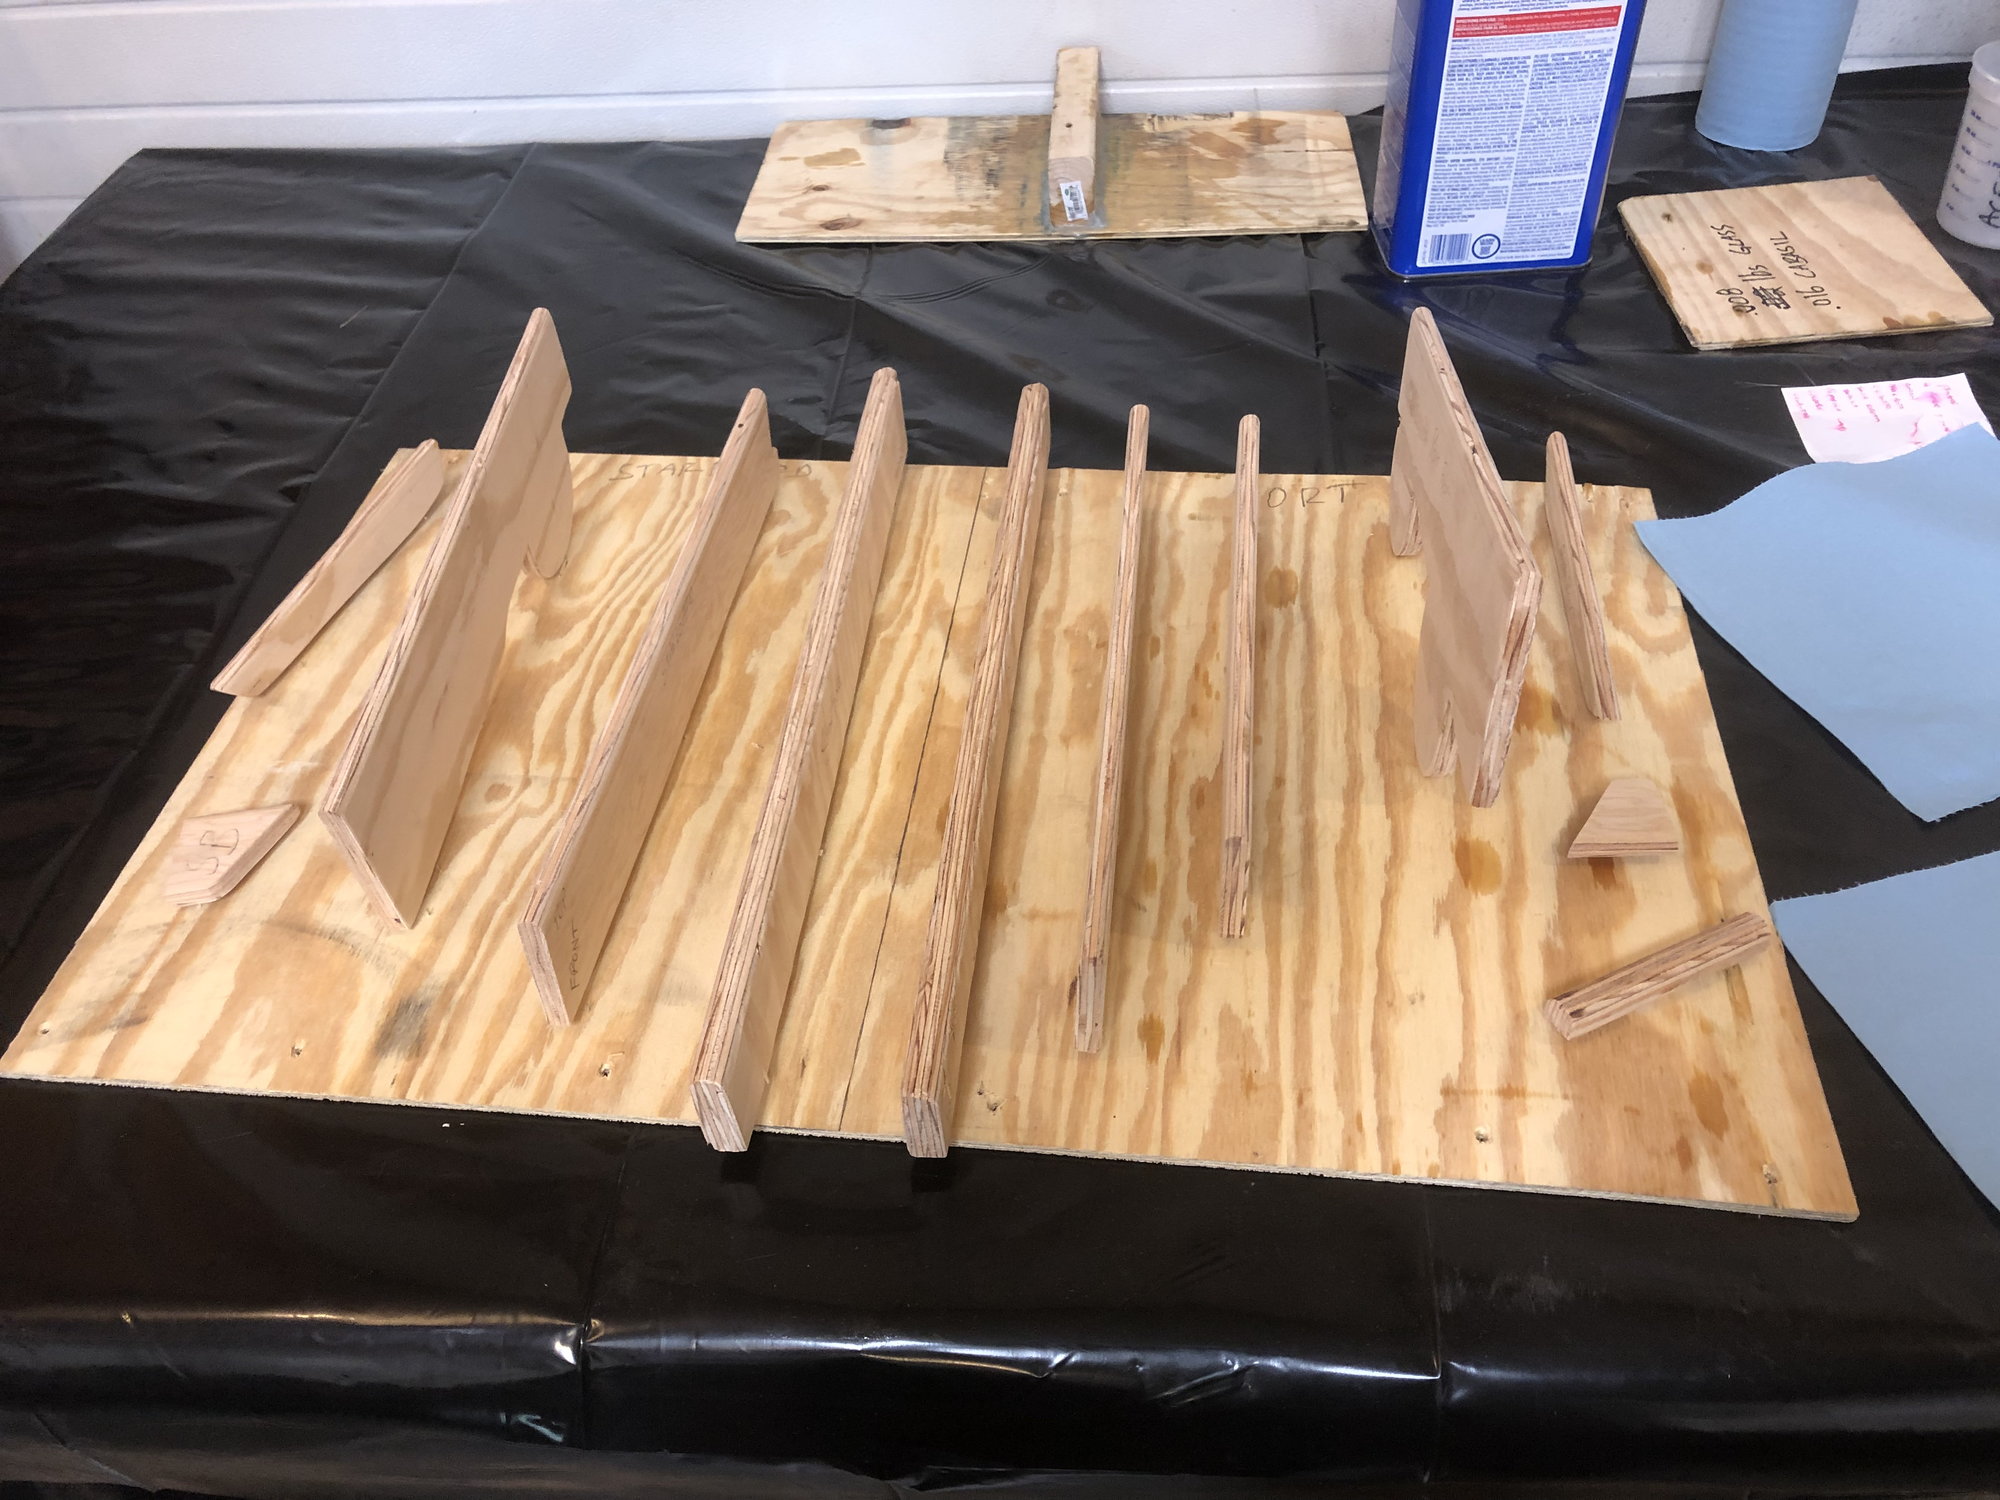
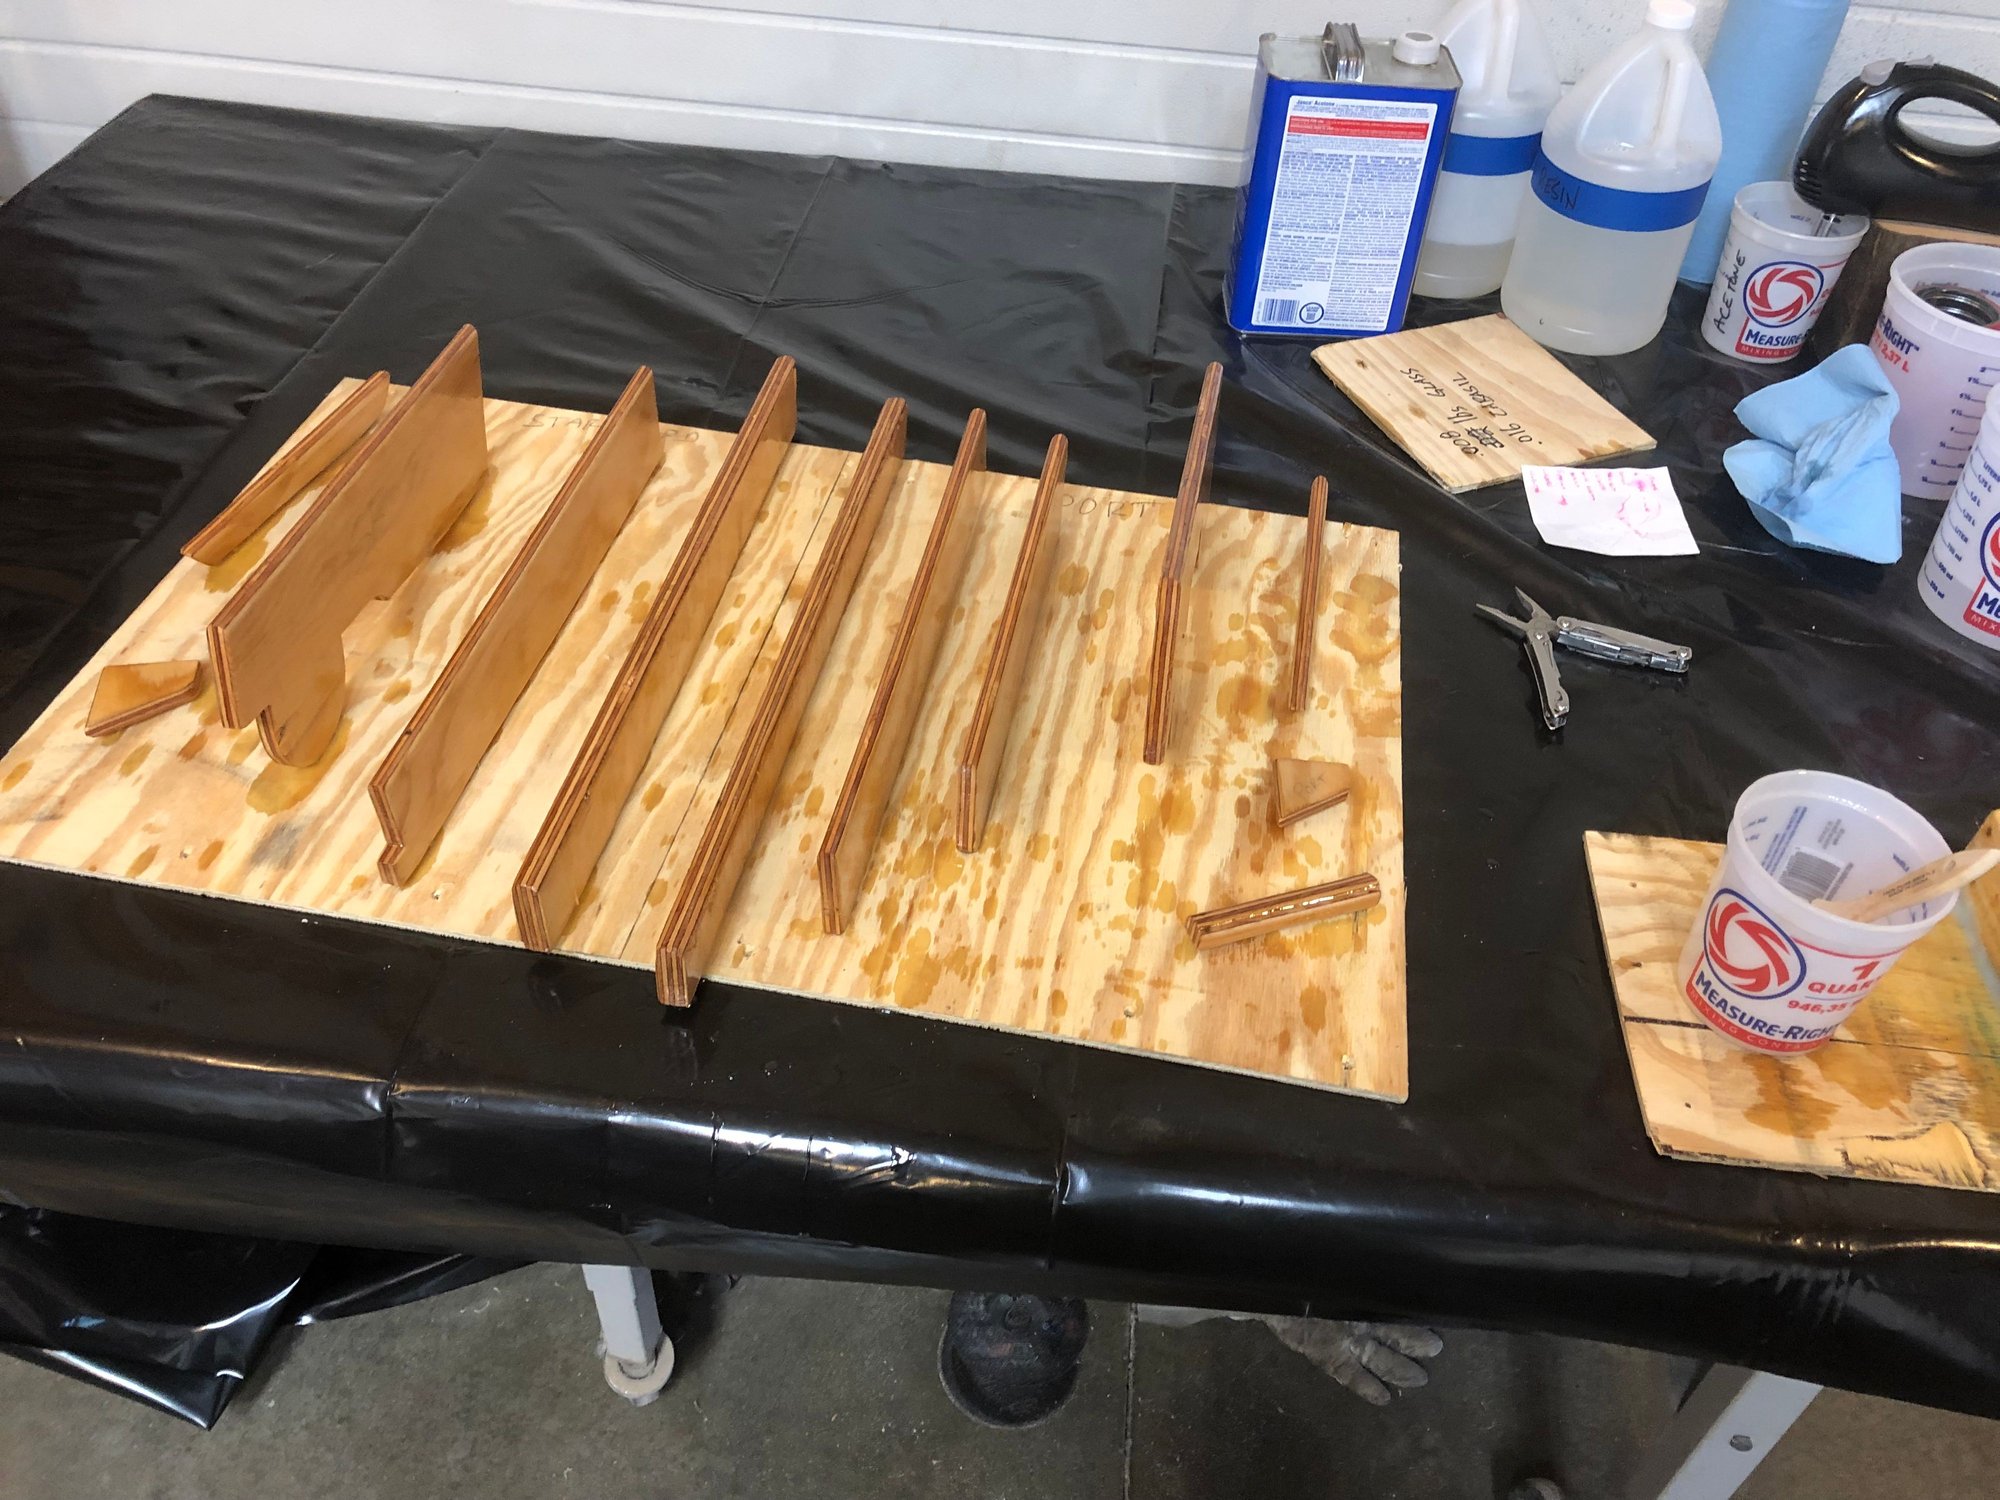
Test coupons from yesterday turned out great. Mixed a batch up and applied to all the stringer pieces. Tomorrow night will be some more sanding to get down to glass around the stringers where the new glass will bond to.
07-30-2019, 11:22 PM
#73
Registered
Woahh !! You got a project on your hand. Why did you yank out the entire transom !?
Also. How did you get your hands on a windshield from a DW?? Did they have distorted spares or did you buy one ? Going to be tough to fit that screen with the body lines of the boat. But if I listened to everyone I wouldn�t be where I am.
Cant wait to follow the project!! Bout time Oso gets some good builds back going like the old days
07-31-2019, 09:28 PM
#74
Registered
Thread Starter
Had plans to mix a thick back of resin / cabosil / glass tonight and put the stringer pieces in but I spent all night sanding - getting the surrounding areas for the new stringer pieces prepped for glass to overlap and tab into the existing stringers. The paint and resin on the existing stringers is so thin when sanding you immediately get into the Kevlar. So now I�ve got some time to spend tomorrow night with the DA and some 220 grit paper to get rid of the strands of Kevlar fuzzies protruding through the old resin. Hopefully if all goes well tomorrow I will be able to set the stringer pieces in with the thick resin mix and I have yet to think of a good way to put weight on them and keep them square and centered on the existing stringer. I guess that�s my midnight daydream for bed tonight 

Stringer pieces sanded with 24 grit for some good tooth for the new resin and glass to grab on to
Would be much easier if I could just be into computers or gaming right?
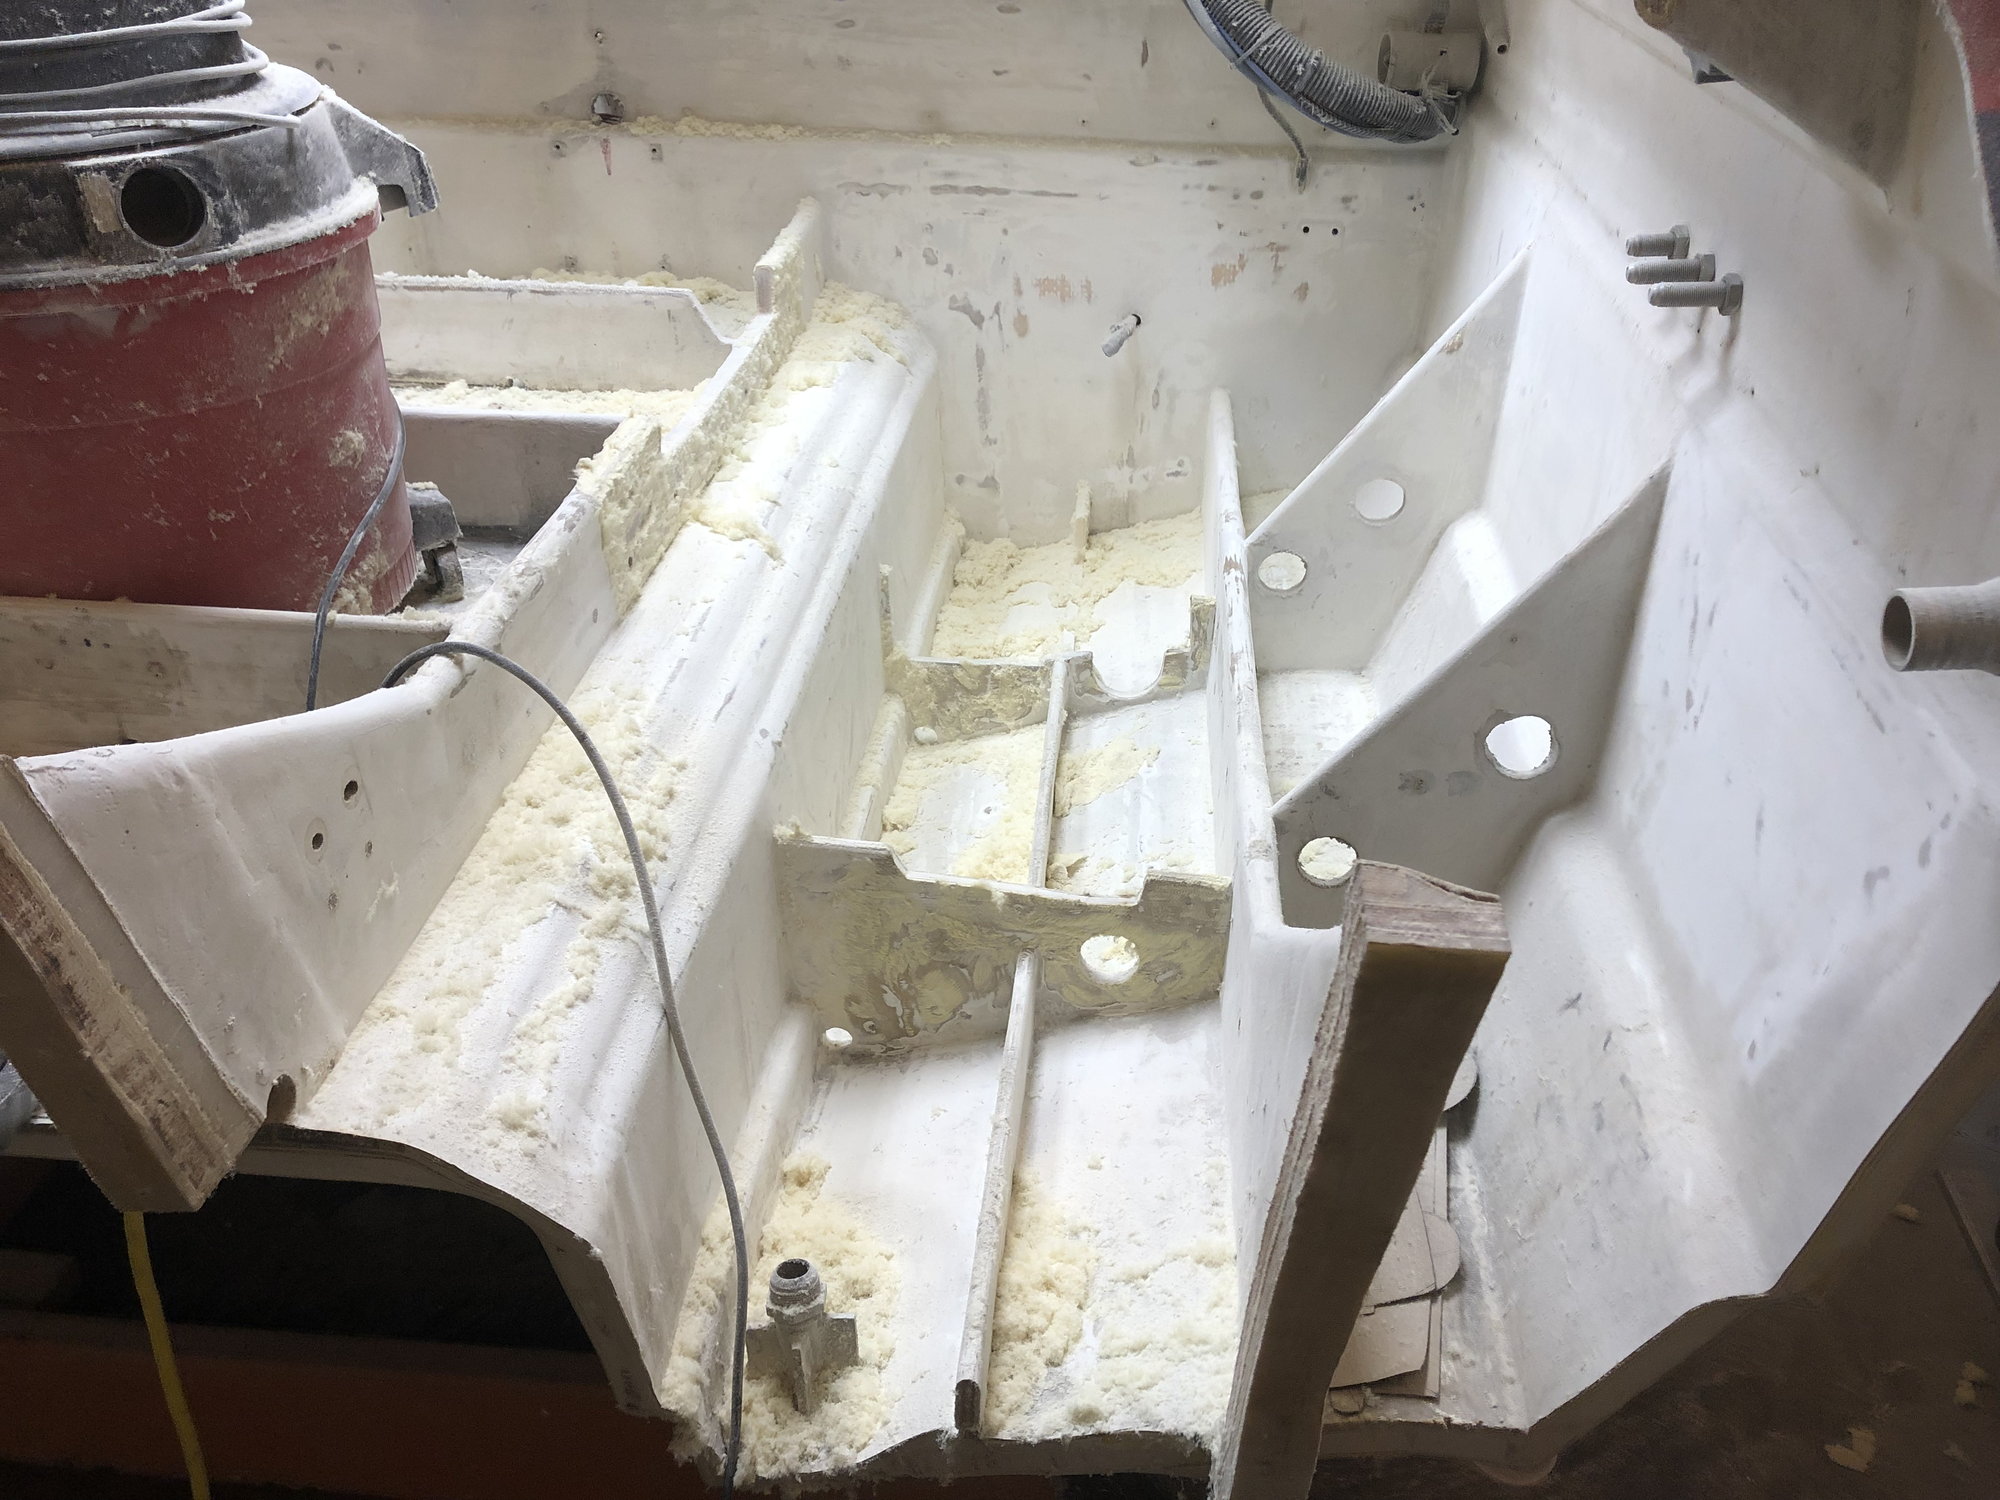
Kevlar fuzzies
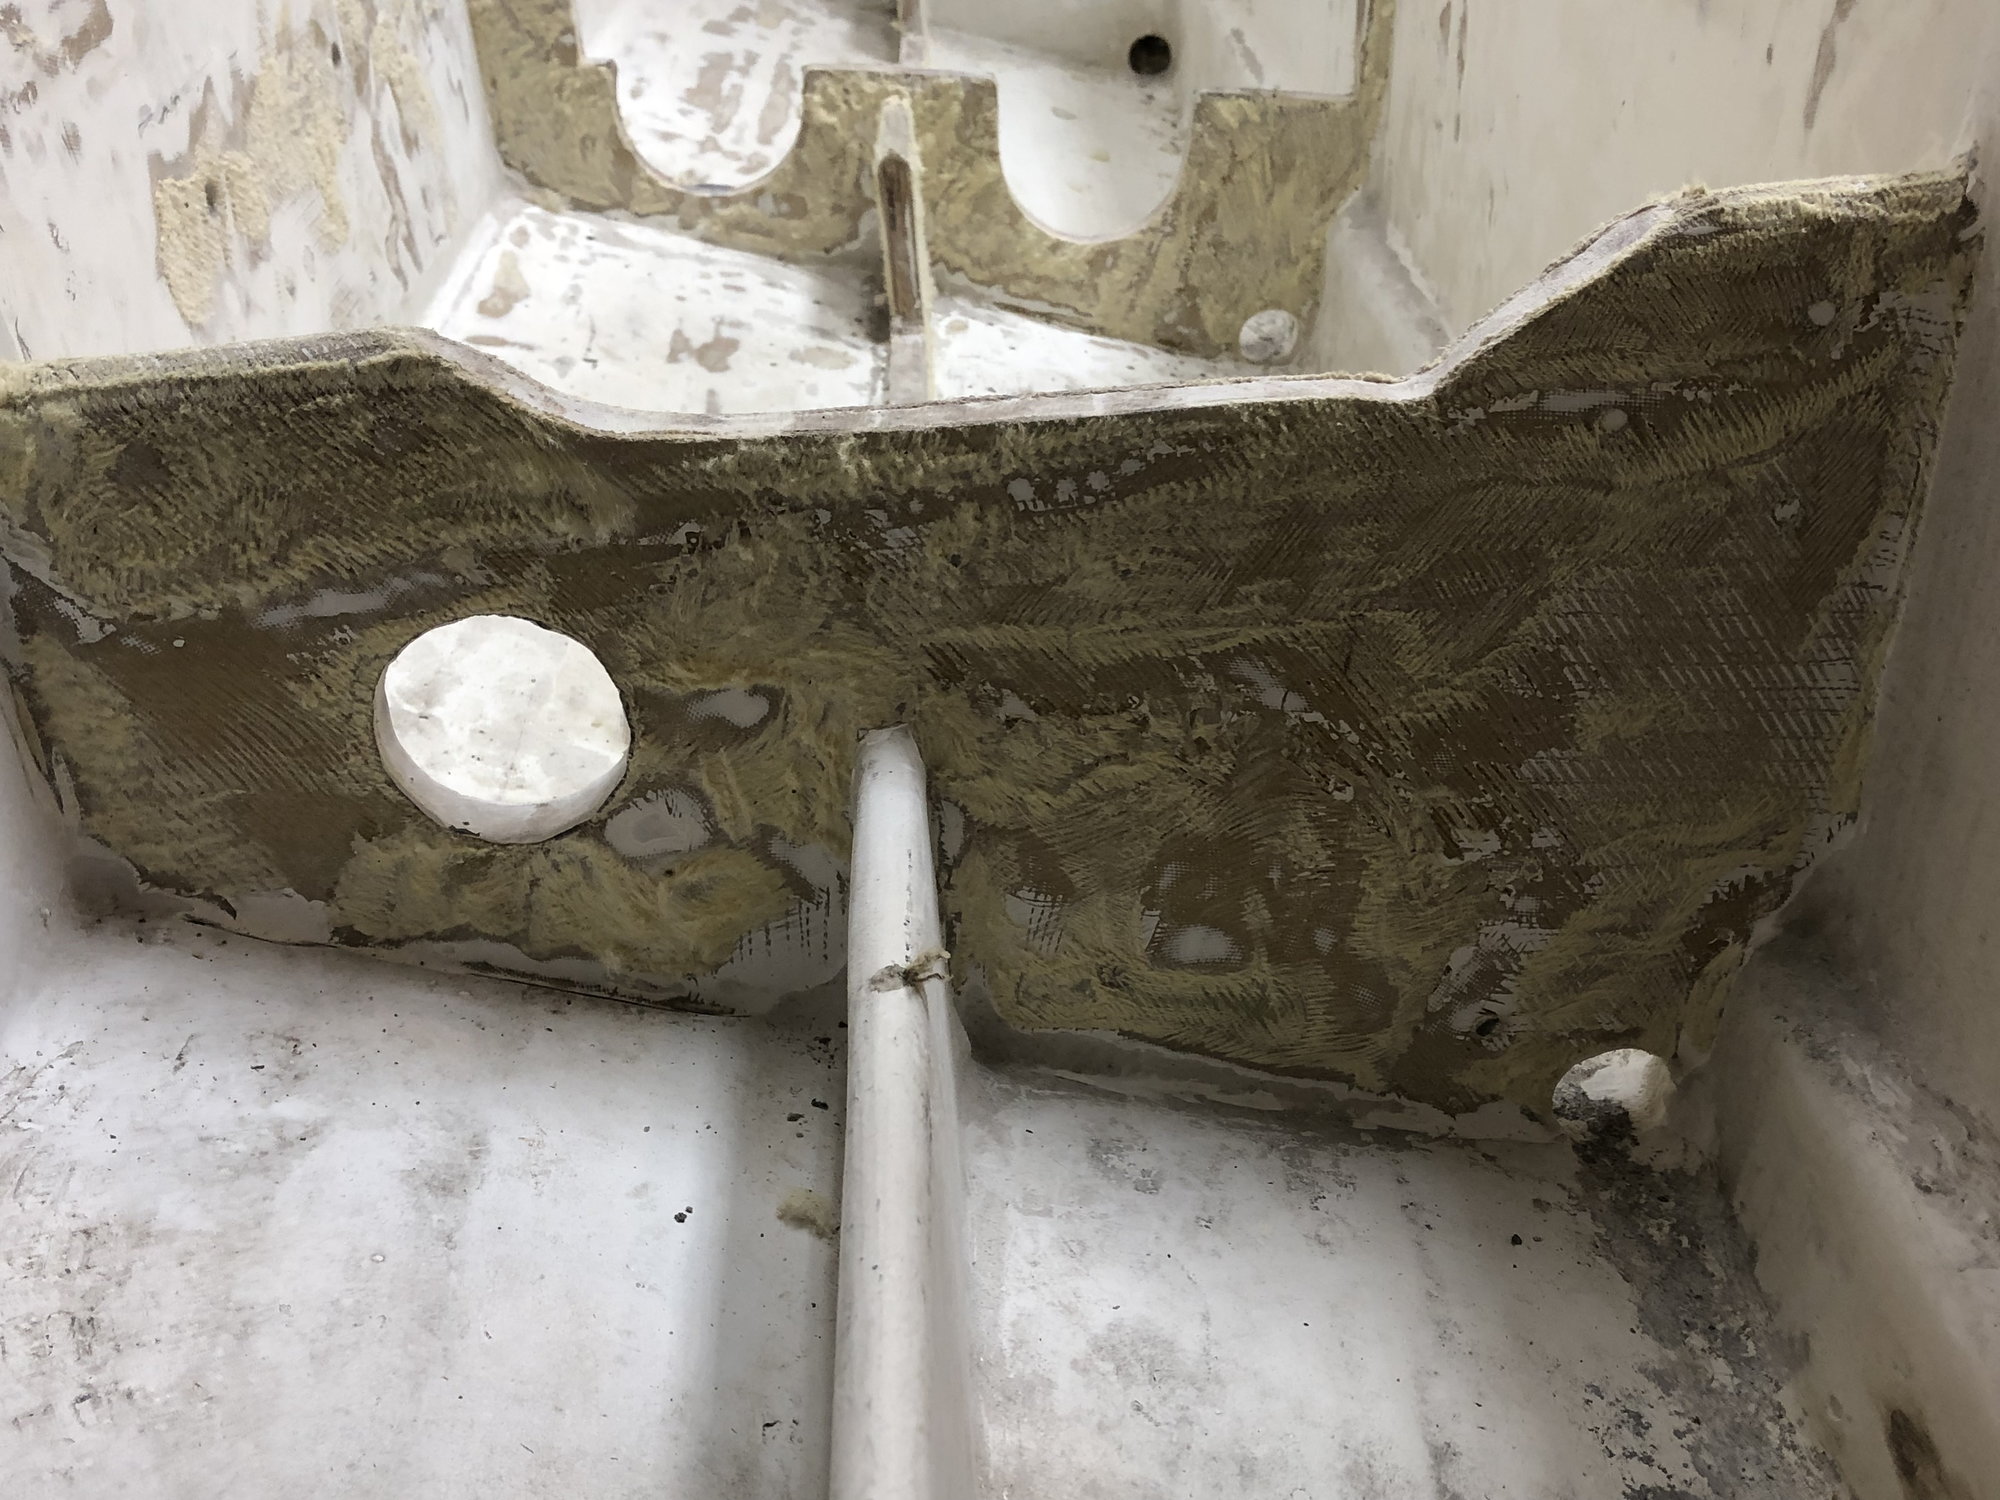
Old stringer almost ready for glass...... �almost�
Stringer pieces sanded with 24 grit for some good tooth for the new resin and glass to grab on to
Would be much easier if I could just be into computers or gaming right?
Kevlar fuzzies
Old stringer almost ready for glass...... �almost�
07-31-2019, 09:44 PM
#75
Registered
Thread Starter
Woahh !! You got a project on your hand. Why did you yank out the entire transom !?
Also. How did you get your hands on a windshield from a DW?? Did they have distorted spares or did you buy one ? Going to be tough to fit that screen with the body lines of the boat. But if I listened to everyone I wouldn�t be where I am.
Cant wait to follow the project!! Bout time Oso gets some good builds back going like the old days
Also. How did you get your hands on a windshield from a DW?? Did they have distorted spares or did you buy one ? Going to be tough to fit that screen with the body lines of the boat. But if I listened to everyone I wouldn�t be where I am.
Cant wait to follow the project!! Bout time Oso gets some good builds back going like the old days
Dmax - I was thinking about leaving the inner glass of the transom in and removing all wood then building from there but there was a few spots where there was 3/4-1� of resin between the knees and the transom and the whole transom was like Swiss cheese. Started life as a bravo boat, then went to #6�s, then bravos on boxes... etc. Some of the holes from the #6�s were just bare wooden dowels. No resin around them only on the outside ends!! The only thing I would have been able to save would be the bottom running surface and the outside edge. I plan on adding a bustle so I will be sanding back into the side of the boat to tab new glass in and I�m not too worried about fairing the running surface back together.
I may get rid of the water induction / �pick up tubes� that are molded into the bottom of hull and build my own adjustable height pick ups that I will mount off the Arneson boxes.
I bought the windshield from performance in LOTO. It was off a boat they had and it is a 1/2� acrylic shield. If my memory serves me right they were going to try a different material and 5/8 or 3/4. I would like it to be thicker but for the price I can not complain. A few guys there told me I would be happier with the 1/2� acrylic In my situation as I am building my own receiver and the shield is able to flex and bend quite a bit - I was impressed when Myrick and myself grabbed each corner and we could drastically change the take of the window and the width at the rear. I plan on making it fit at its natural / resting position so there is not a load on it. Should last longer when taking abuse from big waves.
I agree it is going to be tough to build the receiver to fit the deck and the windshield. I am excited as I think the �V line� on the deck and the more teardrop shape of the window will look killer. I enjoy seeing a challenge, thinking of the best way to solve it, and actually doing it with my hands so I�m not too scared to give it a go.
Thanks dmax
-Ross
08-01-2019, 05:43 AM
#77
Registered
Hearing �kevlar fuzzies� makes me quiver. Awesome material but when it comes to sanding..... I hope the fuzzies are removed easier for you than my experience.
Ideally what you want to do is find a way to remove the fuzz you have now without creating more. If you keep sanding I�m afraid you�ll just continue to keep creating more fuzz as you�re trying to remove the current fuzzies. The stuff is tough but is a pain to finish and doesn�t sand nicely like fiberglass or carbon fiber.
Ideally what you want to do is find a way to remove the fuzz you have now without creating more. If you keep sanding I�m afraid you�ll just continue to keep creating more fuzz as you�re trying to remove the current fuzzies. The stuff is tough but is a pain to finish and doesn�t sand nicely like fiberglass or carbon fiber.
Last edited by IGetWet; 08-01-2019 at 05:48 AM.
08-01-2019, 06:58 PM
#78
Registered
Thread Starter
I did look into alternate materials...After I found some 4X10 marine grade ply locally. I understand there are advantages but I am confident that the ply will do everything I want it to. Boats have been built with ply transoms for decades and I am not trying to set any speed records therefore do not care about the extra 60 lbs by using MGP over an alternative material. I will be running on Lake Michigan 90% of the time and in the rough so the weight may actually help somewhat. They both require the same amount of glass and resin if fusing two 3/4� sheets together. I understand they sell it thicker but I think multiple laminations is much stronger. Maybe on the next one!
Hearing �kevlar fuzzies� makes me quiver. Awesome material but when it comes to sanding..... I hope the fuzzies are removed easier for you than my experience.
Ideally what you want to do is find a way to remove the fuzz you have now without creating more. If you keep sanding I�m afraid you�ll just continue to keep creating more fuzz as you�re trying to remove the current fuzzies. The stuff is tough but is a pain to finish and doesn�t sand nicely like fiberglass or carbon fiber.
Ideally what you want to do is find a way to remove the fuzz you have now without creating more. If you keep sanding I�m afraid you�ll just continue to keep creating more fuzz as you�re trying to remove the current fuzzies. The stuff is tough but is a pain to finish and doesn�t sand nicely like fiberglass or carbon fiber.
-Ross
08-06-2019, 11:20 PM
#80
Registered
Thread Starter

Friends Logan and Joe came over tonight for a few hours and we�re a huge help!

