

84 Scarab Renovation (ongoing)
 09-08-2015, 06:10 PM
#451
Registered
Thread Starter
Join Date: Aug 2007
Location: Sandown, NH - Sebago Lake Region, ME
Posts: 2,960
Likes: 0
Received 7 Likes
on
7 Posts
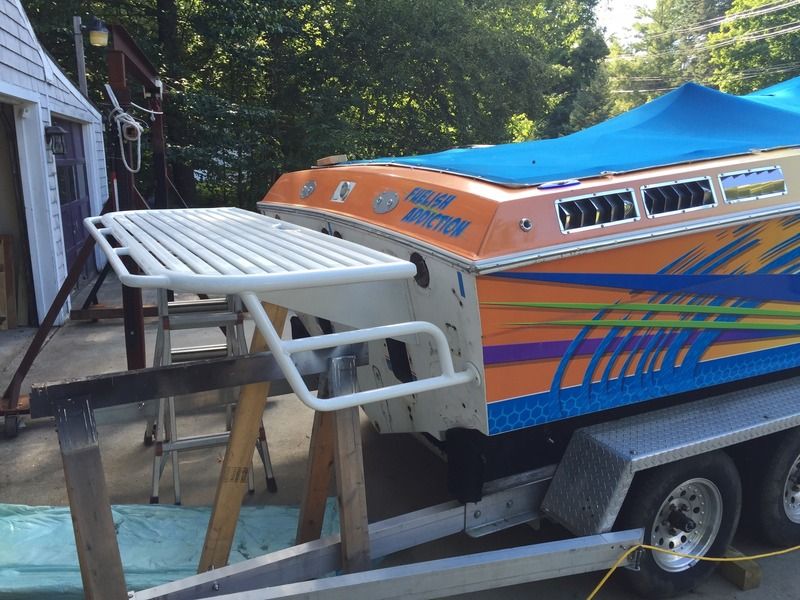
Making some good progress!
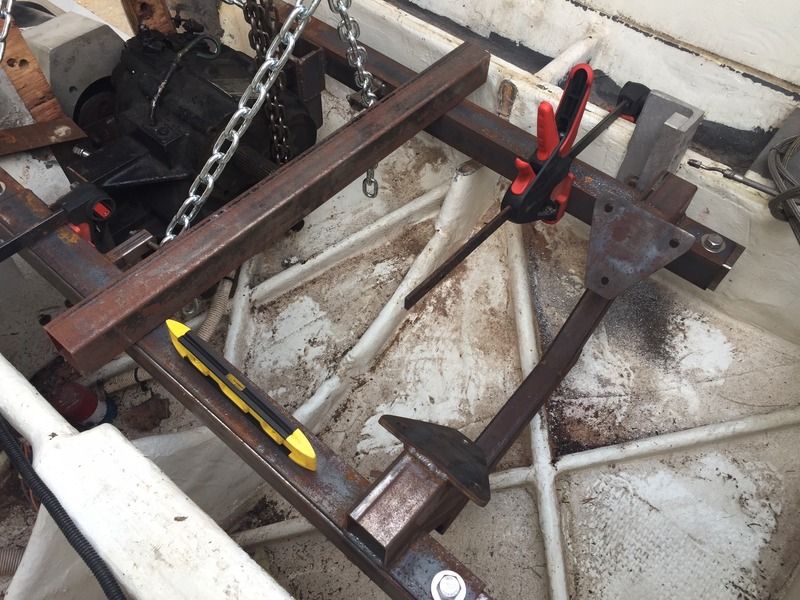
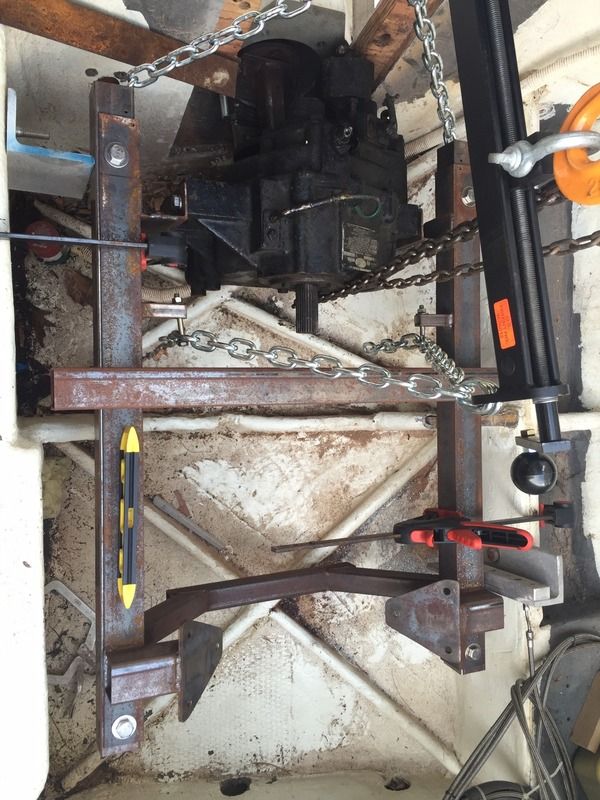
The tranny fit is going to be so tight I will need to cut a relief in the transom for the transmission line! I also had to cut a small notch in the floor to clear the bottom of the gearbox! All in all its coming together!
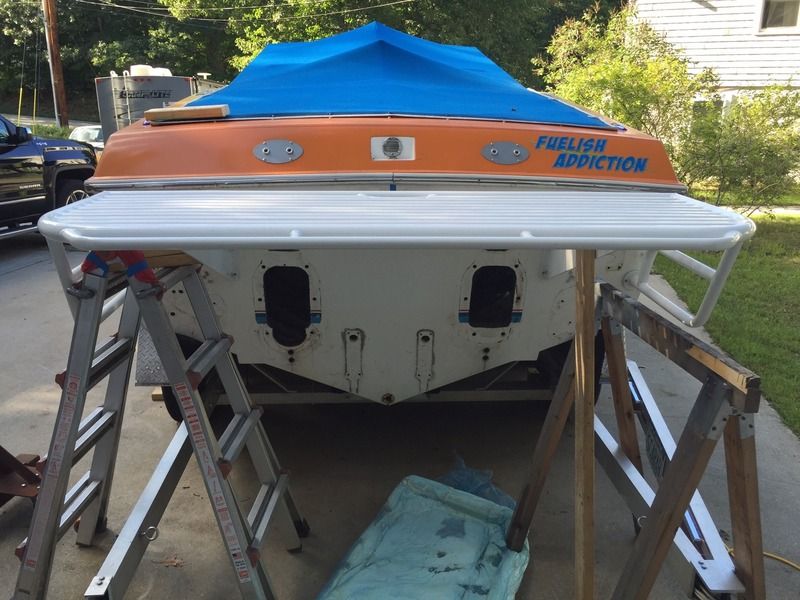
Oh yeah, I also test fitted my new to me swim platform! Super excited! Thanks to Bill (weldcrane)
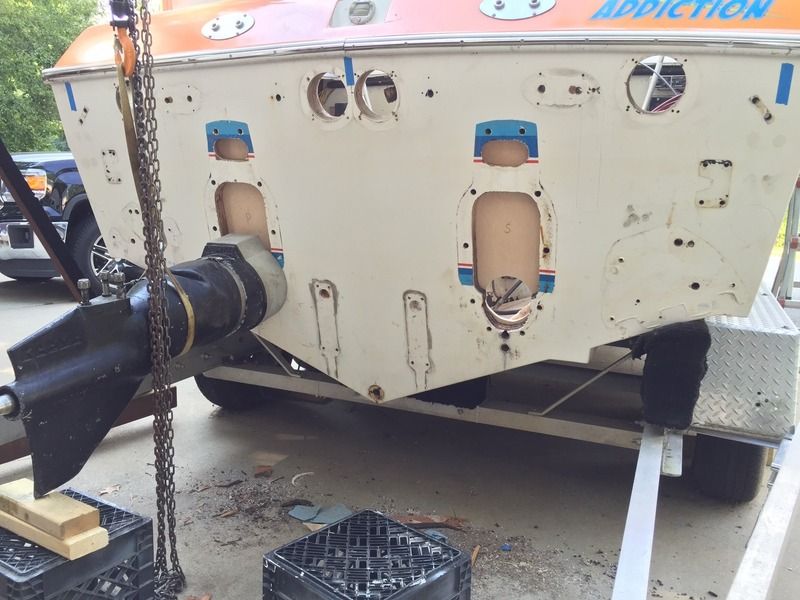
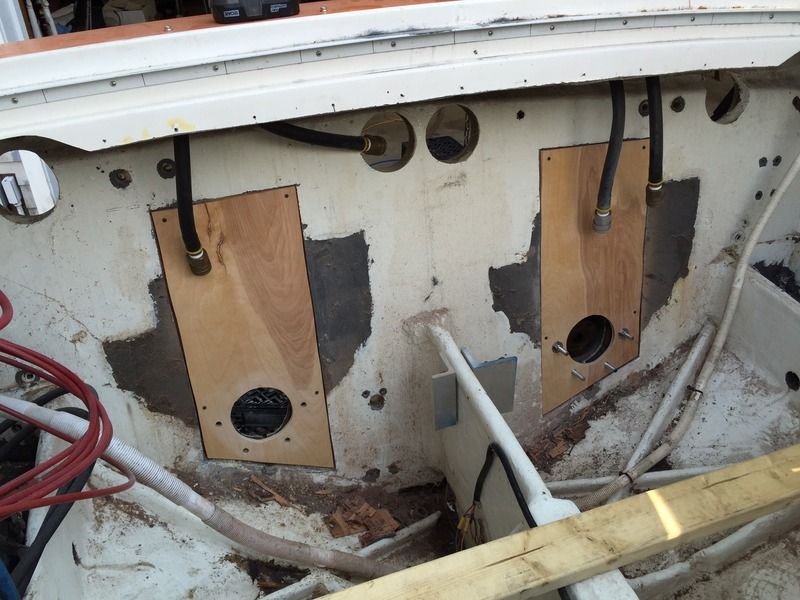
The tranny fit is going to be so tight I will need to cut a relief in the transom for the transmission line! I also had to cut a small notch in the floor to clear the bottom of the gearbox! All in all its coming together!
Oh yeah, I also test fitted my new to me swim platform! Super excited! Thanks to Bill (weldcrane)


 09-09-2015, 07:39 AM
#452
Registered

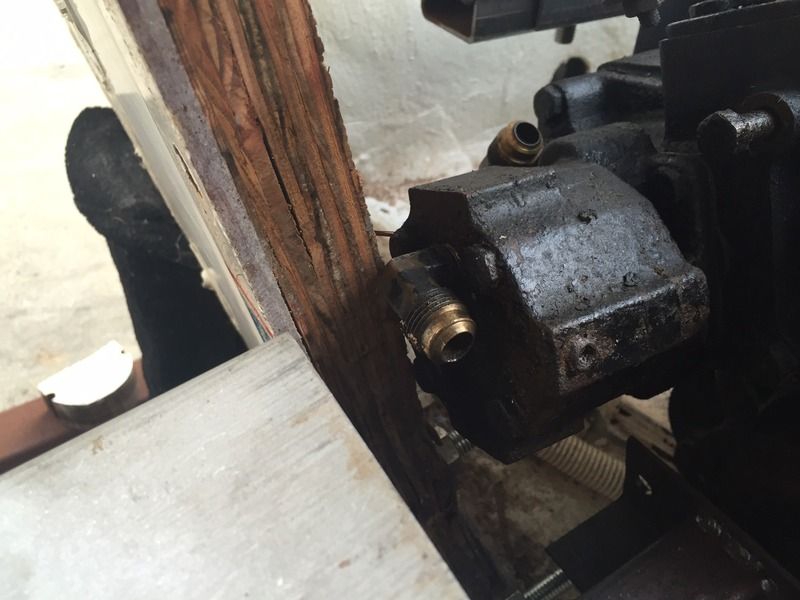
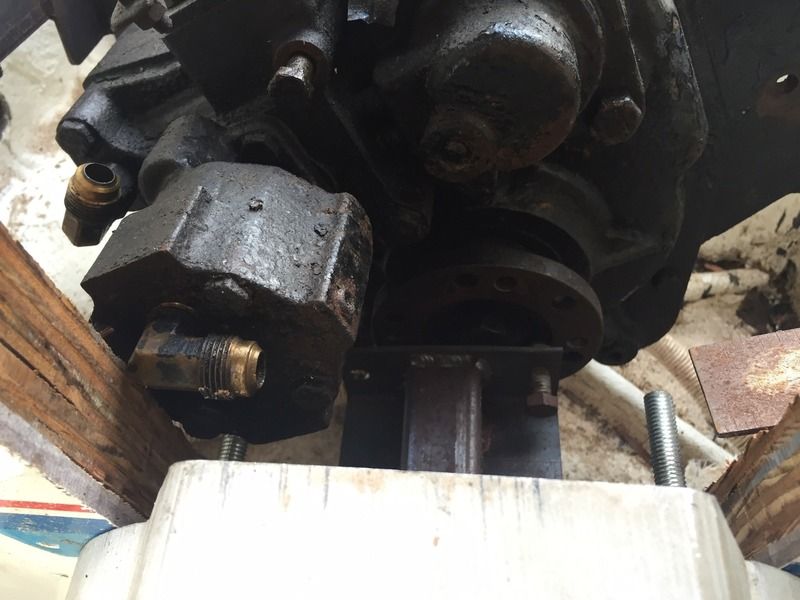
Curious why you use the steel round square bar over the gil engine mounts or something along that line.
Looking good. Looking forward to see the speeds you obtain.
Looking good. Looking forward to see the speeds you obtain.
09-09-2015, 07:48 AM
#453
Registered
I remember asking that question to Jim a while ago. He says his engine compartment is so tight that virtually any service work requires removing the engines, so he built that setup so he can very easily pull the engines and transmissions as a "module". Accessing the mounting bolts is much easier the way he has this setup.
09-09-2015, 02:05 PM
#454
Yeah, I'm looking forward to seeing what the kaama drives add to the top speed. And hey, we're here for moral support too lol. It stinks to miss a whole summer working on your boat which is basically what I did too brother.
09-09-2015, 08:05 PM
#455
Registered
Thread Starter
Join Date: Aug 2007
Location: Sandown, NH - Sebago Lake Region, ME
Posts: 2,960
Likes: 0
Received 7 Likes
on
7 Posts
Exactly what Matt said! I pull these engines quite a bit and it's always a PITA to unbolt the engine from the stringers and then the engine from the transmission. It's even more a PITA to put the engine back in and get the spline shaft on the tranny to line up to the flywheel. The alternative was to pull the BW tranny with the engines but then you had those huge transom bolts that are tourqued to 100+ ft.lbs.! This new setup will keep engine and tranny firmly bolted together and attached to large angle steel plates. These plates will fit snugly down over the new engine chassis which will be mounted in the boat. The bolts holding everything together will be easily accessible from the top. If I had to guess I can have both engines out in about 30 minutes, and probably 45 minutes to put them back in! This is a huge improvement over the stock design!
09-10-2015, 08:26 AM
#456
Registered
exactly what matt said! I pull these engines quite a bit and it's always a pita to unbolt the engine from the stringers and then the engine from the transmission. It's even more a pita to put the engine back in and get the spline shaft on the tranny to line up to the flywheel. The alternative was to pull the bw tranny with the engines but then you had those huge transom bolts that are tourqued to 100+ ft.lbs.! This new setup will keep engine and tranny firmly bolted together and attached to large angle steel plates. These plates will fit snugly down over the new engine chassis which will be mounted in the boat. The bolts holding everything together will be easily accessible from the top. If i had to guess i can have both engines out in about 30 minutes, and probably 45 minutes to put them back in! This is a huge improvement over the stock design!
09-10-2015, 09:05 PM
#457
Keep posting pics!
09-11-2015, 08:23 PM
#458
Registered
Thread Starter
Join Date: Aug 2007
Location: Sandown, NH - Sebago Lake Region, ME
Posts: 2,960
Likes: 0
Received 7 Likes
on
7 Posts
Here is a video of the latest digital trim indicator I am building. I still have several hours of coding but the basics work. I also added the option to have critical engine warnings displayed here. The micro controller will monitor the ohm output of some of the critical sensors like oil temp, water temp, oil pressure, etc. when the number goes above or below my custom set point i can have it flash text to the screen depending on the alert. I will also have the option to remember trim positions on the screen so I can easily get back to the perfect trim setup! Turning out to be a cool little project!!
http://s69.photobucket.com/user/huar...bvrzb.mp4.html
http://s69.photobucket.com/user/huar...bvrzb.mp4.html
09-12-2015, 07:02 AM
#459
Registered
Here is a video of the latest digital trim indicator I am building. I still have several hours of coding but the basics work. I also added the option to have critical engine warnings displayed here. The micro controller will monitor the ohm output of some of the critical sensors like oil temp, water temp, oil pressure, etc. when the number goes above or below my custom set point i can have it flash text to the screen depending on the alert. I will also have the option to remember trim positions on the screen so I can easily get back to the perfect trim setup! Turning out to be a cool little project!!
http://s69.photobucket.com/user/huar...bvrzb.mp4.html
http://s69.photobucket.com/user/huar...bvrzb.mp4.html
09-12-2015, 08:58 AM
#460
Registered
Thread Starter
Join Date: Aug 2007
Location: Sandown, NH - Sebago Lake Region, ME
Posts: 2,960
Likes: 0
Received 7 Likes
on
7 Posts
To have no cables at all would be expensive because you would have to have electronic sensors that are waterproof that would be attached directly to the rams on the drives and tabs. These would still require wiring that would go to the microcontroller. I chose to go with very short cables. The cables will attach to the drives and tabs just like normal but will only be 4-5 feet and terminate in a junction box in the engine compartment where they will attach to the linear potentiometers. From the junction box I only have a very small wire harness 12x 24ga wire. The wire can be very small because there is no power, it's just transmitting a signal. You could do it totally wireless by having one microcontroller in the junction box and one at the dash where they communicate to each other via Bluetooth or wifi but again this adds additional cost and additional complexity. Pretty easy to just run a small harness to the dash especially after being able to get rid of 4 of those big rigid cables!

