

my "Winston Cup" 69 chevelle project
 11-18-2013, 07:51 PM
#181
Registered
Thread Starter
The body is welded to the chassis at the A pillars, the rockers, the roof (where the shoulder belt would mount on a stock chevelle) and the filler panel between the tail lights. Scroll through the thread its all there.
Mine is a 110" Cup chassis. I dont know which chassis you would need but a Cup car has a 110" wheelbase a Nationwide 105" . If you can use a Nationwide chassis do it their cheaper. Keep an eye on Racingjunk.com http://www.racingjunk.com/category/7...A-HOOTERS.html
Mine is a 110" Cup chassis. I dont know which chassis you would need but a Cup car has a 110" wheelbase a Nationwide 105" . If you can use a Nationwide chassis do it their cheaper. Keep an eye on Racingjunk.com http://www.racingjunk.com/category/7...A-HOOTERS.html
 01-02-2014, 09:07 PM
#182
Registered
Join Date: Jan 2007
Location: Murrayville Georgia
Posts: 1,848
Likes: 0
Received 926 Likes
on
335 Posts
all right, the holidays are over and winter is here. we expect to see this thing on the road by the time the snow melts. all kidding aside how is it coming. you are getting close, cant wait to see it burning rubber.
01-04-2014, 10:07 AM
#183
Registered
Thread Starter
Thanks for asking Comp the next big thing is wiring while Im getting my ducks in a row and figuring out what exactly I want to have in the car electricly and then exactly how Im going to accomplish that Ive been working out some smaller details that have to be done at some point
I found when I dropped the engine in the oil pan sat below the front suspension cross member. If I ever had an off road excursion or even a run in with a speed bump I could clean the pan off the engine so I used some heavy washers as spacers on the solid motor mounts to raise the engine up . Plans call for a heavy plate steel skid plate to be fabbed and installed from the c member and fully underneath the oil pan


I found when I dropped the engine in the oil pan sat below the front suspension cross member. If I ever had an off road excursion or even a run in with a speed bump I could clean the pan off the engine so I used some heavy washers as spacers on the solid motor mounts to raise the engine up . Plans call for a heavy plate steel skid plate to be fabbed and installed from the c member and fully underneath the oil pan


Last edited by pullmytrigger; 01-04-2014 at 12:16 PM.
01-04-2014, 10:18 AM
#184
Registered
Thread Starter
Came up with a location for the oil filter that would be accessible to service, out of the direct path of s hit thrown up by the tires and out of the way of future brake cooling ducts and made a bracket and installed the oil filter


Last edited by pullmytrigger; 01-04-2014 at 12:18 PM.
01-04-2014, 10:43 AM
#185
Registered
Thread Starter
Had been trying to figure out what to do with the inside of the roof for sometime. As it sat it was incredibly crude looking especially by the sail panels at the back, it looked like h ell. So I went to the local auto upholstery shop and picked up a big roll of foam backed headliner he had lying around from an 80s Chevy for $60. I glued the headliner directly to the inside bare metal of the roof with spray on adhesive. I made some rear sail panel covers out of heavy cardboard and covered them. The wrinkly bad looking stuff on the far side of the roll cage will be covered by the roll bar padding, you wont see it.You didnt know I was an upholsterer too did you? hahaha not!
The braces used to be the inside windshield braces from the race car. I fabbed up the mounts and installed them. As all the inside bracing from the roof was removed to make way for the roll cage I needed something to hold up the roof. Before the braces if you were to pound on the top of the roof with your hand you could put a permanent dent in it pretty easy and after all that work installing the new roof Im not going to let that happen. I like it looks pretty racy to me.
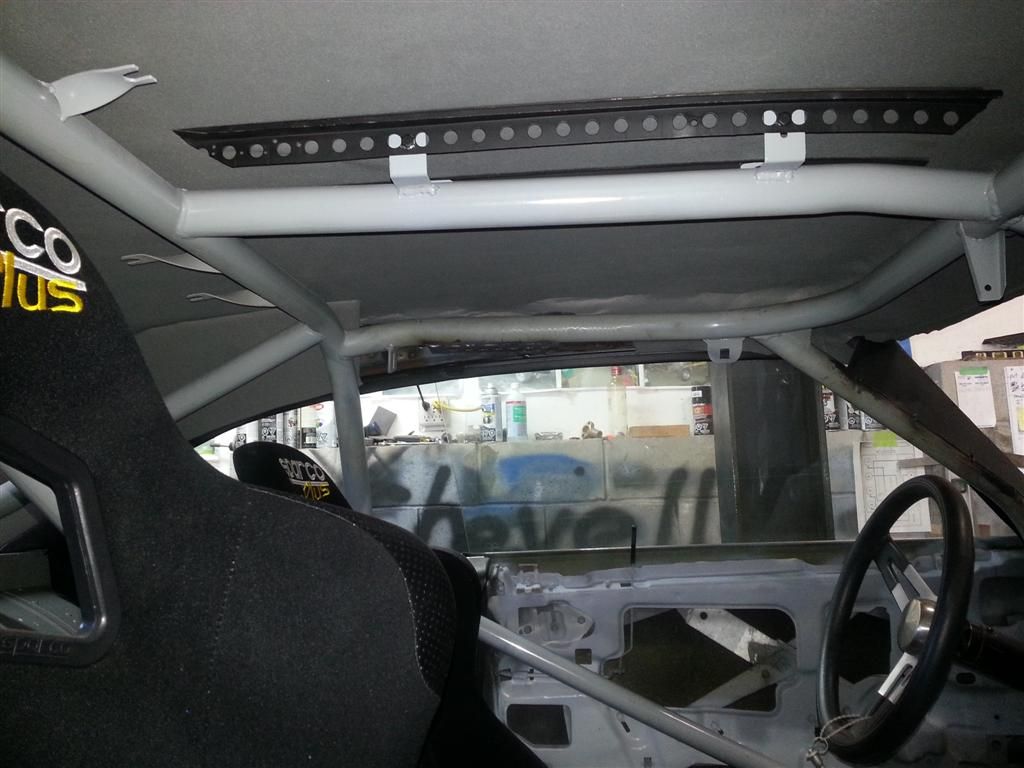
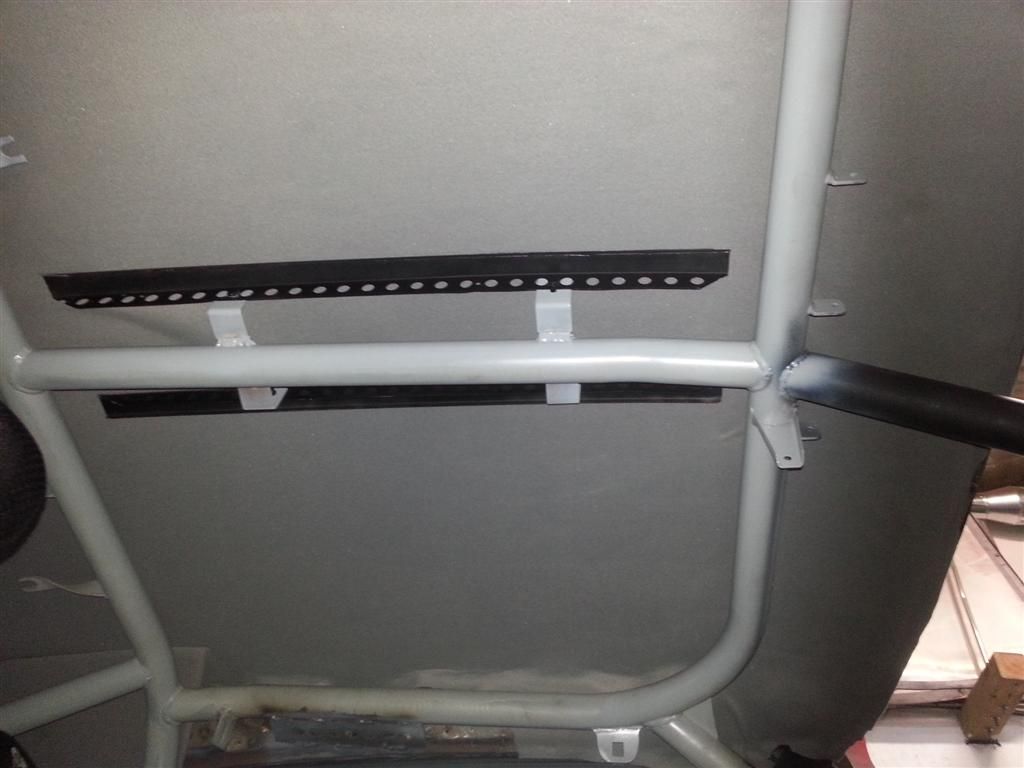
The braces used to be the inside windshield braces from the race car. I fabbed up the mounts and installed them. As all the inside bracing from the roof was removed to make way for the roll cage I needed something to hold up the roof. Before the braces if you were to pound on the top of the roof with your hand you could put a permanent dent in it pretty easy and after all that work installing the new roof Im not going to let that happen. I like it looks pretty racy to me.


Last edited by pullmytrigger; 01-04-2014 at 12:06 PM.
01-04-2014, 11:08 AM
#186
Registered
Thread Starter
My friends race car has no way of telling exactly how much oil is in the thing. Theres an oil cooler and all the lines and an Accusump and its line. They know how much the oil pan and filter holds and "guesstimate" how much oil to add to the engine for the rest. This is not acceptable to me eff that. So I got a twist lock racing dipstick from Moroso to go in the Moroso pan. This block has no provisions for a dipstick like a GM block so this is the only option. No instructions at all with this kit, nothing.. You get this plastic bag of hardware with all these little fittings and you have to figure out for yourself a combination of them that will work for you. I threw away the bracket that was supposed to hold the top of the dipstick tube to the valve cover and fabbed my own. Figured out I had to cut the tube to length and the dipstick to length to get it to work and a compression fitting holds the tube into the pan. Turned into an ordeal but I got it done but Im happy with it.


Last edited by pullmytrigger; 01-04-2014 at 12:21 PM.
01-04-2014, 11:28 AM
#187
Registered
Thread Starter
Got the cowl induction finished. Had to cut out the brace in the back of the hood for a hole and make up a "bracket" to hold a piece of screen on the top of the hood. Then make an extension on the back of the carbon fiber Cup air cleaner to match up with the hole and rivet it on and seal it. Went with hood props as opposed to a lift off hood as that offers one man operation.


 01-04-2014, 11:45 AM
#188
Registered
Thread Starter
Got the hood pins on and my cool rear licence plate that after at least a half dozen different ideas I finally settled on. That is a sticker over an old decorative licence plate that I had lying around. I had my buddy who owns a sign shop make it up for me the gray on the plate matches the gray on the bumper exactly. Some of the other colors/things I was going to do stuck out too much back there. I like this.


Last edited by pullmytrigger; 01-04-2014 at 03:48 PM.
01-04-2014, 12:00 PM
#189
Registered
Thread Starter
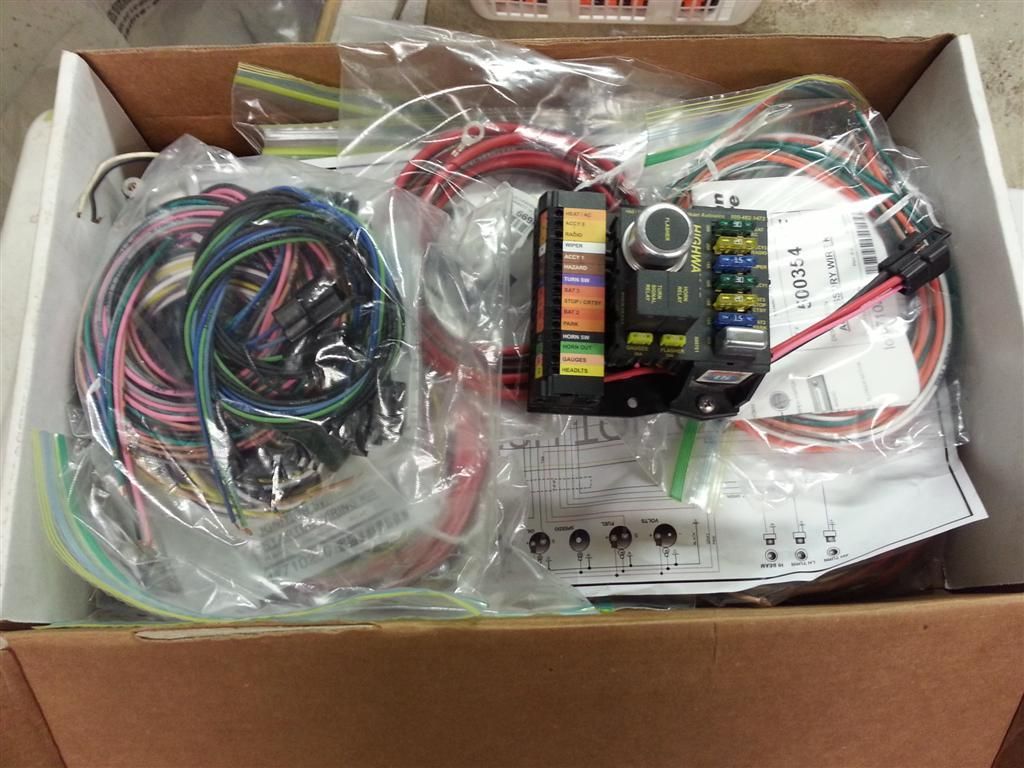
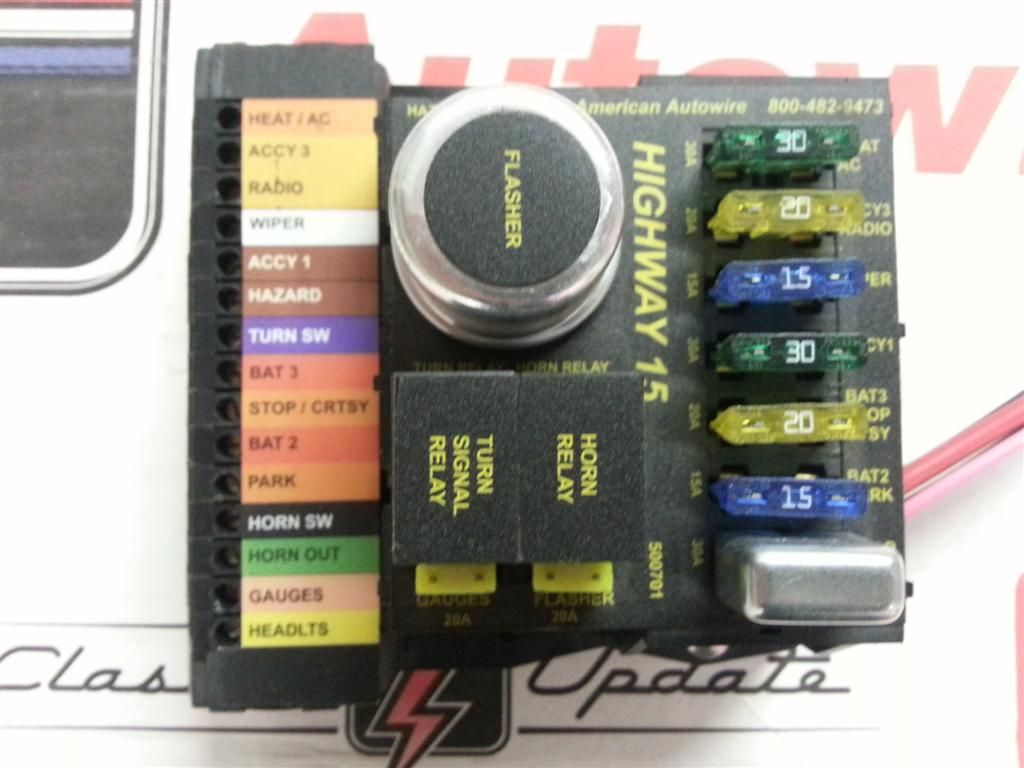
And here is the wiring kit I bought American Autowire Hwy 15 kit. The kit is a bit of overkill for this car at this point but it was only a few bucks more than the kit below and it can easily handle anything I could ever want to do with the car as you can see. The fuse panel itself is only slightly larger than their lesser kits so Im not getting much of a weight penalty. Im starting from scratch with the wiring as there is no wiring whatsoever in the car at this time. By all accounts the American Autowire kits have better quality hardware and fuse panels than their competitors so I went with them. So this is he next big thing. Thats it for now thanks for stopping by http://www.americanautowire.com/shop...-15-wiring-kit


Last edited by pullmytrigger; 01-04-2014 at 12:25 PM.
01-04-2014, 06:29 PM
#190
Registered
Join Date: Jan 2007
Location: Murrayville Georgia
Posts: 1,848
Likes: 0
Received 926 Likes
on
335 Posts
it has come a long way and looks great. I have used American Autowire a bunch and I like their stuff better than any of the others so you made a good choice. by the time your snow melts you should be ready for the road.

